Are you good to yourself? I hope so. It seems that the person we are often the hardest on, is ourselves. I hope that today, you will take a few minutes to do something just for you!
What do you think about this gal's outfit? Are you wondering how I made it? It was so easy! Just choose your favorite designer series paper, stamp her image on the paper and fussy cut the part that you want. For her hat I stamped her on the same Hand Penned Petals designer series paper (DSP) as I used for the background. For the blouse, I stamped her on another pattern in the Hand Penned Petals DSP. For her skirt I used Misty Moonlight cardstock because I thought it looked like the color of a dark denim skirt. Once the images were stamped, I got out my Paper Snips and started fussy cutting. Then just adhered each piece to the full image that I had already stamped on Shimmery White cardstock.
This technique is called Paper Piecing. Before I "dressed" her, I did a little coloring on the base image with some Stampin' Blends. The railing was colored with Crumb Cake, her skin was colored with one of the new Neutral Tone Stampin' Blends (S1000), and I gave her a glass of white wine with my So Saffron Stampin' Write Marker and a touch of Wink of Stella. The sky was created with my Water Painters and some Balmy Blue ink - which is why I used Shimmery White cardstock rather than Basic White cardstock. The finish on the Shimmery White cardstock handles the water a little better.
After completing the image, I die cut it with the largest circle die from Layering Circles and then die cut a coordinating scalloped circle from Misty Moonlight -- to tie in with her "denim" skirt.
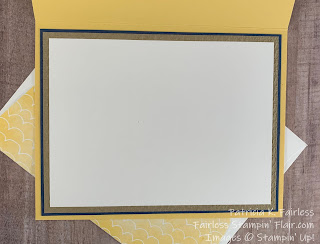
I purposely kept the inside of the card very simple -- but not naked.
Using multiple layers in the colors of the card front are a great way to dress-up the inside of the card. For this card I used Misty Moonlight and Crumb Cake layers. I also like to slightly vary the width of the revealed layers as I think this is more interesting than if each layer has the same width. This is very easy to do. The Misty Moonlight has a 1/16" reveal and the Crumb Cake has a 1/8" reveal. You would not think that just 1/16" would make a difference, but it does provide a bit more visual interest. So don't forget the "little" things when you make your cards.
If you would like a tutorial with all the cutting dimensions and step-by-step directions, you can download a FREE Tutorial using this link.
For more information on the products used, please refer to the list below.
I would also like to take a minute to remind you that Sale-a-Bration ends at the end of this month. Don't miss out on your opportunity to choose from some awesome FREEBIEs! There are several choices at the $50 merchandise amount, and a couple at the $100 level. If you spend $100, you can also choose two $50 items. Obviously, the more you spend, the more FREEBIEs you get!
But, if your wish list is over $100, you should seriously consider signing up to become a demonstrator. When you join during Sale-a-Bration, not only will you get $125 worth of merchandise for $99 (includes shipping), but you will also be able to select any two additional stamp sets for FREE! And don't forget, once you join, you will enjoy at least a 20% discount on any additional purchases you make. I would love to have you join my team. If you have interest and have questions, please reach out to me at fairlessflair@gmail.com


No comments:
Post a Comment