Monday, February 28, 2022

SIMPLY GEOMETRIC ART IN BLOOM

 Are you ready for another Simply Stamping card made with the Art in Bloom Stamp set?  This card is probably not what you would expect from a stamp set that has "Bloom" in its name.


But this stamp set also includes a couple of graphical stamps for making borders, so I decided to only use those today and see what I could come up with.

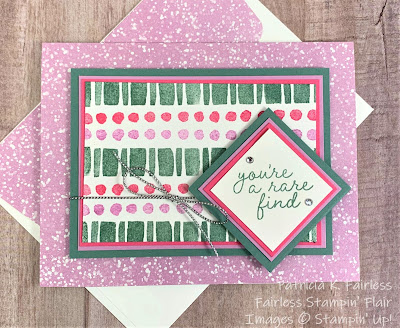
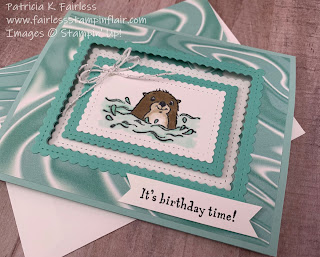
The designer series paper background is a pattern from the Friendly Hello collection.  This is one of the Sale-a-Bration items, and TODAY is the last day to get it.  It's hard to believe, but today is already the last day of Sale-a-Bration!  If you have not yet taken advantage of the FREEBIES, you need to act quickly!

If you want to make a focal point similar to this one, I have a hint for you on how to make the pattern centered.  Start stamping in the center and then work up and down from there.  In this example, I wanted the Soft Succulent square stripe to be in the center.  I'll be honest, I don't normally start stamping in the center.  I'm used to either starting on the bottom and working up, or at the top and working down.  I tried it several times working from the bottom up and could not get it to come out right.  I either had a little tiny partial green stripe on the top or I had a big space that needed some dots.  It was driving me a "little" crazy trying to figure out the spacing, when all of a sudden, a light bulb went off, and I thought, why don't you try starting in the center.  I then stamped a row of dots above and below the center green stripe, another row of dots above and below -- and so on until the cardstock was covered.  So that's my hint for today. I don't know why it took me so long to figure that out!


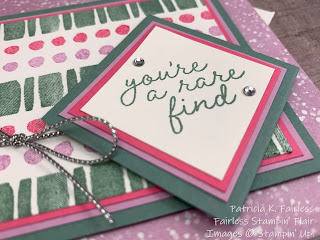
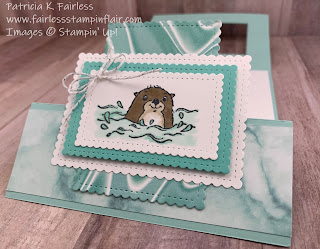
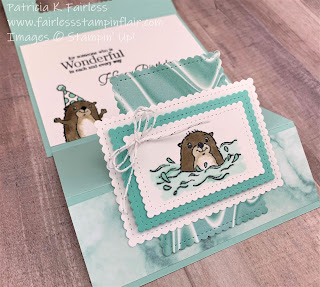
After I finished stamping the focal point, I wanted to add a sentiment, of course.  I first made a square sentiment, and it just looked a little boring -- too much "square" going on.  I then tried a circle and that shape looked OK, but I wanted to mimic the colors of the mat layers, and the circles dies I have required the layers to have larger borders and the sentiment was getting way too big.  I didn't want to cover up that much of my focal point.  I wanted the sentiment to compliment that focal point and not become the focal point.  Besides, I had worked way too hard figuring out that spacing, and I didn't want to cover up my hard work.  LOL So, I turned my square sentiment at an angle and thought "that works"!  Obviously, I had to restamp the sentiment at an angle, but that also allowed me to make it a little smaller.

What do you think?  Do you like the "diamond" shape?

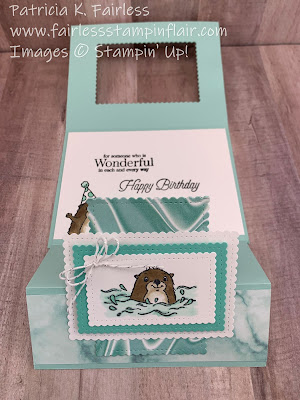
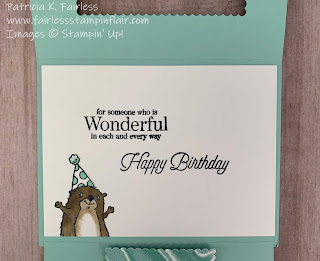
For the inside of the card, I used the same rectangular stripe and dots stamps to create a border on the left side of the basic white.  


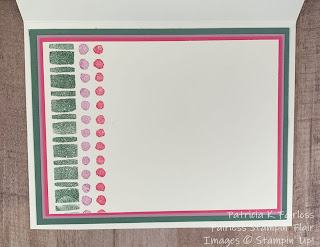
I often leave the inside of my cards sentiment-free so that I can add an appropriate sentiment later when I know what the card will be used for.  Do you do that, too?

If you would like a tutorial for today's card, you can download one using this link.

The products I used are listed below:

Product List

Sunday, February 27, 2022

SIMPLE ART IN BLOOM

Happy Sunday stamping friends!

I'm stopping by a day early this week because I have so many cards to share with you this week.  My featured bundle this week is Art in Bloom.  This is a very unique bundle as it includes a Hybrid Embossing Folder in addition to the stamp set and coordinating dies!  Are you wondering what is special about a Hybrid Embossing Folder?  Well, it not only embosses, but you can place a coordinating die inside the folder and die cut at the same time you emboss!  

But I've gotten ahead of myself.  The first couple of cards this week are what I considered "simple stamping" cards.  Technically, "simple stamping" cards are only supposed to use stamps, ink, and paper, but I added a couple of simple embellishments, so I guess I broke the rules.  But honestly, these flowers needed pearls in their centers!  Don't you agree?  


The color of today's card is Fresh Freesia, and the pretty designer series paper (DSP) is called Friendly Hello.  It is one of the Sale-a-Bration selections that you can choose when you place a $100 order.  You are probably wondering why this DSP requires a $100 order.  It is because you also get a coordinating stamp set if you choose this Sale-a-Bration item.  I featured a card last week with the Friendly Hello Stamp Set.   If you missed it, you can check it out at this link.

However, if you want it, there is no time to waste.  Tomorrow is the last day of Sale-a-Bration.

The centers of the flowers were colored with Fresh Freesia ink using sponge daubers -- a quick and simple way to give them a bit of pop.


As you know, I can never leave the inside of a card naked, so to keep it simple, I just added another strip of the Friendly Hello designer series paper.  The DSP and the Basic White are both mounted to Black mats to make them pop.  If you look closely, you will also see that I used this paper design to cover the flap of my envelope.  Covering the envelope with DSP is a favorite quick and simple solution to making a coordinating envelope for my card.


A tutorial with dimensional information is available for download at this link.

A list of the products I used is shown below.


Product List

Friday, February 25, 2022

ITS AN AWESOME OTTER BIRTHDAY

My last card for this week is made with the cute little Awesome Otters Sale-a-Bration stamp set.  These little guys are so cute that you can't help but smile--just like Ottie is smiling here for his picture!  I'm hoping Ottie puts a smile on someone's face when they receive him for their birthday.


On Monday I shared a fun fold card that was demonstrated at our Creativate retreat last month.  Today's card is another "fancy" Fun Fold that was also demonstrated at the retreat.  This one was by Brandy Cox and believe me -- this one is also pretty "FANCY".

This card is a bit difficult to explain verbally, so I'm going to share several photos which I hope help you to see how this card works.

It starts off with the basic 5-1/2" x 8-1/2" piece of cardstock, scored at 4-1/4".  After adhering the Simply Marbleous Designer Series Paper (another Sale-a-Bration item) to the front of the standard card base, the center is die cut with a die from the Stitched So Sweetly Dies.  That piece is saved to be used later for the vertical piece you can see in the following photo. 

And then the "fancy" and the fun begins...

A piece of 5-1/4" x 8" Pool Party Cardstock is adhered to the inside of the card to make the Fun Fold part of the card.  Several more die cuts are made using various sizes of the scalloped rectangle dies from the Stitched so Sweetly dies to create the piece for Ottie to swim on and for his pretty frames.  With these same dies, a frame is also made for the opening that was die cut in the front of the card base.    Do you see the Coastal Cabana frame on the front?


Before adhering the inside fun fold to the inside of the cardcase, some scoring is done to create the "tent" you see towards the front.  The front of the tent is decorated with another piece of the Simply Marbleous Designer Paper.  For my card I used the reverse side of the same paper as was used for the card front.  After this, all that is left is to layer all the die cut pieces and add your focal point.


Ottie was colored with Crumb Cake Stampin' Blends and his swimming pool was colored with Pool Party.  After all of this you would think we would be finished, but no, there is still one more thing to do--the "inside" of the card base. You can see a peek of it in the image below.


And here is a photo of the full inside panel.  All sentiments used on this card are from the Special Moments Sale-a-Bration stamp set.


Ottie is there with his hat on and ready for a birthday party!

I hope you enjoyed today's card and the chance to meet Ottie.   He said to tell you that if you would like to make a card like this, you can download a detailed tutorial with all the cutting and scoring dimensions and also more details about which size dies to use for which pieces.  He also said to make sure to remind you that if you want to make a card with him on it, you only have a couple days left to place a $50 order to get him for FREE.  After February 28, Ottie is going back to wherever it is that Otters play.

Below is a list of all the Products used for today's card.


Product List

Wednesday, February 23, 2022

CONTEMPORARY CHIC SCRAPPY STRIPS

I recently saw a card with a technique I had never seen before, so I started digging to find out who "invented it".  I found a video done by Bruno Bertucci from Australia back in March of 2020.  So, this obviously isn't a new technique, but it was fun to watch his video.  It was fun for a few reasons.  1) I loved the contemporary and chic result of the technique.  2) It's a technique that is a fantastic way to use up all those little strips of scraps that we paper crafters have a tough time throwing away, 3) Bruno and his wife were entertaining, and 4) the video was made just as we were starting to hear more about COVID, and some of the comments were interesting in view of what happened globally since that time.  I found his video on YouTube if you would like to watch it.

On Monday, I indicated that I was using some Sale-a-Bration Products this week that will soon be gone forever (or presumably forever).  Today, I'm already breaking my own "rule", but the products I'm using are also soon going to be gone "forever".


To make my Scrappy Strip focal point I decided to use the 2020 - 2022 In-Colors.  When the new catalog launches in May, these colors will be retired, and we will have to say good-bye.

The colors are Bumblebee, Just Jade, Magenta Madness, Misty Moonlight and Cinnamon Cider.  I am definitely going to be sad to see Misty Moonlight go as it has been one of my favorite go-to-colors these last couple of years.

Back to the technique...

Isn't it eye-catching?  I am definitely going to be using this technique again.


All you do is cut a bunch of different color strips at various angles (NO MEASURING REQUIRED), and then start adhering them to a piece of cardstock leaving little gaps between each color.  I used Basic Black for my piece of backing card stock, but any color can be used.

Since the "scrappy strips" were the focal point, I kept the sentiment small, and I can never have too many thank you cards, so it was an easy choice.  The sentiment is from the Sale-a-Bration Stamp Set called Special Moments.  I debated back and forth if the card needed anything else, and finally I just added three Classic Matte Dots in black.

When I made the focal point for the card front, I made it a little larger than needed so I could trim a piece off from the bottom to decorate the inside of the card.


You can also see a peek at the envelope behind the card.  I used more leftover strips and the same Scrappy Strip technique to cover the flap of the envelope.  In this case, the gaps between the colors are white -- the color of the envelope, so it looks a little different.  This gives you an idea of what it would look like to use a different color for the backing cardstock.

Do you have a preference? Which do you like best?  The black or the white background?

If you would like to download a tutorial for this card, you can use this link.

Below is a list of the products I used, but obviously, you can try this technique with any scraps you have.  Even scraps of designer series paper could be beautiful.  After trying this for the first time, I have so many ideas that I want to try with the Scrappy Strip Technique.


Product List