Sunday, June 30, 2024

AZURE WILDFLOWERS

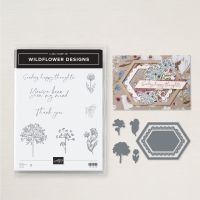
It's a new week and the last Sunday of the month!  That means I have a new featured Bundle for the week, Wildflower Designs, but it is also the day for the Crafty Collaborations Share it Sunday Blog Hop!

For this blog hop, there are no "rules".  We can just share whatever we have been creating.  

If you have been following me, you know that I share a Technique each week during my Learning with Friends video series.  This card was made with the Waxed Paper Resist Technique that I shared recently.  If you are unfamiliar with this technique use the link below to watch the video on YouTube.  It is a fun and easy technique that can be done with various types of cardstock, Basic White, Photo Paper or Glossy Cardstock.  The video will show samples of each, and one of the cool things about this technique is that it makes two backgrounds at the same time!  Also, depending on the type of "paper" you use, the color will look a little different.  I show all 3 types of cardstock on one card, so you will be able to easily compare them.


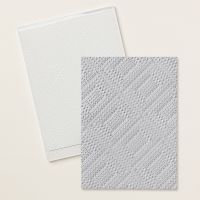
Today's card uses the Dashing Designs Embossing Folder (one of my new favorites) and Photo Paper.

I wanted to showcase the technique with this card, so kept the focal point relatively simple.  It uses two of the "frame" dies from Wildflower Designs to provide a home for the simple flower.


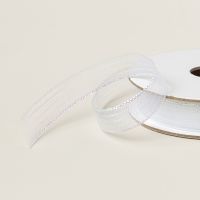
For additional shimmer and shine the beautiful Iridescent Striped Ribbon was wrapped around the scalloped frame and tied in a bow.


After trimming my oversized technique sheet to size I used the leftover strip to add a bit a pizzaz to the inside of the card.

Want more details to make this card?  Use this link to download a FREE TUTORIAL.

For additional Sunday inspiration use the following links to hop along with other Crafty Collaborators and see what they are sharing for Share it Sunday!  Be sure to leave them some love along the way.


A list of Stampin' Up! products used on today's card is shown below.  I used HP Photo Paper for my Waxed Paper Resist Technique, but as you see in the video experiment with whatever cardstock or paper you have!  


Product List

Friday, June 28, 2024

GARDEN MEADOW AND A SALTED BACKGROUND

Have you watched my Learning With Friends Technique videos?  Do you ever wonder what I do with all those "extra" technique sheets that I create?  Too often, I stick them in a box to use later -- but then never do.

If you are a regular follower of my website, you know that this week we are trying something  "new".  I'm calling it hodgepodge week.  So, you are seeing a little of this and a little of that.  One of my thoughts is that maybe I can make use of some of those "leftover" technique sheets.

So, today's card does just that!  It was made with one of the Salted Background sheets we created during last week's Learning with Friends.  


This was my favorite one made with Thick Basic White cardstock and Pretty Peacock, Pumpkin Pie and Daffodil Delight ink.  So, I used it for the background behind my Garden Meadow Arch.  The "salt spots"  show up really well in the Pumpkin Pie area.

The arch, gate, boots, garden tools, flowers and the sentiment are all from the Garden Meadow Bundle.  

The flowers and boots were colored with Stampin' Blends and the garden tools were stamped on Silver Foil and then die cut.  All stamped images have coordinating dies, so that makes quick work of putting this card together.  No fussy cutting required!

I die cut two of the gates and trimmed the opposite sides off of each so that I could have a gate that opened.  Cute, right?

The sentiment was positioned toward the right side of one of the Nested Essentials Dies and then after die cutting the left portion was trimmed to make it better fit the card.


The most difficult part of this card was deciding which section of my completed technique sheet to use for the "arch".  I decided to maximize the amount of blue in the arch, so that left me with a "scrap" strip on the right which was mainly Daffodil Delight and Pumpkin Pie.  I used that strip to add some color to the inside of the card.  I also stamped and colored the basket of flowers for a bit more pizzaz.  

Use this link to download a free Tutorial.

This wraps up another week of blog posts.  I hope you have enjoyed the ideas and have found some inspiration!

I'd love to hear your comments.

Product List

Wednesday, June 26, 2024

THEO TEACHES COMPLEMENTARY COLOR THEORY

There are 4 basic color theory classifications:  monochromatic, complementary, analogous and triadic.  The card today uses the complementary colors Petal Pink and Pool Party.


At my June Stamp Camp, we made cards using each of the four color theories.  This was one of the cards we made.  I used the color wheel in the 24-25 Annual Catalog and looked for colors that are approximately across from each other as those are considered "complementary".  

If I had not been using Color Theory as the theme for June's stamp camp, I doubt that I would have ever chosen these two colors for a card, but I received some help from Theo, our Complementary Color Theory teacher.  

Theo is one of the Fluffiest Friends, and he thought the combination "looked interesting" and suggested I search through my designer series paper (DSP) for collections that used those colors.

I thought Theo was a little crazy for picking these two colors, so I was VERY surprised when I looked at the Country Woods DSP and saw both colors on the same sheet of paper!  Theo really liked the wood grains so "we" decided to use a couple of different selections from this collection.  I then also found an alternate Petal Pink pattern in the Country Lace DSP and told Theo I was going to mix in a little lace to go with all the wood grain.   Theo wanted to use only wood grain, but I thought all wood just seemed like too much wood.  He needed a little lace to compliment his flower.   

Theo also thought his Petal Pink background looked a little plain.  Since I had just received my new ONLINE EXCLUSIVE stamp set, Of Art & Texture, I told Theo I could use that to add some "paint splotches."  He just shrugged and walked off to sit on his wood Decorative Circle, so I proceeded.  Theo is a cat, after all, so he doesn't always listen very well.

He did let me add a little Pool Party ink to give his "stool" a hint of color.  All he cared about was that it was embossed with the Timber 3D embossing folder so it looked like wood.  Yes, more wood!

Theo is delivering a pretty Petal Pink flower in a Pool Party flower pot to his friend for her birthday.  

He hopes his friend likes the flower because he's trying to make up for being late for her birthday.  (We all need a few of these kind of birthday cards in our stash, don't we?)

I'm curious as a cat as to what you think about Theo's complementary color selection.

You can use this link to download a tutorial with all the dimensional information and step-by-step assembly instructions to make Theo's card.

Below is a list of the products that were used for his card.

Product List