Wednesday, March 30, 2022

ON THE BOARDWALK

Today, we are taking a stroll on the Boardwalk.  Maybe there are Boardwalks here in Michigan, but I don't think I've ever seen one, but that's OK, we can still take a walk in our imagination, right?

My card today was inspired by a card I saw from Linda Heller at Lindastamps.com.


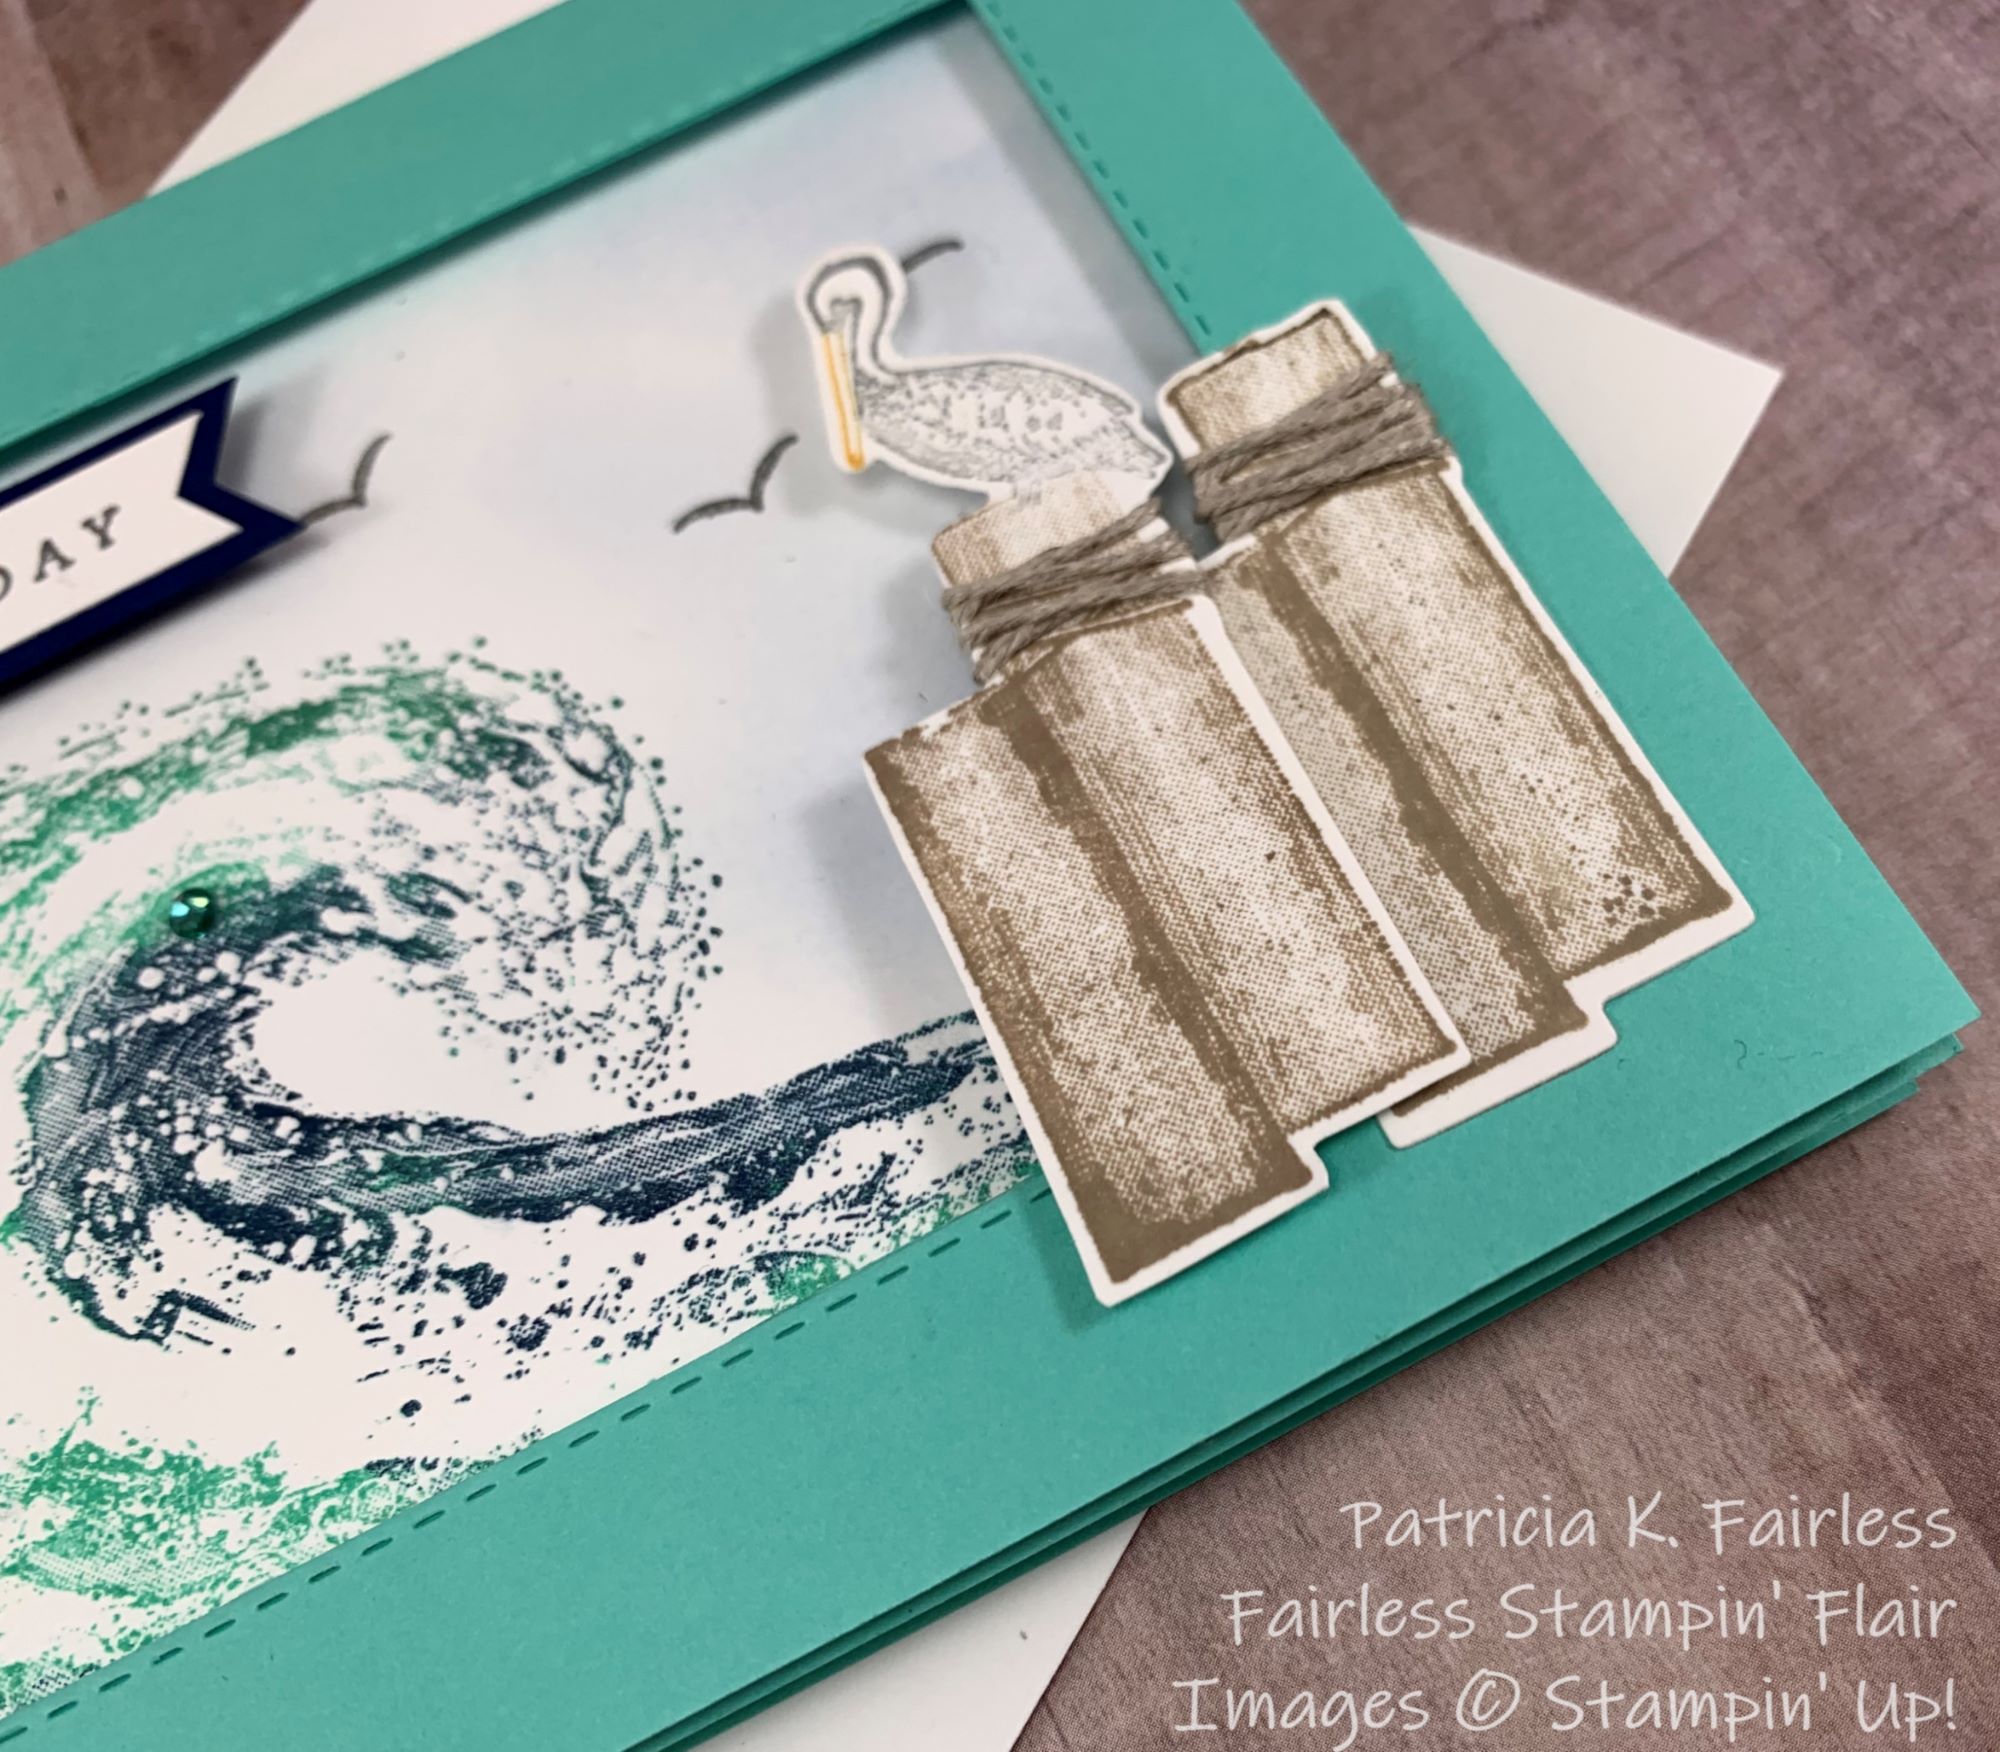
Today's card uses one of the beautiful designer paper patterns from Waves of the Ocean.  These designs are all so pretty!  I'm told that the inspiration behind them was from paintings made using the Paint and Pour Technique.  Have you tried that Technique?  I would love to try it, but I'd really like to do it someplace other than in my house.  I make a big enough mess with paper and ink.  I don't want to think about the mess I would make with pouring paint over something!

I thought the colors in this paper looked a bit like the ocean as it rolls and foams up over the beach as the water starts to recede.  What do you think?


To make the Boardwalk I used designer series paper from the Heart & Home Collection.  To give it a little more realistic and a bit of an aged look I snipped a "V" between each board.  I then used a sponge dauber to add some Basic Gray "grunge" along the edge of the Boardwalk.

I repeated that same process around the sentiment.


The Poles and Pelican were stamped with Black Memento ink and then colored with Stampin' Blends.  I did cut a little notch in the Boardwalk, so I could slightly inset the poles into the Boardwalk.  I thought this made them look more like they are a part of the dock.

For the Inside of the card, I kept it clean and simple.


I just used a strip of the same Waves of the Ocean designer series paper inset in a strip of Night of Navy.  A sentiment can be added later once I determine who will receive the card.

You can also see a small peek of the envelope flap in the various photos.  I covered it with a different portion of the same sheet used for the card front.

A FREE TUTORIAL is available for download at this link.

Shown below is a list of the products used on this card.

If you haven't yet checked out the Last Chance List, don't wait too long and miss out on something you love.  These items are only available while supplies last and many go very quickly.


The best way to obtain the products before they run out is to visit my Demonstrator Webpage.  There you will be able to see the most current availability and place an order easily and quickly--before the item you want is gone!


Product List

Monday, March 28, 2022

THE WAVE ROLLS IN

This week I am going to play with a new "sneak peek" stamp set called Waves of Inspiration.  This Collection is now available for purchase.  The complete collection, called Waves of the Ocean, is available through May 2, 2022, but the stamp set, and the coordinating dies will be in the new 2022 - 2023 Annual Catalog so will continue to be available after May 2.  The full collection also includes the beautiful Waves of the Ocean, Designer Series Paper, which was inspired by Paint Pouring, Blue Foils in Silver, Coastal Cabana and Night of Navy, and Rhinestone Waves Basic Jewels in multiple blues.  It is all so pretty, but only the Stamp set and Dies will be available after May 2.  The other items are available only while supplies last.


My first card this week was created to look like a picture.  I used a Stitched Rectangle Die to create the picture frame.

If you want to have a multi-color wave, a Stamparatus or similar tool is a necessity.  I created the wave by first inking the stamp with Coastal Cabana ink and stamping on my Basic White cardstock.  Leaving the stamp on the Stamparatus, I cleaned it and then used a sponge dauber to apply some Night of Navy Ink.   I stamped a 2nd time with the Night of Navy ink.  I cleaned again and then added a third ink color, Basic Gray, using the same process.  The multiple colors really provide depth and the look of movement to the wave.


Before adhering the Wave to the front of the Coastal Cabana card base, I used my Blending Brush to add a very light amount of Night of Navy ink to the sky.  Gulls were stamped with Basic Gray ink and the stamp included in the Waves of Inspiration stamp set.

The "Picture Frame" was then added with Foam Adhesive Strips over the wave scene.

To make the Poles with the Pelican, I again used the Stamparatus so that I could stamp the Pelican in Smokey Slate and the Poles in Crumb Cake.  By using the Stamparatus, I could mask one area, for instance the Pelican, and then easily ink the poles.  After removing the mask, I stamped the poles and then reversed the process.  I masked the poles and inked the Pelican.  The Stamparatus ensures that each image on the stamp is aligned as if it was all stamped at the same time.  I did try to ink the stamp with my Stampin' Write Markers but was not happy with the quality of the image.  I found that the Stamparatus gave me a better image.


To finish the poles, I wrapped some Linen Thread round them.  The stamp does include the rope detail in the image, but I thought the Linen Thread added some dimension.


What do you think?  Does it look like a picture?  I think it will make a nice masculine birthday card for someone special.

For the inside of the card, I just added the Pelican and Poles again.  This time, to keep it simple I stamped it all in a single Crumb Cake Color.

I'll add a sentiment later when I decide who is going to receive the card.

If you would like to download a more detailed tutorial, one is available at this link.

The list of products I used is shown below.


Product List

Friday, March 25, 2022

CANALS OF THE NETHRLANDS

Several years ago, I was fortunate to visit the Netherlands for work.  While work trips rarely provide time for sightseeing, we did have to travel by car from Amsterdam to Eindhoven-- about an hour and a half drive.  So, this provided an opportunity to see some of the countryside.  We know the Netherlands is known for their canals, windmills, and tulips.  And while I don't remember seeing a lot of tulips, we did see canals and windmills.

For today's card, I wanted to try to capture that bit of the Netherlands, so I started searching pictures for inspiration.

This is the card I came up with.


Here is the photo I used as my inspiration.


Today's card uses the two interesting V-shaped stamps from the Tulip Fields Stamp Set to create the field of tulips.


I started at the horizon with the double-V stamp and Mango Melody ink.  I then worked my way down each side towards the center, Flirty Flamingo bed of tulips.  

There was a fair amount of masking required to create the canal and the left riverbank.  To make the mask, I sketched my scene on a piece of scrap paper and then tore it to make each mask section.

The water in the canal and the grassy bank were created using Blending Brushes.  Little ripples in the water were created with a white gel pen and Wink of Stella.

The sky was created with designer series paper from the Flowering Fields Collection.  Using DSP for the sky also helped to create a nice straight horizon line for the cute little fence.

The two windmills were colored with Crumb Cake and Real Red Stampin' Blends and two trees were added on the left bank.

A third windmill was stamped on the inside of the card and colored to match the front.  A little hill of Daffodil Delight flowers was added using one of the "V" stamps.  The flowers ground the windmill, so it doesn't look like it is floating in air and also provide a pop of color.


Since the Tulip Fields Stamp Set does not include sentiments, I used the birthday sentiment from the Flowering Tulips Stamp Set.

I hope you have enjoyed the Tulip Fields cards this week and that you have been inspired to give this bundle a try.  The wedges of Tulips stamps looked a bit daunting before I started, but I have to say that the designer and the engineer that sized and created these stamps did an awesome job.  It was much easier than I expected to align the images and create beautiful fields of flowers.

If you would like a tutorial for today's card that includes the cutting dimensions and step-by-step directions, please use this link to download your copy.

A list of the supplies I used is also shown below.

Product List