Rather than featuring a specific stamp set, bundle or suite, this week I am going to share cards made to showcase Designer Series Paper (DSP).
If you are a Paper Crafter, you probably have more Designer Series Paper than you "need", so let's look as some card designs that show off all that pretty paper.
Fun Folds are always a great option for Designer Series Paper (DSP), and this card is no exception.
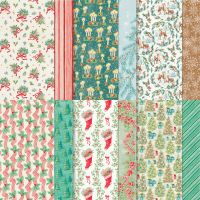
It uses four different designs from the Sentimental Christmas Collection. This DSP is Stampin' Up!'s current #SUDifferenceMaker! product. For each package sold, Stampin' Up! donates $3 to organizations around the world to benefit children's literacy.
This Fun Fold is the Accordion Double Gate Fun Fold.
On the front of the card you see three of the four different designs. The Real Red "ribbon" with holly is on the panels on each side of the card, a stripe pattern is behind the stocking and the stocking itself is die cut with a coordinating die from another design.
Open the gates and you see the fourth design of Christmas Trees in the center behind the accordion. It is also a great card to set out on display as it stands beautifully on its own.
Here's a closer look at the 5 panels of the accordion.
Use this link to download the PDF with all the dimensions and step-by-step assembly information. A link to the how-to video is included on the PDF.
A list of the current products used is shown below. The snippet of red ribbon on the stocking was from my stash. Use what you have!
Product List





No comments:
Post a Comment