Showing posts with label 2024 Christmas Card. Show all posts

Wednesday, December 25, 2024

SHEPHERD'S CARE - MERRY CHRISTMAS

Merry Christmas Stamping Friends!  I hope you are having a beautiful Christmas celebrating Jesus Birth with friends and family.

I took a break from this week's featured stamp set, Love & Strength, to share a Christmas Card on this special day.


I'm taking it a little easy myself this week by using some cards that I made previously for other events.   Today's card was made for a Learning with Friends video I did a while back.  I decided to save it for Christmas day and use it as my Christmas Greeting for you on this Blessed Day.

This card was made with the Faux Linen Technique.  It makes the perfect background, soft and subtle, for our Shepherd and Wonderful Counselor, Mighty God, Everlasting Father and Prince of Peace.

If you missed the Faux Linen Technique on Learning with Friends, you can always watch the replay.

The Shepherd's Care stamp set was the first I added to my wish list when the 2024 September - December Mini catalog was launched.  It also appears to be carrying over as it is not on the Last Chance list.  Yay!  I love when that happens with one of my favorites.

It is difficult to see in the photos but the colors on this card are Blackberry Bliss and Night of Navy.  

On the inside of the card I stamped the large star and the City of Bethlehem with Night of Navy and the sentiment with Blackberry Bliss ink.


Use this link to download a PDF tutorial for today's card and learn all the details.

A list of the products used is shown below.  Click on any image to learn more about that product.


Product List

Monday, December 9, 2024

SENTIMENTAL CHRISTMAS FUN FOLD

Rather than featuring a specific stamp set, bundle or suite, this week I am going to share cards made to showcase Designer Series Paper (DSP).

If you are a Paper Crafter, you probably have more Designer Series Paper than you "need", so let's look as some card designs that show off all that pretty paper.

Fun Folds are always a great option for Designer Series Paper (DSP), and this card is no exception.

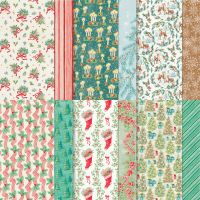
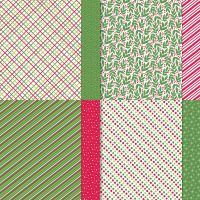
It uses four different designs from the Sentimental Christmas Collection.  This DSP is Stampin' Up!'s current #SUDifferenceMaker! product.  For each package sold, Stampin' Up! donates $3 to organizations around the world to benefit children's literacy.

This Fun Fold is the Accordion Double Gate Fun Fold.

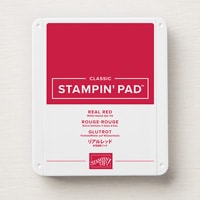
On the front of the card you see three of the four different designs.  The Real Red "ribbon" with holly is on the panels on each side of the card, a stripe pattern is behind the stocking and the stocking itself is die cut with a coordinating die from another design.


Open the gates and you see the fourth design of Christmas Trees in the center behind the accordion.  It is also a great card to set out on display as it stands beautifully on its own.

Here's a closer look at the 5 panels of the accordion.


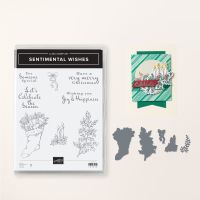
As I stated above the stocking on the front is simply die cut from DSP.  So easy!  No stamping or coloring.  Just zip it through the Stampin' Cut & Emboss Machine with the Sentimental Wishes Dies and you have a completed stocking.


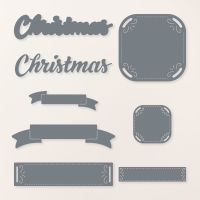
The sentiments are all from the Sentimental Wishes Stamp Set.  The "For Someone Special" Sentiment was die cut with the smallest "square" die from Peaceful Seasons Dies.

There isn't a lot of room to write a message on this fun fold, but the easiest way to solve that issue is to add a panel to the back of the card.


Now there is plenty of room to add names and a personal message.

If you are wondering how this Accordion Double Gate Fun Fold goes together, I have put together a short video showing you how to assemble it.  To keep the video short it only shows you how to make the fun fold portion of the card.  


The cutting dimensionals for all the DSP and cardstock pieces are shown in the written tutorial.  They are just layered together and adhered to the fun fold base.  So, there is nothing unique about assembly once you know how to add the accordion portion to the base portion of the Fun Fold.

Use this link to download the PDF with all the dimensions and step-by-step assembly information.  A link to the how-to video is included on the PDF.

A list of the current products used is shown below.  The snippet of red ribbon on the stocking was from my stash.  Use what you have!

Product List

Monday, December 2, 2024

DECORATIVE TREES VARIETY

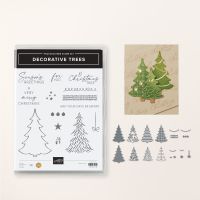
This week let's decorate our Christmas trees!  I will be using the fun Decorative Trees Bundle this week.  When I first saw it in the Fall Mini catalog last summer, I didn't think I needed another Christmas Tree set, but then I saw the die cuts for this bundle at a retreat I attended in August.  And that totally changed my mind!


This bundle has multiple decorative dies to put on your solid tree die cut, and I'm going to show them ALL to you today.  We made this simple little fun fold card at my Christmas Card Stamp a Stack in October, and since we were creating a "stack" of Christmas cards, the attendees made one card with each of the trees.  This first one uses the plaid die cut.

Before I show you the other three cards, let's look at the fun fold a little closer.  It is basically comprised of a card within a card and is a vertical version of a Joy Fold.  The smaller card in the center overlaps the fold of the larger card at the bottom.


First the small card opens and then the lower part of the larger card opens.  Super quick & simple to make.  The designer series paper (DSP) is the Take a Bow 6" x 6" DSP, and every piece of a 6" x 6" piece was used to make one card -- including the decorative strip on the envelope flap!
For all the details on this Fun Fold, here is a tutorial that you download.  It includes a cutting diagram to maximize the use of a 6" x 6" piece of DSP.

Now here are the rest of the tree design die cuts.

Here is the "striped" version.


Here is the version I call a Charlie Brown Tree.


And maybe my favorite -- the snowflake tree.

Which is your favorite?  They are all so cute aren't they?  The die set includes a die that cuts out 6 bows at once, so each tree got 6 little Real Red Bows.

Since the Take a Bow DSP has 4 different double-sided patterns, I used a different DSP pattern for each card which shows off all 8 of the different patterns.  The Basic White background behind the trees was embossed with the Snowflake Sky Embossing Folder.

Listed below are the supplies for each card.  A tiny double bow was made with Real Red & white Bakers Twine.

Product List

Friday, November 29, 2024

THE PRINCE OF PEACE

Today I am using the Shepherd's Care Stamp Set to create a new Fun Fold.  Well, there really isn't much in the paper crafting world that is new, but this Fun Fold was new for me.

I have no idea what the official name of the Fun Fold is, but I've named it a Side-Box Fun Fold That's because the part of the card on the left is box-shaped.

Maybe you can see the box a little better in the photo above.  It is really an easy Fun Fold to make, but it is not all that easy to get great pictures to show it off!

I demonstrated how to make this fun fold on my Learning With Friends Video this week.  If you are located here in the US, you were probably busy getting ready for your Thanksgiving Celebration when the video aired, but no worries, you can still watch the replay.


It's a great fun fold to send to someone who likes to display their cards because it stands up wonderfully!

The focal point on the front of the card is adhered to side of the little box section, so that also makes is easy for mailing as it lays flat to tuck in an envelope.

I used Deckled Rectangle and Deckled Circle dies for my focal point.  

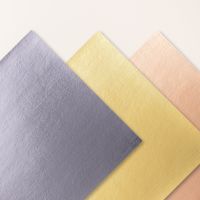
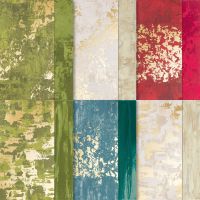
The Designer Series Paper is the beautiful Season of Elegance Specialty Paper, and the gold metallic mats were cut from the Textured Metallic Specialty Paper.  I almost missed this beautiful Specialty Paper in the Annual Catalog.  You can see it better by clicking on the link in the product list below!  It comes in 3 different colors and is oh, so pretty.


The "inside" of the card is actually to the right of the "box-section" of the fun fold, and it is hidden by the front focal point.


Use this link to download the tutorial.  The PDF includes a diagram for cutting and scoring the fun fold, but the video will definitely help to understand how to assemble it!

See the Product List below to learn more or purchase the products I used.

Product List