Showing posts with label Flowering Rain Boots Bundle. Show all posts

Wednesday, June 15, 2022

FLOWERING RAIN BOOTS ARE LAST CHANCE

Another of my favorite Last Chance items is the Flowering Rainboots Bundle. I have had so much fun making cards with this bundle over the last several months, and I am sad to bid it farewell.  I was really hoping that this one would carry over into the new Annual Catalog, but, alas, it did not.  So, let's play with it once again before it is gone forever.


I combined the Rainboots with the new Split Card Textures Dies from the 22-23 Annual Catalog.  This is the first time I have used these new dies and I love them.  This is one of two dies in the set, and doesn't it make a statement?  These dies are going to be an easy way to add some simple pizzaz to any card.

Today's card is also the first time I have used the new Orchard Oasis In-Color cardstock.  I have used the Orchid Oasis ink previously, but this is my first card using this color cardstock as a main color.  It was not my favorite of the new In-Colors, but after using it on this card, it is growing on me.

The card base is made with Thick Very Vanilla, and I combined the Orchid Oasis with two other new In-Colors, Parakeet Party for the boots, and Sweet Sorbet for the tulips.  The daisies are Mango Melody.  Isn't this a bright and cheery color combination?  The sparkle from the two strips of Orchid Oasis Metallic Woven Ribbon adds a bit more wow to the card.
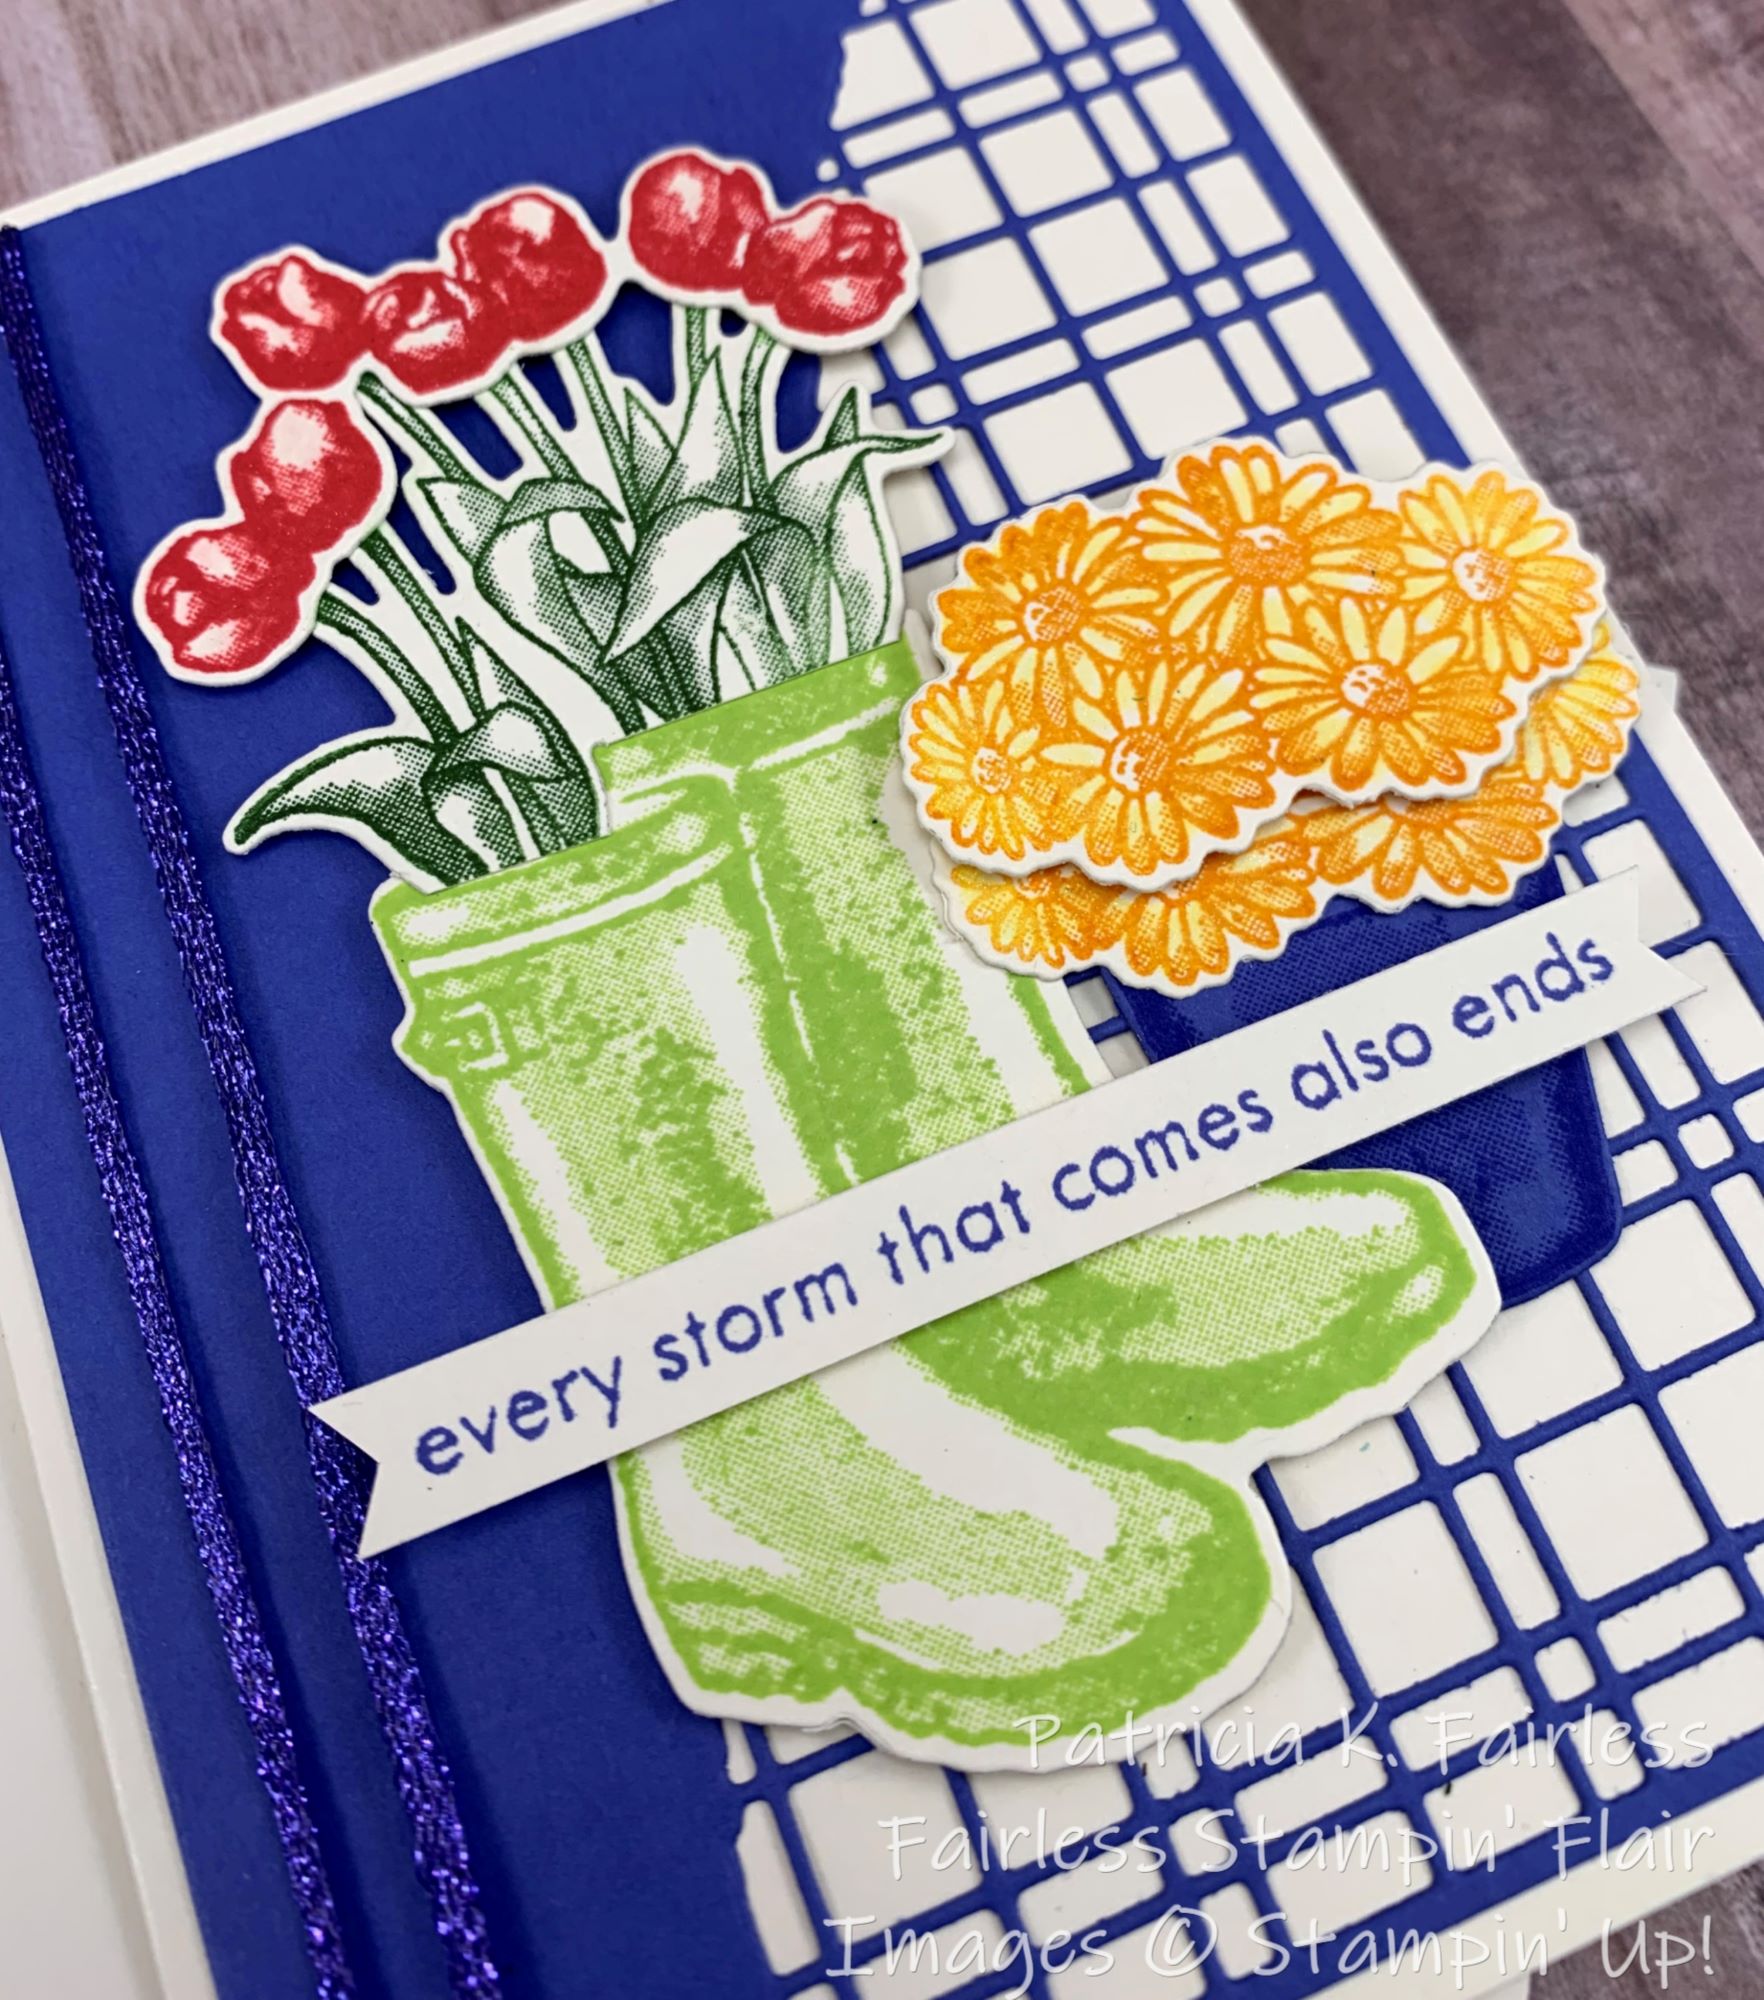

Before layering the tulips over the boots, I used my paper snips to remove the lower edge of the die-cut up to the leaves so that there was zero border left below the leaves.  This was an easy way to make it more realistically look like the leaves were coming directly out of the boots. 

The first layer of daisies was adhered directly to the Orchid Oasis flowerpot and the second layer was adhered with dimensionals.


To make the pot of daisies for the inside of the card and the lower front corner of the envelope I used the masking technique.  First, I stamped the daisies on my Very Vanilla inside panel. Next, I created a mask for the flowers from copy paper.  After covering the stamped daisies with the mask, I stamped the flowerpot below them with Orchid Oasis ink.  This makes it appear as though the flowers are hanging over the edge of the pot -- just like they do in real life.  Once I make a mask, I just leave it in my stamp case, so the next time I need one, I can just re-use the one I have.


If you would like a FREE TUTORIAL for this card with all the cutting dimensions and step-by-step directions, one is available for download at this link.

For more information on the products I used, please refer to the list below.  When you click on any of the items, you can learn more information on that product.


Product List

Friday, April 15, 2022

SIDE STEP THE RAIN BOOTS

Let's LIVE LIFE IN FULL BLOOM!  Isn't this a great sentiment and reminder that we should make the best of each and every day?  Spring is my favorite time of the year -- especially late Spring, once Michigan decides it really is done with winter.

In the Spring everything is coming back to life.  Trees and grass are getting green, and flowers are starting to bloom.  All the new life just makes me want to live life in full bloom!


Today's card is bright and cheery and full of pretty spring colors.  The mood and the colors for the card were set by all the colors in the striped designer series paper on the front panel of the Side-Step Fancy Fold.  The silver foil trellis and garden tool add some shine and because that wasn't enough shimmer and shine some more was added by brushing Wink of Stella on all the flowers.  I hope it makes you smile.


Side-Step cards are a wonderful way to display stamp sets that have many different elements to show off-- like boots, watering cans, flowerpots, and lots of flowers!  I was able to showcase all of those on this card, and also incorporate the trellis and gardening tool dies.  

I wanted to keep the focus on the front of the card, so I kept the inside simple -- but never naked!


If you would like to make a side-step card, it is a lot easier than you may think.  I know I was a little intimidated the first time I saw one but was pleasantly surprised at how easy it really is.  Once you figure out the cutting and scoring, they are actually quite easy to make.  And the GOOD NEWs is that I have figured out all those dimensions for you.  Just download the FREE TUTORIAL and follow the step-by-step directions.

The products I used are listed below.


Product List

Wednesday, April 13, 2022

FLOWERING RAIN BOOTS FENCE TRELLIS

Do you have a flower wall?  I've seen them on some of my favorite HGTV DYI shows, but I have never tried to make one.  

This is the time of year when I start looking forward to filling my outdoor flowerpots with flowers.  I know that by the middle of July I'll be sick of watering them, but as with many things, dreaming and planning is more exciting than maintaining!  Sort of like making the cards to share is more fun than writing the blogs.


Today's card is the flower wall I dream of.  The Night of Navy pots are safely hanging on a trellis mounted to a rustic fence.  There is no concern about the pots crashing down if there is a strong wind or the flowers wilting because I forgot to water them.  These may just be my favorite kinds of flowers!


I have a couple of pots of daisies in Mango Melody and Daffodil Delight and another pot of Merry Merlot Tulips.  The Brushed Brass Butterflies are flitting around, and all are ready for a Happy Easter.


My rustic fence is made with In Good Taste Designer Series Paper (DSP).  Sadly, this beautiful Paper is retiring, but the good news is that it is now available on the Last Chance List for 40% off.  I have used this DSP Collection for so many cards.  It is very versatile and also works wonderfully for masculine cards!


The inside of the card and the front of the envelope each have another pot of daisies.  These were made using the Masking Technique.  Just stamp the flowers first and then create a mask of the lower portion of the flowers by stamping them on a Post-it Note and cutting around the flowers on the bottom of the bouquet.  Place the mask over the flowers and stamp the flowerpot.  It looks just like the flowers are spilling over the pot, doesn't it?  That's how I hope my flowers will look in a couple of months!

If you would like a tutorial with step-by-step directions and cutting dimensions for this card you can download one using the FREE TUTORIAL.

A list of the Products used is shown below.  You can learn more about each item by clicking on the image for more details.


Product List