Showing posts with label Halloween. Show all posts

Monday, October 12, 2026

PUMPKINS BEHIND THE GATE

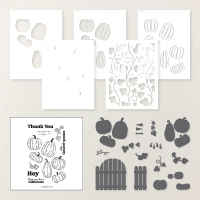
This week I am featuring the fun Painted Pumpkins Bundle.  This bundle not only includes the typical stamp set and coordinating dies, but it also includes coordinating decorative masks -- which are always fun!

Today's card focuses on the dies from the bundle.

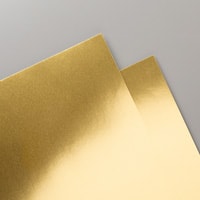
I love the dies that create the fence and gate.  The gate and the narrower fences on each side of the gate are separate dies.,  I die cut all three pieces from the Gradient Foils Specialty Paper.  


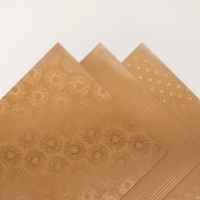
The Gradient Foils Specialty Paper is a beautiful collection of Pecan Pie foil paper with tone-on-tone patterns -- two sheets each of stripes, medium-size sunflowers and a smaller pattern of what I'd describe as medallions.  For my gate I used the stripes pattern.

I love that you can create the gate so that it is "openable" if you want.  It's fun to put a little surprise behind the gate!

Behind my gate I put a few die cut pumpkins with vines and leaves.  Then I added a little fussy cut "Hey" greeting.  I'm not sure how someone would walk through my gate with the pile of pumpkins behind it, but it's creative license, right?

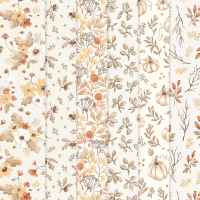
The Designer Series Paper (DSP) on the card front is from the Glow of Harvest collection which is beautiful specialty shimmer paper with soft designs.  This DSP was the Product of the Month in August.  At the time I wrote this post it was still available.

If you're not familiar with Stampin' Up!'s Product of the Month, here's a quick overview.  At the beginning of each month, Stampin' Up! introduces a new product that you can purchase for $5 with a $75 merchandise order.  Because these products are available only while supplies last, we never know how long they'll be around.

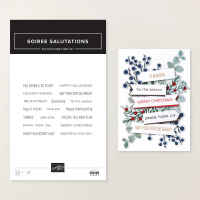
I turned my card into a Halloween card on the inside, but it could easily be used for any occasion.  It definitely has an Autumn Theme, but there isn't anything in the design that particularly "screams" Halloween.  There are no scary ghosts, spiders or witches.  It's only the Soiree Salutations greeting that makes it a Halloween card, so you can make it whatever you want.

Use this link to download a PDF Tutorial with all the details you need to recreate the card.

A list of the products that were used is shown below.  Click on any image to learn more about that product or to make a purchase.
Product List

Friday, September 30, 2022

DOTS AND WITCHES

My last card for this week is made with one of my new favorite color combinations -- Parakeet Party and Night of Navy.  I was first going to use Black with the Parakeet Party, but the Night of Navy was such a happy combination, that I totally changed direction.  I can't help but smile when I look at this card, and I hope it makes you smile, too.


This card is all about the dots!  There are dots everywhere you look!  The little witch's hat was made with the Polka Dot Design.  It was stamped in Night of Navy and then the dots were colored with a Parakeet Party Stampin' Blend.

I decided that with a Polka Dot hat, my little Witch needed a Polka Dot Background to match, so I used the Dots & Spots Die to die cut Night of Navy Cardstock and layered it over a Parakeet Party card base.  A perfect complement to the hat, right?


But I wasn't quite done with dots yet?  I needed a few more.  So, I used one of the dies from Labels Ago Dies to create the perfect accent to outline my little witch's boots!  It is mounted on Night of Navy to provide Night of Navy dots and then matted to a slightly larger Parakeet Party Mat.


She looks like she is ready to kick up her heels and dance a little jig, doesn't she?  I think I can actually hear her yelling "WOO HOO!"

She is still dancing as she gets to the inside of the card to send her Happy Halloween wish.


Her boots were stamped with Night of Navy and then the buckles colored with a Daffodil Delight Stampin' Blend and her socks colored with a Parakeet Party Stampin' Blend.

I hope you have enjoyed my BEWITCHING cards this week.  I'll still need to make a few more Halloween cards, but at least I now have a start!

If you would like a detailed tutorial for today's card, you can use this link to download a FREE copy.

For more information on any of the products I used, please click on the images below.

Product List

Wednesday, September 28, 2022

A BEWITCHING JOSEPH'S COAT

I have a fun card for you today that uses the Joseph's Coat Technique to make a colorful Halloween card using the witch's hat from BEWITCHING!

Joseph's Coat is a fun technique, and if you have never tried it, I hope today's card inspires you to give it a try.  

In July I began collaborating with a fellow Stampin' Up! Demonstrator, Kathy Ondus from Simply Kards by Kathi to make short technique videos.   We call our collaboration Connect to Create and each week one of us develops a video to teach you a few tips and tricks.

In August I made a video demonstrating how to do the Joseph's Coat Technique and this card with the witch's hats from BEWITCHING was the card I used to demonstrate the technique.  If you missed the video, you can see it below.


I chose typical Halloween colors, Pumpkin Pie, Granny Apple Green, Highland Heather, and of course, Black to make my card. 


Since the BEWITCHING stamp set does not include any sentiments, I chose the simple "hello" from the Artistically Inked stamp set for my front sentiment.  I wanted to keep the sentiment small so I could show off as much of the Joseph's Coat background as possible.  After I die cut the sentiment with the small tag die from Heron Dies, there was just enough room to add the little spider from BEWITCHING.  This little tag die has small openings perfect for threading through the Black and White Gingham Ribbon.


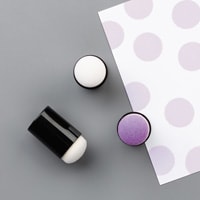
In keeping with my mantra of "no naked insides" for my cards, I wanted to include another colorful hat, but didn't want to repeat the Joseph's Coat technique for the inside -- or for the envelope.  So, I just grabbed the sponge daubers that I had used to create Joseph's Coat and colored the polka dot hat stamp with the three colors used for the background on the card front.  I then houghed on the stamp before stamping the inside of the card.  Since candy is my favorite thing about Halloween, I grabbed the "WITCH way to the CANDY?" sentiment from last year's retired stamp set, Frightfully Cute.


In the first two photos, you can see that I used this same method for stamping the hat on the envelope.   

If you have any questions on the Joseph's Coat Technique Video, or anything else about this card, please leave a comment below.

I also have a FREE TUTORIAL available to download by clicking on this link.

A complete list of the Products I used for the card is shown below.


Product List