Monday, January 17, 2022

CELEBRATE EDEN'S GARDEN

Today's card is a square format card.  This is not a format that I use often, but it was fun to try something different.
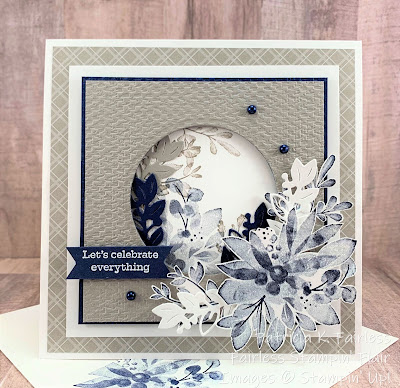

I love this color combination of Gray Granite, Night of Navy and Basic White.  It looks so crisp and clean.  

I started with a 10-1/2" x 5-1/4" Thick Basic White card base scored at 5-1/4" and adhered Gray Granite Designer Series Paper (DSP) from the Neutrals DSP collection to the front of the card base.

To make the circular layer I adhered the Gray Granite to the Night of Navy mat and then die cut the circle with the Layering Circle Dies.  After it was die-cut, I ran it through the Cut & Emboss Machine with the Tasteful Textiles 3D Embossing folder.
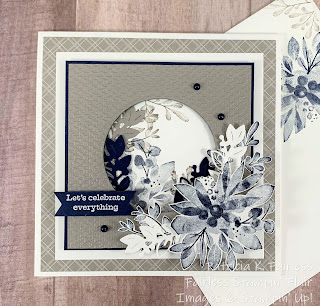

Next, I laid the Navy/Gray panel assembly in position on the Basic White Mat and very lightly marked the circle with a pencil.  This allowed me to remove the Navy/Gray panel assembly and use that pencil mark to determine where I wanted to stamp the Night of Navy and Granite Gray images around the circle.  Once the stamping was complete, I erased any pencil lines that might show.  I added a couple of Night of Navy sprigs cut with one of the Eden Dies and then laid the layer with the circle over the stamping and adhered with dimensionals.

The bouquet on the lower right was made by stamping the large flower and some leaves with Night of Navy on Basic White cardstock and then fussy cutting.  Yes, unfortunately, there are not coordinating dies for the large flower and leaves.  The white stems in the bouquet were cut with a die from Eden Dies.  To provide some dimension to the bouquet, the stems and flowers were adhered to the card front some with dimensionals and some directly to the card front.
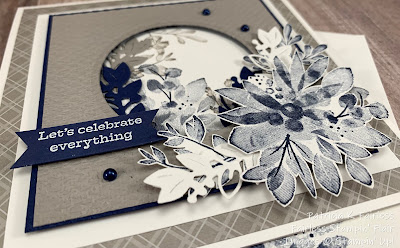
I added a sentiment heat embossed with White Embossing Powder on Night of Navy on the left.  The Navy Pearls were created by coloring our Basic White Pearls with a Night of Navy Stampin' Blends Marker.  This is a great technique to remember and keep in your tool box!  You can turn White Pearls and also the Clear Basic Rhinestones into whatever color you want simply by using your Stampin' Blends or a Sharpie to color them.


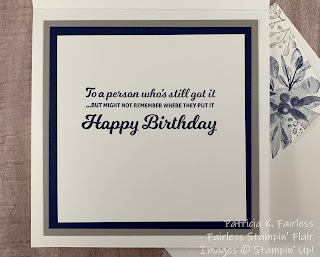
I decided to keep the inside simple, so just repeated the Night of Navy and Gray Granite color scheme in the mats.  I love this birthday greeting from Lighthearted Lines.  I may have to make a few more cards with this sentiment as I have sever people that I think I could send it to -- including myself!  

How much time do you spend looking for your scissors that you just had in your hand a minute ago?  Some days I feel like I spend more time looking for something I just had than I do actually creating!

If you would like to a FREE TUTORIAL for this card with all the cutting dimensions and assembly details, you can download one using this link.   Nearly all cards I share have tutorials available.  To easily search them click on the 2021 or 2022 Tutorial Tabs.

A list of Products used to create this card is shown below.


Product List

Sunday, January 16, 2022

EDEN'S GARDEN STAMP CAMP-TO-GO

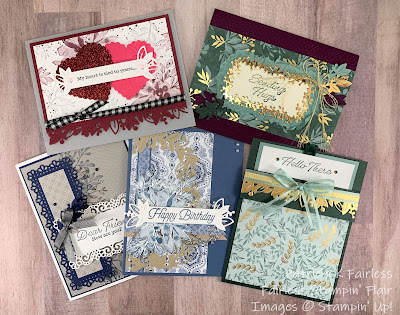
Each month I hold a Stamp Camp-to-Go.  Today, I am sharing a little peek at the cards that were in January's kit.


Each of those that sign up for my Stamp Camp-to-Go (SCTG) receive a kit with all required cardstock and embellishments.  The participants must have the bundle of the month and ink to complete the cards.  A tutorial is also provided with detailed assembly instructions, pictures, and special hints to make each of the cards.

If you are interested in participating in a future Stamp Camp-to-Go, please subscribe on the right and you will receive my Fairless Stampin' Flair Newsletter which provides a 3 month look-ahead for which bundles will be featured each month.  You will be added to my contact list and will also receive the invitation with all details on how to participate.  

On the last Tuesday of each month a Zoom Preview is held for the next month.  This allows participants to see the cards before they decide if they want to participate in the next month's Stamp Camp-to-Go.  During the Zoom, I also provide pointers and hints for making each of the cards as well as a recommended list of ink colors (or substitutes) that will be needed.

This week on Fairless Stampin' Flair, I will be featuring additional cards that were created with the Eden's Garden Bundle.  Free Tutorials will be available for all featured cards.

For those that participated in the January SCTG, this provides an added benefit of additional ideas for the bundle they purchased.

For those that didn't participate you still have the benefit of the ideas and FREE TUTORIALS.  Remember, for all cards, these are just meant as ideas.  You can also substitute other products to make them your own.


Product List

Friday, January 14, 2022

A SIMPLE HEART VALENTINE

If you need to make several Valentine Cards and need a quick and simple design, this is the card for you!  


It's pretty.  It's colorful.  And it is easy, particularly because all the measurements have been figured out for you!

Even if you don't have any of the supplies I used, you can recreate this card with items you already have.  All you need is a pretty designer series paper and coordinating cardstock colors.  If you are a stamper -- beginner or avid -- you probably have everything you need to make a card like this.

I used three different patterns from the Sweet Talk Designer Series Paper that is in the new Stampin' Up! Spring Mini, but any Valentine paper you have will work. 


I used Stampin' Up!'s Heart Punch Pack to create the center heart, but any heart punch or heart dies that you may have will work.  I used dimensionals behind the heart and the sentiment because I like the look of dimension in my cards, but you can also eliminate or minimize the dimension and it will be a "less expensive" card for mailing.


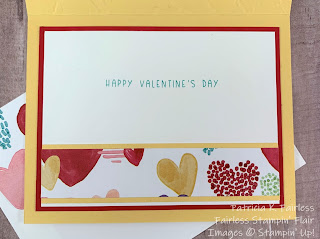
For the inside of the card, I made a simple Pool Party Mat and used a sentiment from the Sweet Conversation Stamp Set.  The four little hearts at the bottom were made with another die from Sweet Hearts Dies, but if you don't have these dies, just add a strip of your designer paper at the bottom.

You can also easily make a version of this simple card for any occasion.  It doesn't have to be a Valentine.  It could be a birthday card, a get well card, a just because card, or any kind of card you need -- just turn the heart into a flower, or even just a large sentiment that you already have.

I have a FREE TUTORIAL that has calculated all the dimensions for you so you can easily create this simple card with equal gaps around the DSP sections.  Figuring those out was the most "complicated" part of figuring out the layout.  But it's done!  All you need to do is click this link and download the tutorial.  I hope you will give it a try.  

You may be wondering why I am telling you all reasons you don't need to have the Sweet Conversations Bundle and Sweet talk DSP to make this card.  Would I like to sell you those products?  Of course, I would, but my goal is also to provide you with ideas for how you can use products that you already own.  That may not make for the best "salesperson", but I believe it makes for a great demonstrator, and that's what I want to be.  

If you don't already have a demonstrator, I would love to be yours.  If you would like to be added to my contact list, please use the "Subscribe" section on the right to provide me your contact information.

Below is a complete list of the products I used to create this card, but remember, this card is easy to make with things you most likely already have.


Product List

Wednesday, January 12, 2022

A COLOR TWIST VALENTINE

What do you consider a "normal" Valentine color?  Red? Pink? A combination of these?

How about So Saffron?  Probably not the first color that came to mind, right?


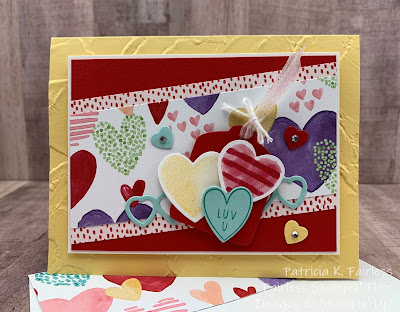
The new Sweet Talk Designer Series Paper has so many colors in it that I decided to use some of the more "non-traditional" colors for today's card.  Yes, it still has red (Real Red, that is), but the main color of the card is So Saffron.

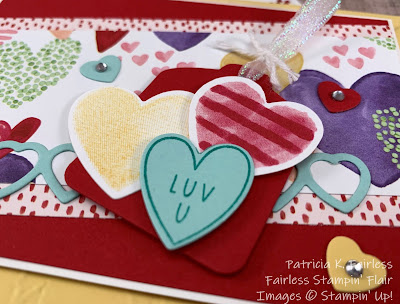
The three little hearts which create the focal point are So Saffron, Real Red, and Pool Party.  That's a very unique Valentine color combination for me, but since Stampin' Up! used it in this Sweet Talk Designer Series Paper, it must be OK, right?  LOL


Do you see the row of Pool Party outline hearts behind the 3 hearts on the tag?  This is just one of the unique dies from the Sweet Hearts Dies.  There are a couple more like this one, including one that makes a similar row of vertical hearts.  The little Real Red Tag behind the 3 hearts is another of the dies included in the set.


The layout for this card is a modified version of my favorite go-to diagonal layout.  Normally I use this diagonal layout for Portrait orientation cards, but today's layout is adapted to a Landscape orientation.  What do you think?  Compare it to the Portrait card at this link and let me know if you have a preference.

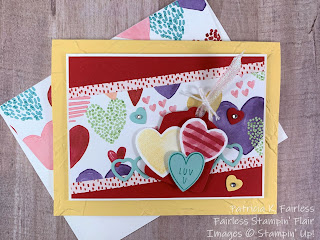
The inside of the card is decorated with a strip of the same designer series paper as was used on the card front.


If you would like a FREE TUTORIAL with all the cutting dimensions and step-by-step assembly directions, one is available at this link.

I'd love to hear what you think of the unique color combination!

A complete product list  for this card is shown below.  The Snowflake Splendor Ribbon is retired, but all other products are current.


Product List


DON'T FORGET TO SALE-A-BRATE!  

Remember for every $50 of merchandise that you order, you can choose a FREE Sale-a-Bration item.  Are you wondering what the items are that you can choose from?

You can check out the list below -- or click on the catalog icon in the right border of the blog to see the Sale-A-Bration Brochure.

But remember, you can only receive these as a Sale-a-Bration reward item.  You can not order them directly.


Product List