
Painting a Traditional Christmas
This week I'm getting into the Christmas spirit -- and besides, it is really time for me to get moving on making Christmas cards if I am going to get them finished on time!
I have decided to use the Painted Christmas Suite of products this week.
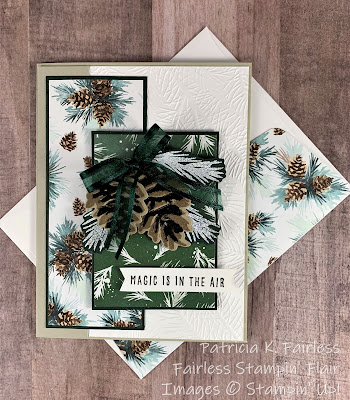
Today's card features the Painted Christmas Designer Series Paper. The pine cone design is one of my favorites in this paper pack. I combined it with the more "simple" Evening Evergreen paper with the white pine branches.
In keeping with this design I used one of the Wintery 3D Embossing Folders with the pretty pine branches to emboss the white background. Since this embossing folder 2-pack includes two narrower embossing folders which are not wide enough to emboss a full card front, I added a strip of Sahara sand, which is the same color as the card base, on the left side of the card front. This was my "Band-Aid" to cover the portion of the white cardstock that was not embossed, but I actually like how it turned out. If I hadn't told you, you probably would have thought it was part of the plan, right?
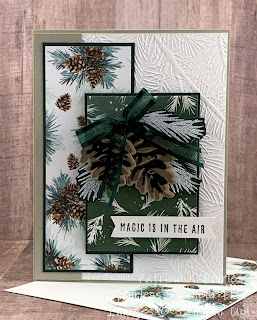
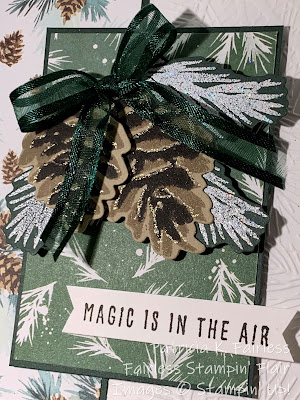
The two pine cones and the pine branches were made with stamps from the Christmas Season stamp set, and then die cut with coordinating dies from Seasonal Labels Dies. The pinecones are stamped with Crumb Cake and Early Espresso, and the pine boughs are heat embossed with white embossing powder.
The sentiment is from the Christmas to Remember stamp set.
I did add a little sparkle by using a white sparkly gel pen to outline the top edges of the Early Espresso ink on the pine cones. In person, this adds exactly what the card needed.
And of course, we couldn't forget to decorate the inside and the envelop. I added a narrow strip of the Painted Christmas designer paper edged with Evening Evergreen, and the two pinecones were made with the same process used for those on the card front. The sentiment is also from the Christmas to Remember stamp set.
One of my favorite ways to add a finishing touch to an envelope is to cover the flap with designer series paper. It's so quick, easy & pretty!

If you would like a free tutorial for this card, you can find one at this link.
I hope you enjoyed today's card and are motivated to start making your Christmas Cards. I realize it is only August, but if we want to save ourselves stress later, it's never too early to start!
A complete product list for today's card is included below.
")
")

 Designer Series Paper")


 Open Weave Ribbon")

")

No comments:
Post a Comment