Showing posts with label Christmas to Remember. Show all posts

Wednesday, July 20, 2022

THE CHRISTMAS WOODS

For today's Christmas card I used one of the patterns from the new Designer Series Paper (DSP) called Boughs of Holly.  If you prefer DSP that is more traditional in design and color, then you will love this one from the 2022 July - August Mini Catalog.


This particular design makes you feel like you are in the middle of a Wintery Woods.

I used the third largest die from Scalloped Contours Die to create my focal point of pinecones and pine boughs that look like they were freshly picked from the woods behind them.  Can't you almost just smell the fresh pine scent that we love at Christmas?


To create my stamped pine boughs, I used the stamp rolling technique.  This is an old technique and was one of the first that I learned as a beginning stamper over 17 years ago.
You just ink the stamp with the lighter of two ink colors and then you "roll" the edges in a darker shade of ink.  I used Soft Succulent and Evening Evergreen ink and by using two shades it makes the pine boughs have more depth and variation of color.

The Cherry Cobbler berries add a little pop of color.


I used the Stylish Shapes dies for my sentiment.  The MERRY sentiment from the Christmas to Remember stamp set is highlighted by a square Soft Succulent mat positioned on the diagonal.  The stitching on these dies keeps a consistent them with the stitching on the Scalloped Contours Basic White die cut.  

Three Brushed Metallic Dots were added to the card front for a little bit of gold bling.


The inside uses another sentiment from Christmas to Remember and the inside is decorated with a simple strip of the same DSP as used on the card front.

The envelope flap is also covered with the same Boughs of Holly DSP.

If you would like a tutorial with step-by-step directions and cutting dimensions you can download a copy at this link.

For more information on the products used, click on the links in the Product List below.


Product List

Monday, July 18, 2022

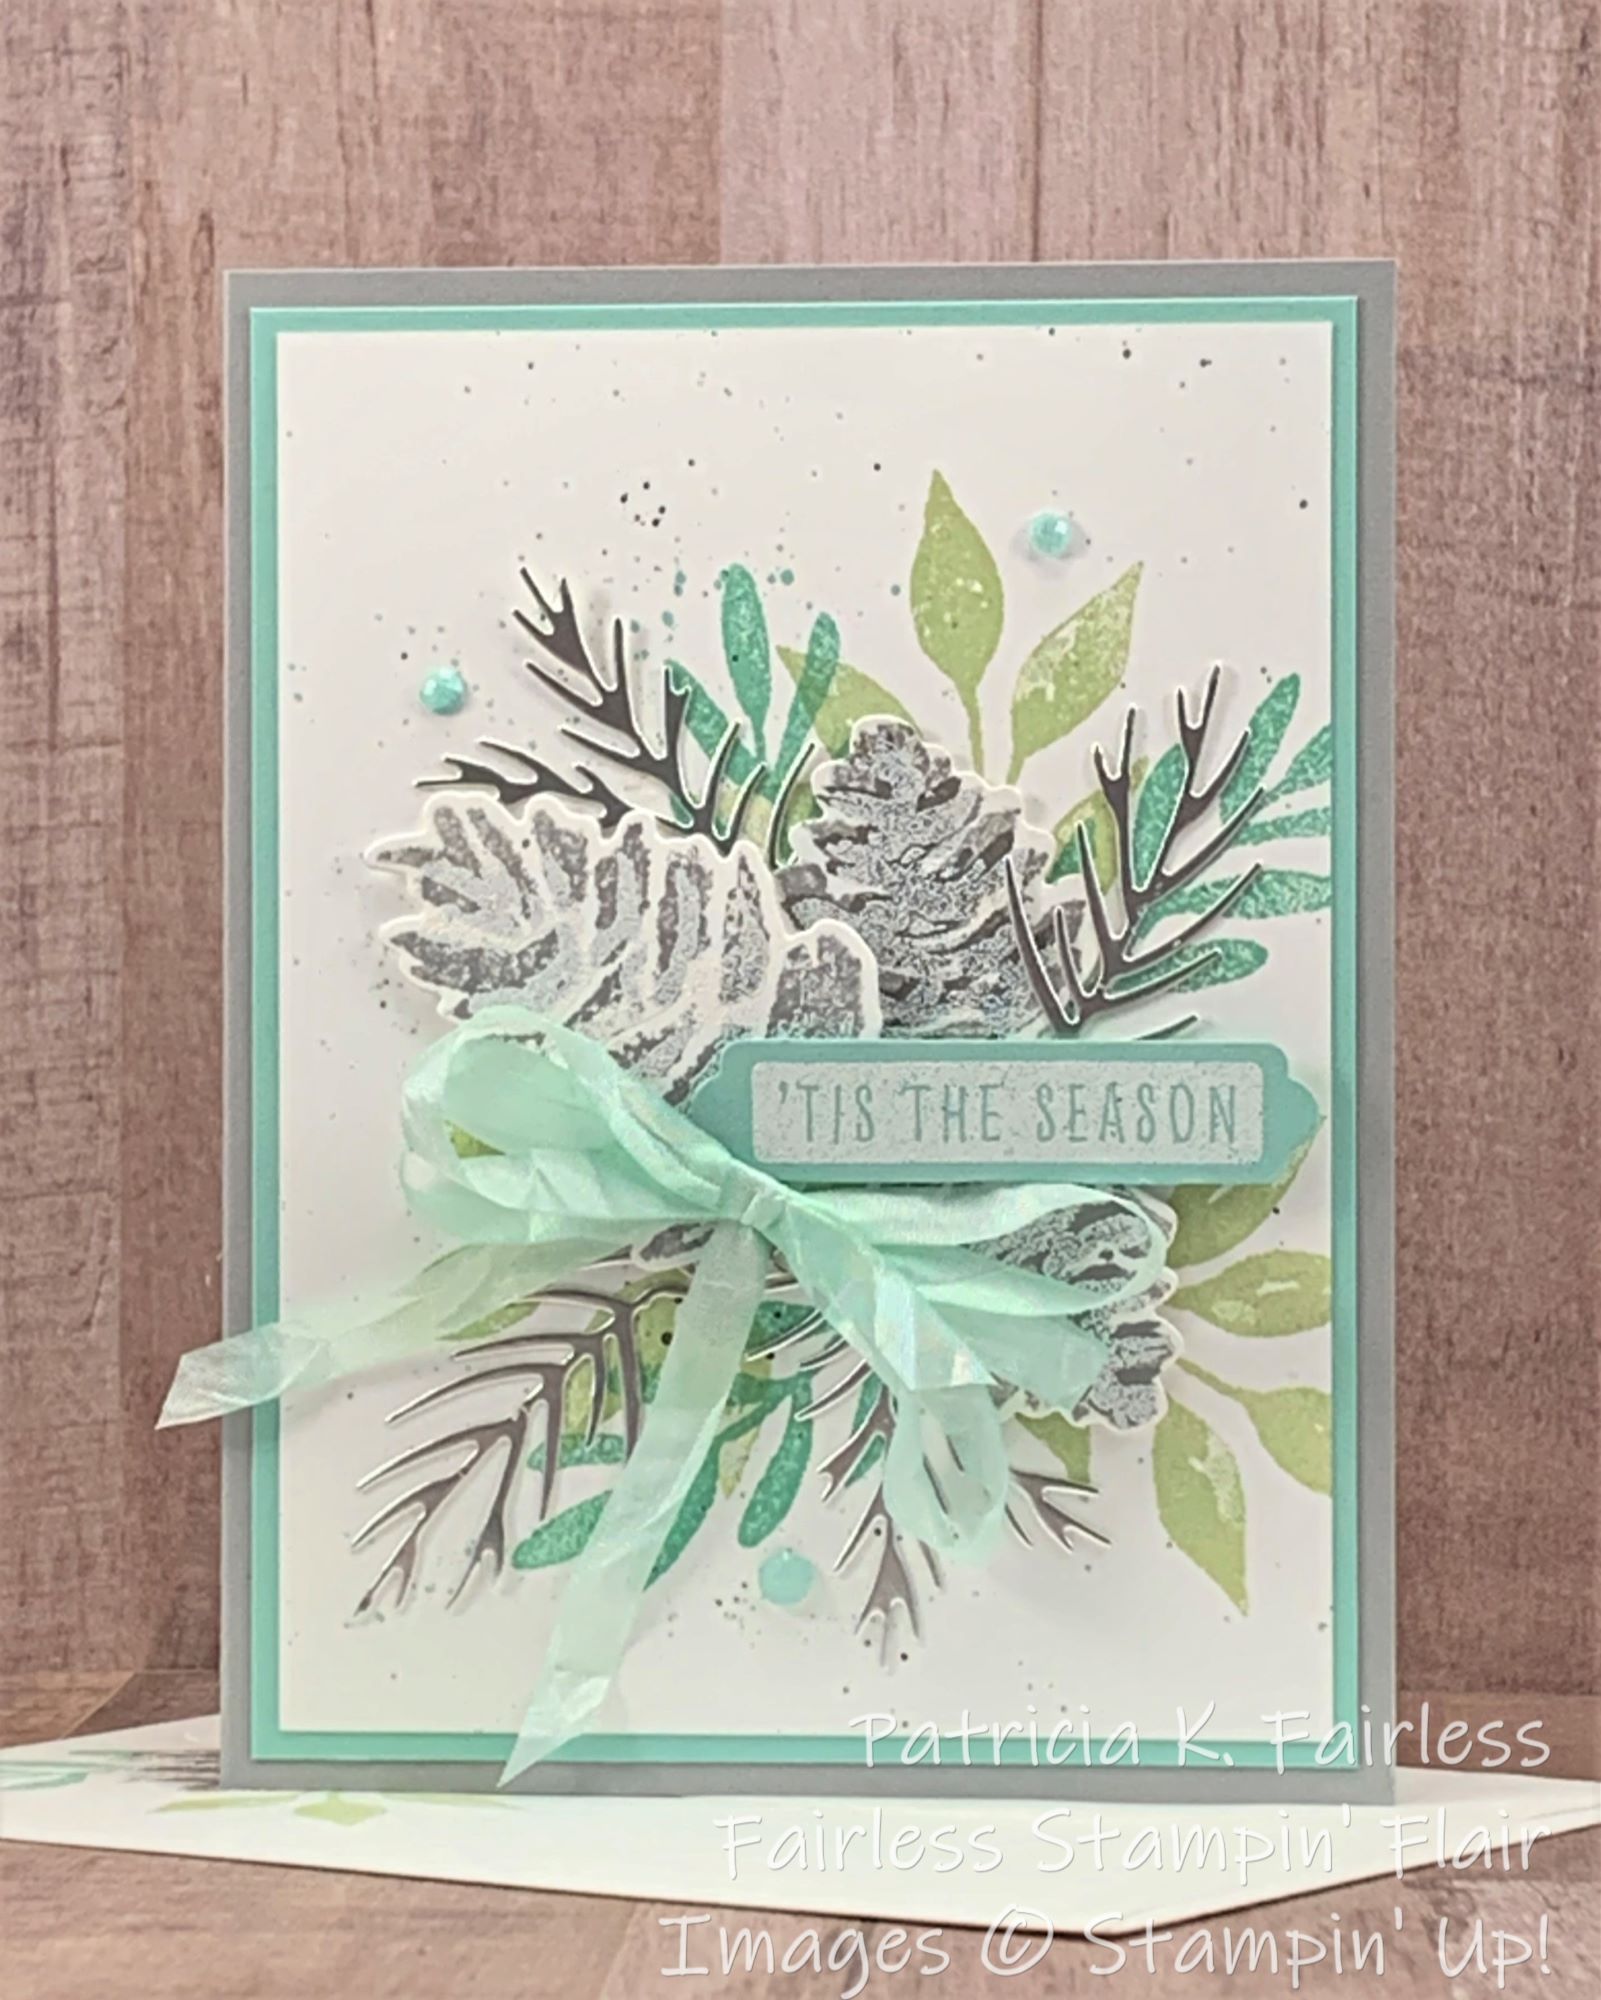
CHRISTMAS BLUES

As I mentioned yesterday, this week I will be sharing some additional Christmas Card ideas with you using the featured products for the July Stamp Camp-to-Go.  The stamp set I used is Christmas Season and the coordinating dies are the Seasonal Labels Dies.  

Today's Christmas Blues card uses beautiful soft colors.  Doesn't it just make you feel calm?  These colors today are not necessarily traditional Christmas colors, but we will get to those later this week.  I promise.


Our wintery spray of leaves and pinecones uses Soft Seafoam, Pool Party, Shades of Gray with a little shine of silver mixed in.  I knew I didn't want the pinecones to be the traditional shades of brown, so I played a bit with Smokey Slate and Basic Gray.  I liked it, but they were a little darker than the vision I saw in my mind, so I added a third layer of color by using the detailed stamp with VersaMark ink and then embossing them with white embossing powder.  That added the softness I was after.  What do you think?


I used the cap on my Stampin' Write Markers to flick some speckles of Basic Gray, Smokey Slate and Pool Party ink on the card front.  The sentiment is heat embossed with white embossing powder on Pool Party Cardstock and then die cut with the smallest die from Seasonal Labels Dies.

These Seasonal Labels dies were first introduced a year ago in the Fall 2021 Mini, and I was so excited when I saw them come back in the current Annual Catalog.  These dies include a wide variety of label sizes, and they also are designed so that you can layer them together -- which is awesome!  And not awesome just for Christmas -- but for year round use!


To decorate the inside of my card, I placed the sentiment on its own separate mat -- something I rarely do.  However, I wanted to cover the top edge of the leaves and pinecone, so this was my solution.   There was something about just having the tops of the leaf stems and pinecone hanging in space that didn't look quite right, but I like how this turned out.  What do you think?

If you would like a FREE TUTORIAL for this card, one is available for download at this link.

A list of the products I used is shown below.

If you have any questions or if I can be of assistance, please leave me a comment or contact me directly through the contact tab above.


Product List

Friday, October 1, 2021

WHIMSY & WONDER

Today's card uses a layout that I learned through Sharon Armstrong's mystery stamping.  I first shared this layout a few weeks ago and predicted that you would be seeing it again.  If you missed that post, you can check it out here!

I love the versatility of this layout, and it works so well to showcase beautiful designer series paper.  And there is nothing not to love about this Whimsy and Wonder Specialty Designer Series Paper.  Look at these two beautiful patterns--one with Mint Macaron trees and one with beautiful holly.  The designs in this paper have beautiful iridescent highlights!  I just can't get over how pretty it is in real life!  The photos just don't do it justice.

Rather than focusing on the trees from the Whimsical Trees Bundle, today I decided to use the ornaments stamp.  I stamped two sets with VersaMark on Basic White cardstock and then heat embossed them with silver embossing powder.  I colored them with Mint Macaron and Polished Pink Stampin' Blends and die cut with the coordinating die from Trees Dies.  The sentiment on the front of the card is from the For Unto Us Stamp Set and was stamped on Basic White and then die cut with a die from Tasteful Labels.

In keeping with my mantra of "no naked card insides", I added another set of silver heat embossed ornaments colored with Stampin' Blends on the top left of the inside of the card.  The sentiment is from the Christmas to Remember stamp set and is stamped in Black Memento.  

I'm addicted to sentiment stamps and have a difficult time passing one up.  This awesome new Christmas to Remember Stamp Set from the Fall Mini was no exception.  It has great fonts and some new and unique sentiments different from those I already own.  Check it out in the Product List below!

Usually I just give you little sneak peaks of the envelops that I make for each of my cards, but today I thought I would share the whole envelop.  I am really happy how it turned out and thought it was too special not to share.  I hope it inspires you to also decorate your envelopes. 

Maybe a pretty envelop will also bring a smile to the person that delivers it and not just the person that receives it!  I hope it at least made you smile today!

As always, there is a detailed tutorial available for today's card.  Just click on this link for all the cutting dimensions and step-by-step directions.

All the products I used to create the card are listed below, and if you have any questions on the cards I share, please leave a comment and I'll do my best to answer them.  I'm here to help!


Product List