Showing posts with label Christmas Pinecone Dies. Show all posts

Friday, September 29, 2023

PETAL PARK CHRISTMAS

I continue to strive to meet my self-imposed challenge to create a Christmas card each week using whatever products I am featuring that week.

Well, using the Petal Park Bundle to create a Christmas card was certainly a challenge.  This bundle definitely does not scream "Christmas!"  But I was determined.


I first got some assistance from the Christmas Pinecone Dies, and then I also took color inspiration from a card I saw by "Frenchie" on Demonstrator Planning Place.  She shared a couple of cards she had made with the Saint Nicholas stamp set.  On one of the cards, she gave Santa a Lost Lagoon Santa Suit, and I really liked the warmth of her card, so I decided to use Lost Lagoon for my Christmas card.


The pine branch background was die cut from Pretty Peacock Soft Shimmer Specialty Paper, and I used Pecan Pie and Early Espresso for my pinecones.

Then it was time to add some Petal Park flowers.  I tried several different reds embossed with white embossing powder and also white cardstock embossed with the colored embossing technique using various red inks.  I ended up with Cherry Cobbler flowers heat embossed with white embossing powder.

After scattering several flowers around the pinecones, I still thought it needed some additional white to brighten it up a bit.  So, I die cut an additional piece of Basic White cardstock with the pine branch background die and snipped it apart to make several little branches.  Then I tucked them among the pinecones and flowers.  And just in case, the Pretty Peacock Soft Shimmer pine branches didn't give enough sparkle, I brushed some clear Wink of Stella on the white branches.  The sentiment from Hope & Peace completed the card.

What do you think of my result?  Did I successfully meet my challenge?

With all of my experimentation on the front of the card, I ended up, as usual, with leftovers.  I was brought up in a home where leftovers never went to waste.  As a result, it is difficult for me to throw away leftover stamping bits!  As I often do, I used my leftovers to decorate the inside of my card and added another sentiment from Hope & Peace.  I love the Christmas sentiments in this stamp set.  It is available as an ONLINE EXCLUSIVE.  You can click on it in my Product List below to see the additional Christmas sentiments it includes.

For a tutorial for today's today, use this link to download a FREE COPY.

Product List

Monday, October 24, 2022

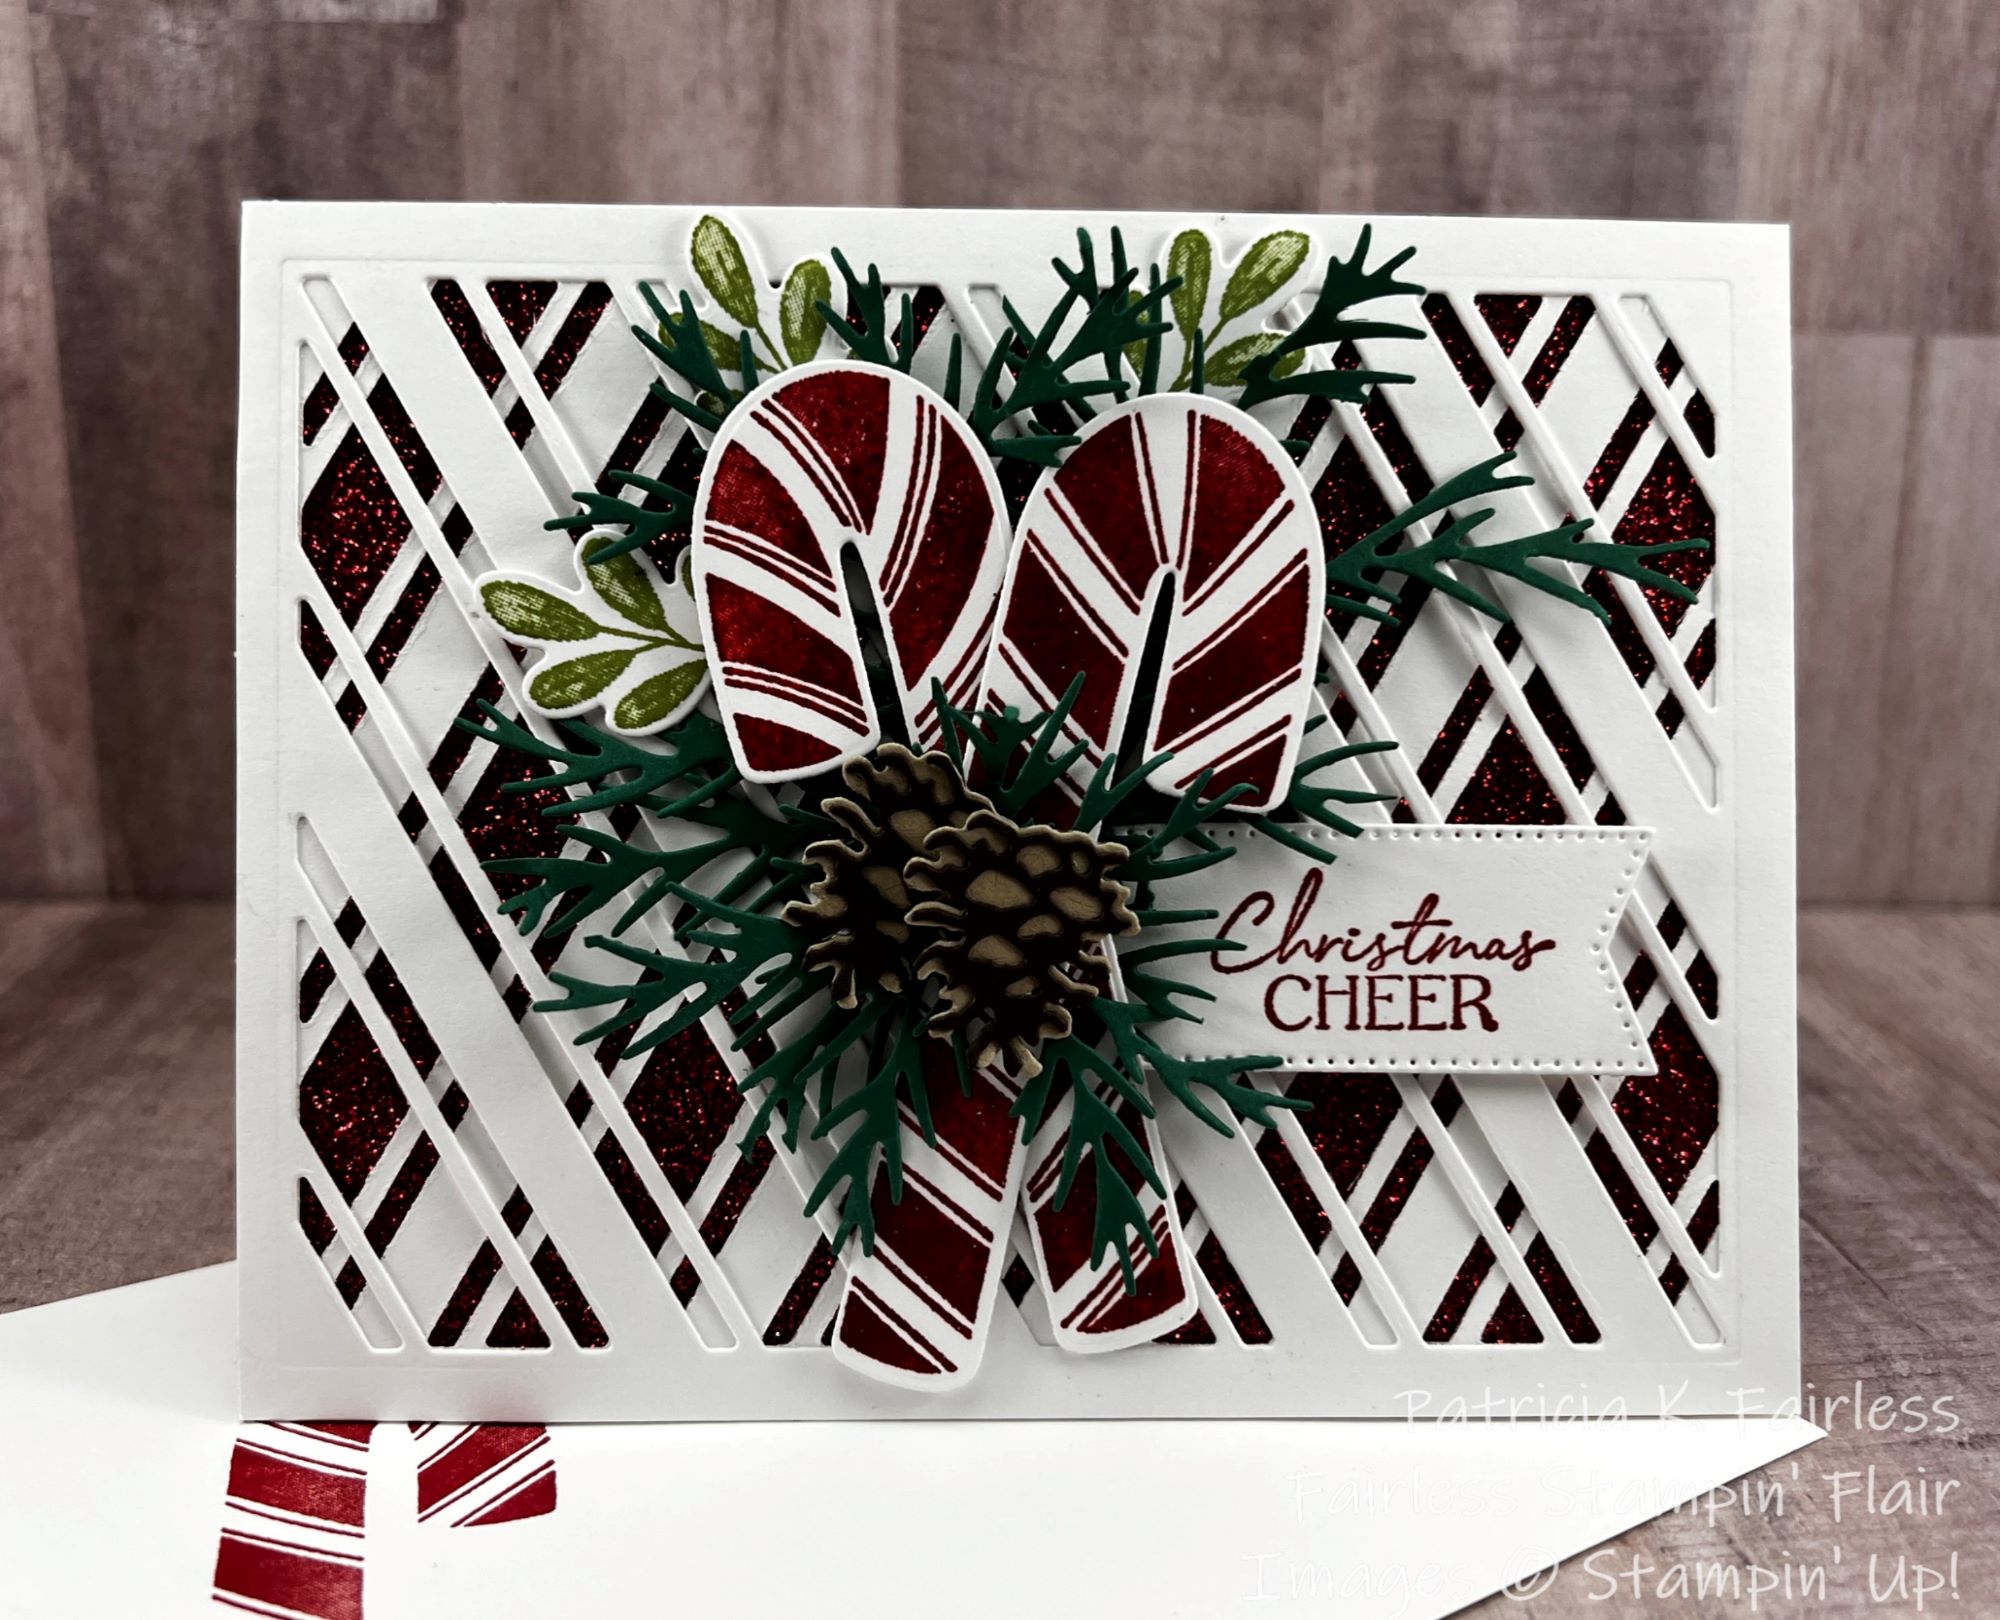
CANDY CANES AND GLIMMER

Last week I shared Christmas Cards made with the Merriest Moments products and this week I have more Christmas Cards to share with you.  If you are a stamper you, like me, are probably busily working on your Christmas Cards.  If you haven't started, it is time!

This week I will be using the Sweet Candy Canes Bundle which definitely leans more towards the cute and whimsical than the traditional and elegant that I shared last week.  I had a lot of fun making this week's cards, and no matter your preferred personal style, I hope you enjoy them and find some inspiration for your own cards.  

This Sweet Candy Canes bundle will also be the featured bundle for the November Stamp Camp-to-Go class.  If you would like more information on how to participate in that class, please sign up for my Newsletter and you will receive all the details!

I thought I would start the week with a card full of sparkle and shine (not that my photographic skills will necessarily fully show that).  In real life, this card has lots of both. 

I started by cutting two pieces of Thick Basic White cardstock with the stripes die from the Sweet Candy Canes Bundle.  If I'm totally honest, this die is what sold me on this bundle.  It is unlike anything I already have, and it makes a gorgeous statement.

To make the stripes crisscross, one is flipped over.  I have two hints if you do this.

1.  On the die cut that you flip over, use your bone folder and rub it over the cut edges of the die cut to lay those cut edges down.

2.  Use the "flipped" die cut on the bottom layer.

 And next comes the sparkle!  After adhering the die cuts together to hold them in place, I adhered them to Red Glimmer paper.  You will want to use a good adhesive to do this.  I found that liquid glue seems to hold the best when adhering other cardstock to glimmer paper.

Once the Red Glimmer Paper and two die cuts were assembled, I adhered them to the front of my Thick Basic White card base.

Now the decorating fun begins!

I wanted my Candy Canes to Shine, so I used the Colored Embossing Technique to create them.  This is a simple technique to create a shiny embossed image in any color.   For my Candy Canes I used Real Red ink.   If you are not familiar with this technique, I have described it in my FREE tutorial which you can download by using this link.  

In the following photo you can see the shine on the Candy Canes that is provided by the Colored Embossing Technique.


Once the Candy Canes were complete, I thought they could use a bed of greenery to lay on.  I used the detailed pine bough die from the Christmas Pinecone Dies to create some Shaded Spruce boughs for their bed.  I used the same die set to create a couple of pinecones to make a "bouquet" of sorts to lay over the candy canes.  To add a slight variation in greenery color, I tucked a couple of Pear Pizzaz leafy branches among the pine boughs behind the candy canes.  These were made with the stamp and dies from the Sweet Candy Canes bundle.


All that remained was adding a sentiment.  The Christmas Cheer sentiment is also from the Sweet Candy Canes stamp set.  After stamping it in Real Red on a Basic White scrap, I die cut it with one of the flag dies from Stylish Shapes Dies.  I hope this die set never retires (which I know won't happen) as it is a go-to, all-purpose die set that I use on the majority of my cards.  If you don't have it yet, you should consider it.  You can see more details by clicking on the image in my product list below.

For the inside of the card, I kept it extremely simple.  I added a strip of Red Glimmer cardstock to the left side of the Basic White and Stamped another sentiment from the Sweet Candy Canes stamp set with Real Red ink.  It doesn't get much easier than that!


As indicated above, a detailed tutorial is available for FREE so if you would like more step-by-step information, please use the ink provided above to download a copy.

A list of the products I used is shown below and you can learn more about any of them by clicking on the image.


Product List

Monday, July 18, 2022

CHRISTMAS BLUES

As I mentioned yesterday, this week I will be sharing some additional Christmas Card ideas with you using the featured products for the July Stamp Camp-to-Go.  The stamp set I used is Christmas Season and the coordinating dies are the Seasonal Labels Dies.  

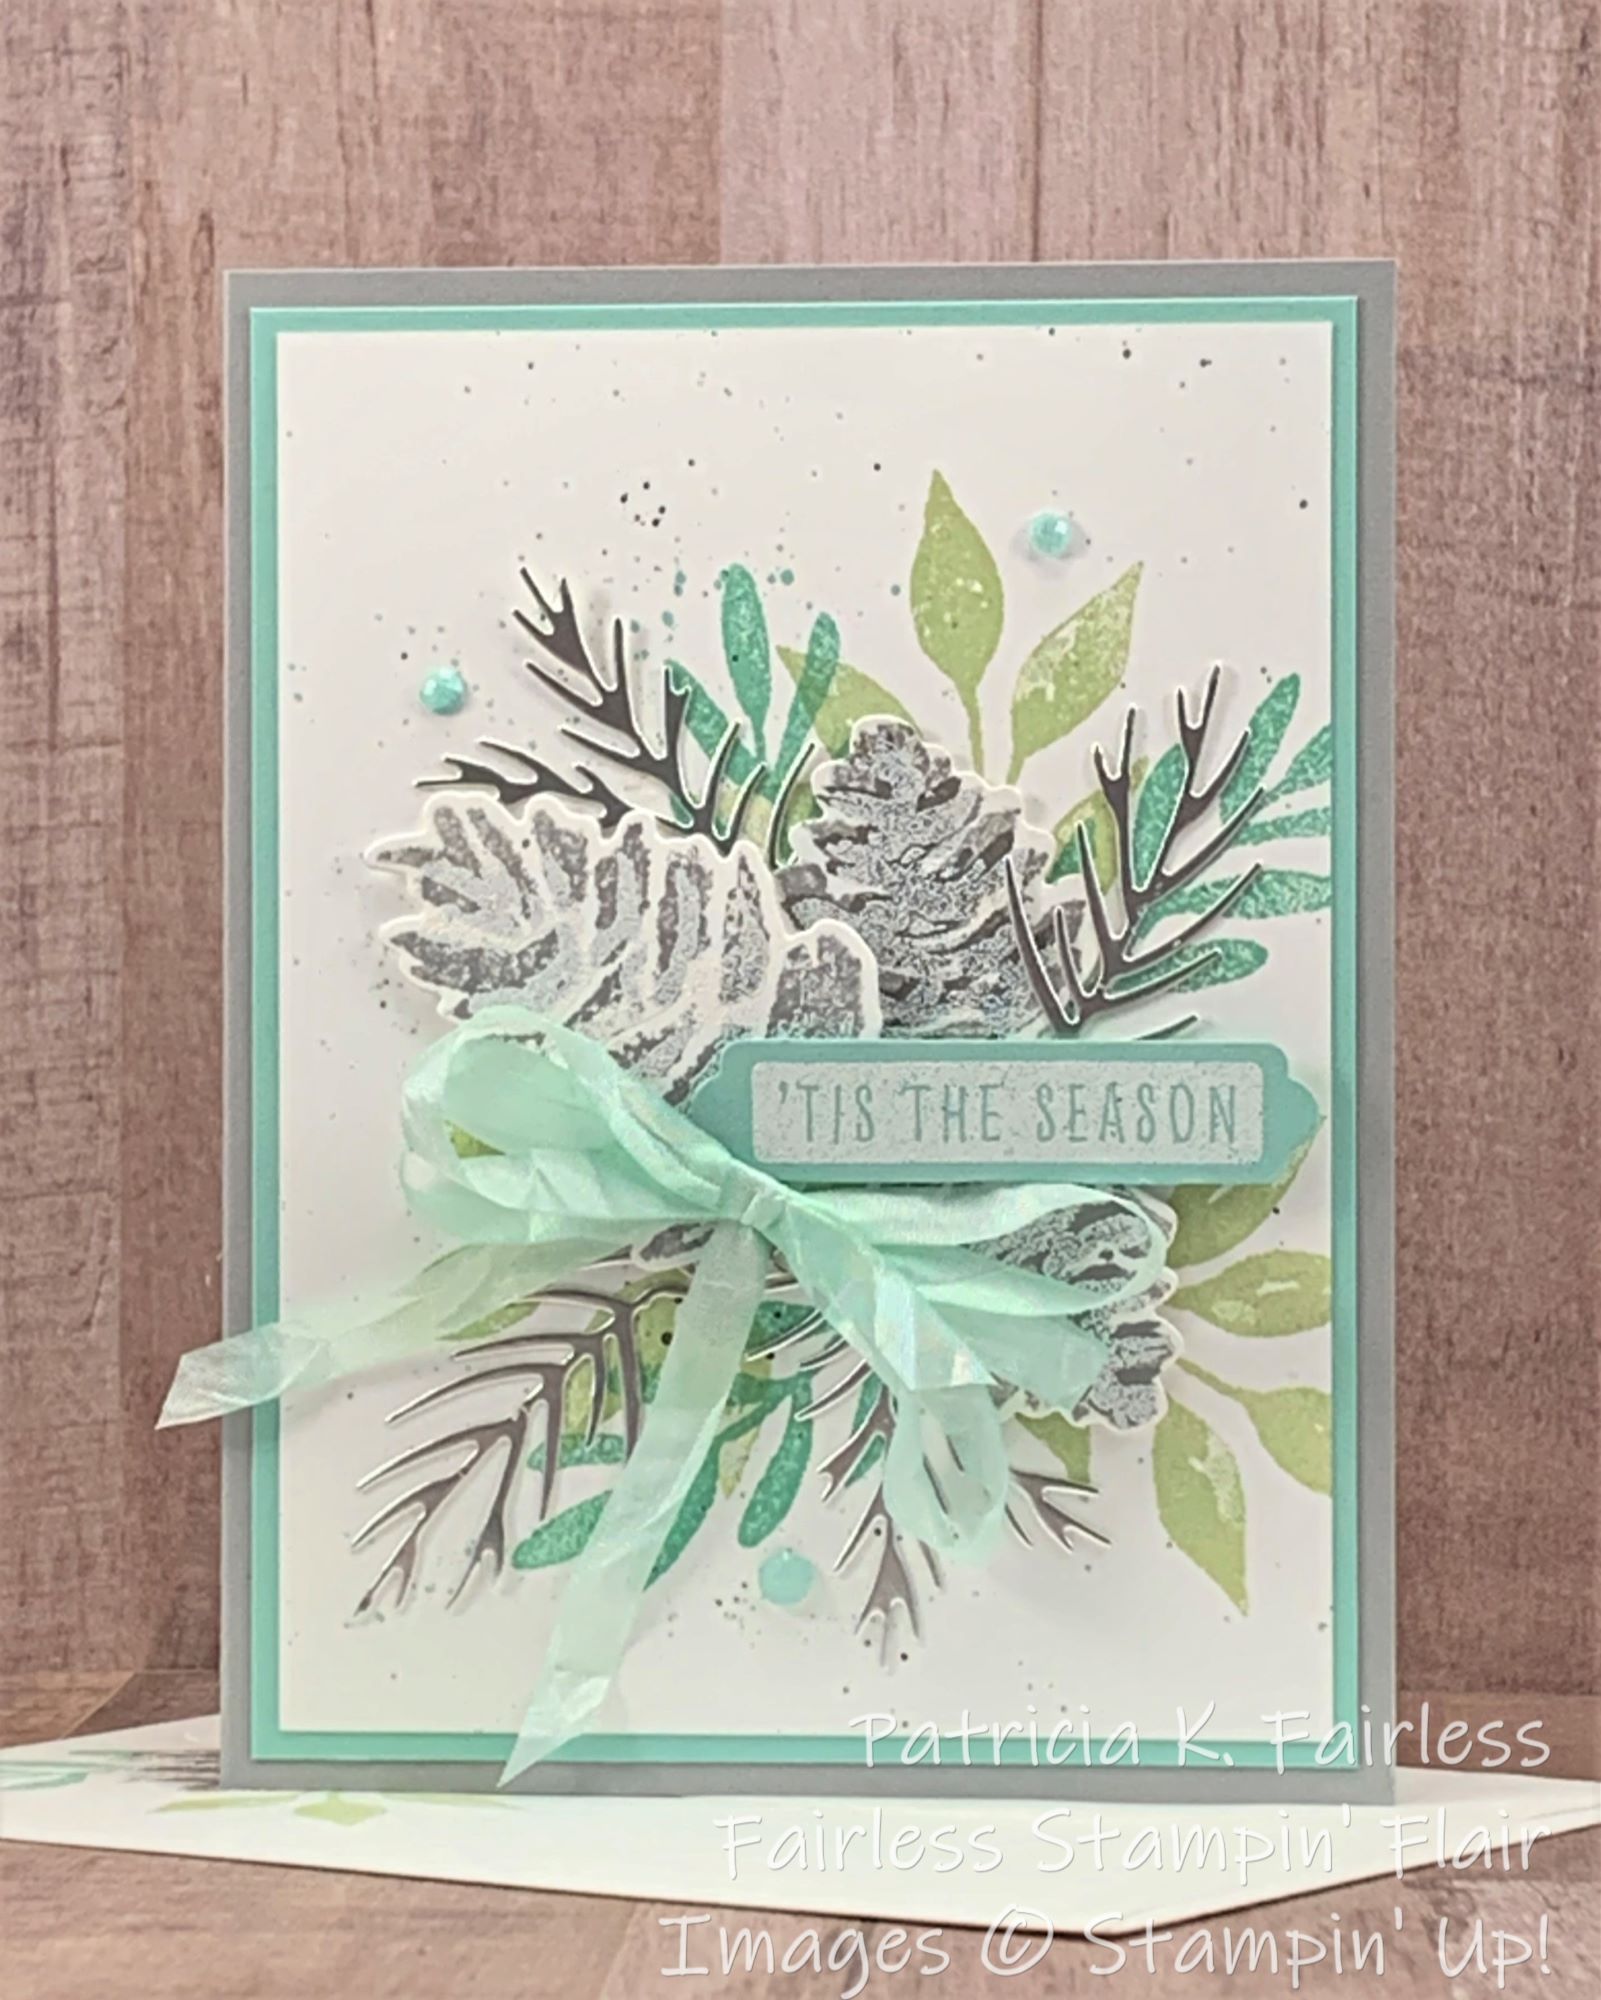
Today's Christmas Blues card uses beautiful soft colors.  Doesn't it just make you feel calm?  These colors today are not necessarily traditional Christmas colors, but we will get to those later this week.  I promise.


Our wintery spray of leaves and pinecones uses Soft Seafoam, Pool Party, Shades of Gray with a little shine of silver mixed in.  I knew I didn't want the pinecones to be the traditional shades of brown, so I played a bit with Smokey Slate and Basic Gray.  I liked it, but they were a little darker than the vision I saw in my mind, so I added a third layer of color by using the detailed stamp with VersaMark ink and then embossing them with white embossing powder.  That added the softness I was after.  What do you think?


I used the cap on my Stampin' Write Markers to flick some speckles of Basic Gray, Smokey Slate and Pool Party ink on the card front.  The sentiment is heat embossed with white embossing powder on Pool Party Cardstock and then die cut with the smallest die from Seasonal Labels Dies.

These Seasonal Labels dies were first introduced a year ago in the Fall 2021 Mini, and I was so excited when I saw them come back in the current Annual Catalog.  These dies include a wide variety of label sizes, and they also are designed so that you can layer them together -- which is awesome!  And not awesome just for Christmas -- but for year round use!


To decorate the inside of my card, I placed the sentiment on its own separate mat -- something I rarely do.  However, I wanted to cover the top edge of the leaves and pinecone, so this was my solution.   There was something about just having the tops of the leaf stems and pinecone hanging in space that didn't look quite right, but I like how this turned out.  What do you think?

If you would like a FREE TUTORIAL for this card, one is available for download at this link.

A list of the products I used is shown below.

If you have any questions or if I can be of assistance, please leave me a comment or contact me directly through the contact tab above.


Product List