Today's card is made with the Layers of Beauty Bundle. I love that this bundle has coordinating masks which makes coloring the large, beautiful, floral image so easy.
I used two of the retiring 2024-2026 In Colors: Pretty in Pink and Petunia Pop. For me, it was love at first sight with this 24-26 Class of In Colors, so I'll admit I'm a little sorry to say goodbye.

Before adding the flowers, the Basic White cardstock was very lightly shaded with Pretty in Pink ink using a Blending Brush. A few speckles were also added by flicking the cap of a Basic Black Stamping Write Marker on the brush end of the marker.

After creating the image with gold heat embossing, I colored it using blending brushes and the coordinating five layers of masks. After die cutting the coloring image it was positioned in the lower right corner of the tinted Basic White cardstock so that some of the edges were extending off the cardstock layer. Those edges were then trimmed flush with the Basic White layer.
The sentiment was stamped with Old Olive ink and die cut using the small label die from Layers of Beauty Dies.

For the inside of the card, I stamped a portion of the large floral image and heat embossed it with gold embossing powder. The coloring process using masks and blending brushes was repeated, just as on the card front.
Use this link to download a free tutorial.
Below is a list of the products that were used.
Product List![Layers Of Beauty Bundle (English) [ 163519 ]](https://assets1.tamsnetwork.com/images/EC042017NF/163519s.jpg "Layers Of Beauty Bundle (English) [ 163519 ]")
![Layers Of Beauty Decorative Masks [ 163517 ]](https://assets1.tamsnetwork.com/images/EC042017NF/163517s.jpg "Layers Of Beauty Decorative Masks [ 163517 ]")
![Basic White 8 1/2" X 11" Thick Cardstock [ 159229 ]](https://assets1.tamsnetwork.com/images/EC042017NF/159229s.jpg "Basic White 8 1/2\" X 11\" Thick Cardstock [ 159229 ]")
![Pretty In Pink 8 1/2" X 11" Cardstock [ 163793 ]](https://assets1.tamsnetwork.com/images/EC042017NF/163793s.jpg "Pretty In Pink 8 1/2\" X 11\" Cardstock [ 163793 ]")
![Pretty In Pink Classic Stampin Pad [ 163807 ]](https://assets1.tamsnetwork.com/images/EC042017NF/163807s.jpg "Pretty In Pink Classic Stampin Pad [ 163807 ]")
![Petunia Pop Classic Stampin Pad [ 163811 ]](https://assets1.tamsnetwork.com/images/EC042017NF/163811s.jpg "Petunia Pop Classic Stampin Pad [ 163811 ]")
![Old Olive Classic Stampin' Pad [ 147090 ]](https://assets1.tamsnetwork.com/images/EC042017NF/147090s.jpg "Old Olive Classic Stampin' Pad [ 147090 ]")
![Versamark Pad [ 102283 ]](https://assets1.tamsnetwork.com/images/EC042017NF/102283s.jpg "Versamark Pad [ 102283 ]")
![Blending Brushes [ 153611 ]](https://assets1.tamsnetwork.com/images/EC042017NF/153611s.jpg "Blending Brushes [ 153611 ]")
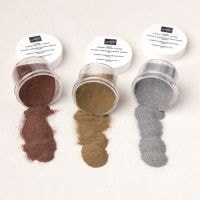
![Metallics Wow! Embossing Powder [ 165678 ]](https://assets1.tamsnetwork.com/images/EC042017NF/165678s.jpg "Metallics Wow! Embossing Powder [ 165678 ]")
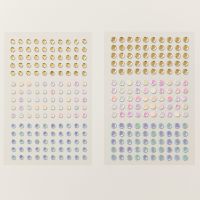
![2024–2026 In Color™ Shimmer Gems [ 163781 ]](https://assets1.tamsnetwork.com/images/EC042017NF/163781s.jpg "2024–2026 In Color™ Shimmer Gems [ 163781 ]")
![Early Espresso & Old Olive Linen Thread Pack [ 165986 ]](https://assets1.tamsnetwork.com/images/EC042017NF/165986s.jpg "Early Espresso & Old Olive Linen Thread Pack [ 165986 ]")
![Embossing Additions Tool Kit [ 159971 ]](https://assets1.tamsnetwork.com/images/EC042017NF/159971s.jpg "Embossing Additions Tool Kit [ 159971 ]")
![Heat Tool (Us And Canada) [ 129053 ]](https://assets1.tamsnetwork.com/images/EC042017NF/129053s.jpg "Heat Tool (Us And Canada) [ 129053 ]")
![Stampin' Cut & Emboss Machine [ 149653 ]](https://assets1.tamsnetwork.com/images/EC042017NF/149653s.jpg "Stampin' Cut & Emboss Machine [ 149653 ]")