Showing posts with label Abstract Beauty DSP. Show all posts

Wednesday, June 1, 2022

LET'S SET SAIL - ABSTRACT BEAUTY

Today's Let's Set Sail card has a different feel from Monday's card.  Monday's card was bold and colorful while today's card is calm with pastel colors.


This card is a Double Z-Fold card and for this Fun Fold Style I always like to use designer series paper.  For today's card I used the Abstract Beauty Designer Series Paper.  This paper is in the January - June Mini and is currently on the Last Chance List for 50% off.  It is beautiful designer paper!  To see more of the patterns, click on the Product List link below.


I also used the new Charming Sentiments Bundle for the sentiment on this card.  This new bundle comes with dies that cut out each sentiment, so it looks like it was fussy cut!  This sentiment bundle is definitely in my Top 5 favorite items in the new catalog.

The sky was made with Balmy Blue and Polished Pink ink and a Blending Brush.


The sails were punched from the Abstract Beauty designer series paper, and, like Monday's card, I drew the lines on the sail with a glimmer gel pen to provide the illusion of curvature.


Here is a better view of the partially open Double Z-Fold Fun Fold.  This fun fold is actually very easy to make and once you decide which Designer Series Paper you want to use, they come together quickly.

If you would like a Tutorial with the cutting and scoring dimensions and step-by-step directions on how to make the Double Z Fun Fold you can download one at this link.

The picture below shows the card lying flat so that you can see each section more clearly.

What do you think of this card?  I'd love to hear your comments.

Below is a list of the Products used on today's card.  And don't forget, the Abstract Beauty DSP is on the Last Chance List for 50% off.  Last Chance items are only available while supplies last, so don't wait too long, and miss out!

Product List

Wednesday, April 20, 2022

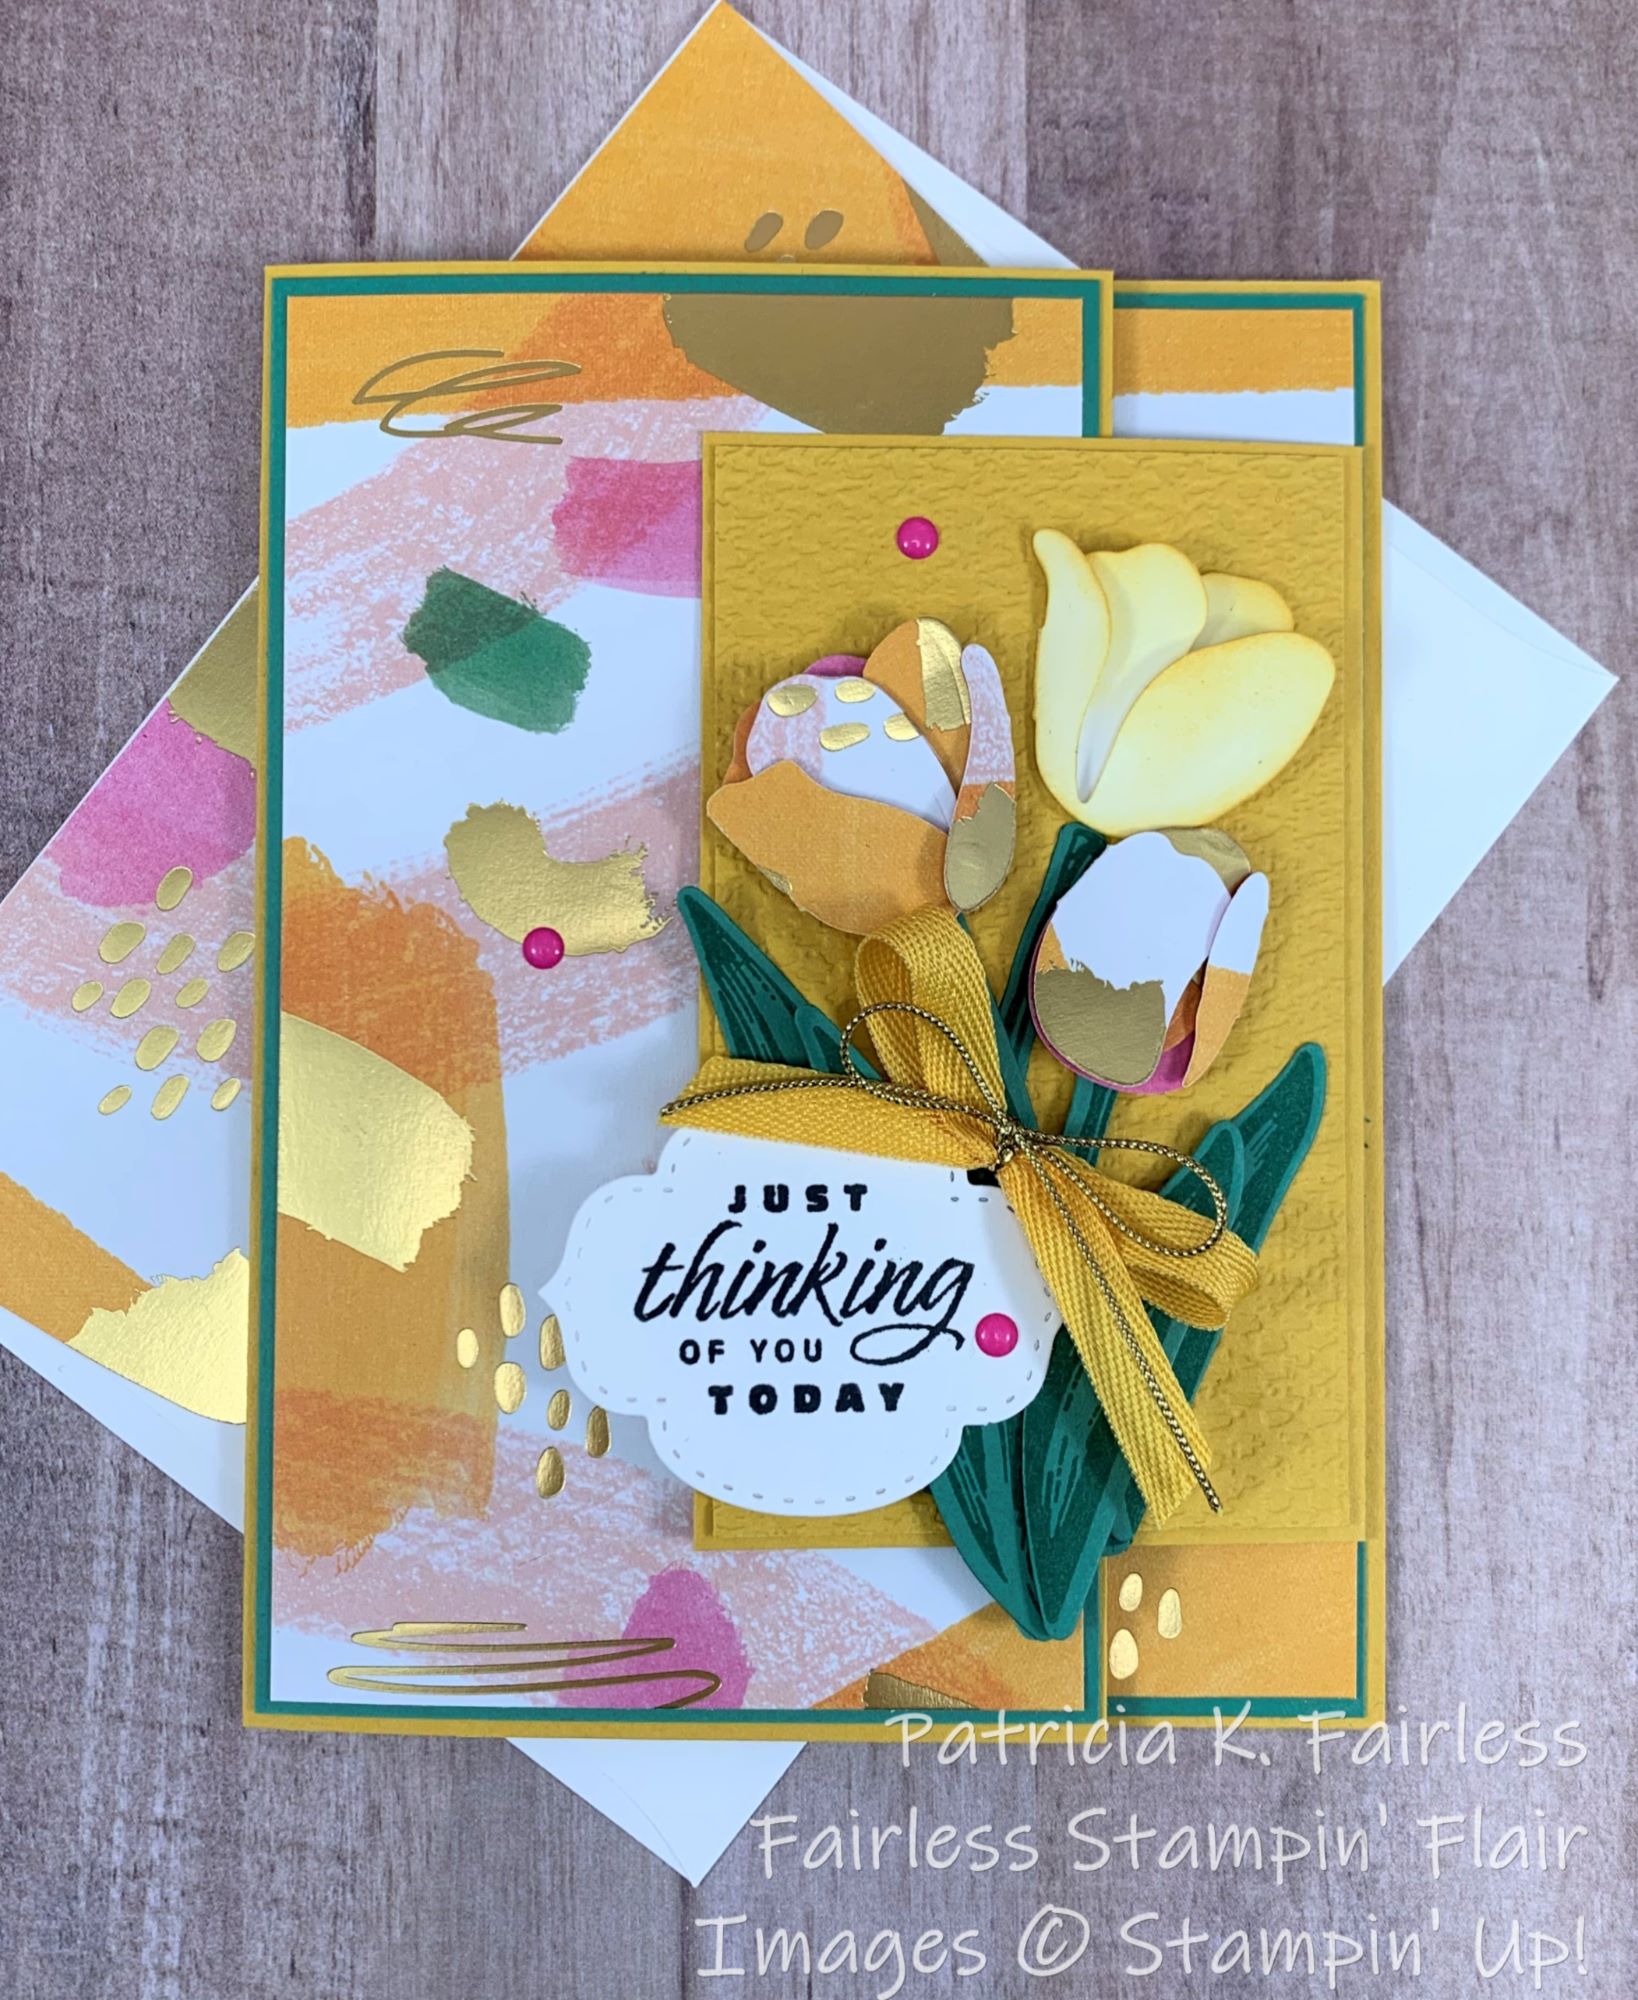
FLOWERING TULIP DOUBLE FLAP FUN FOLD

I have another card today made with the Flowering Tulips Bundle.  As I mentioned on Monday's post, I had used the stamp set previously, but had not played with the dies that made the 3D tulips.  Well, I have been having a lot of fun with these dies once I got over my intimidation!  You should see my work desk (kitchen counter)!  I have tulip bits everywhere!

I've also gotten a bit hooked on the Abstract Beauty Designer Series Paper (DSP).  So, today I have another card that uses this beautiful paper.  And what better way to show off Designer Series Paper than a Fun Fold Card.  Fun folds are my favorite way to use my DSP.

I call this Fun Fold a Double Flap Fold.  I don't know if that is the official name, but that's what I call it.  The Bumblebee flap on the right folds over the Abstract Beauty flap on the left.

I need to work on my photographic skills for taking good pictures of Fun Folds.  They don't always cooperate so well and stand, sit, or lay where you want them to.  They have a bit of a mind of their own!

The colors I used for today's card are Bumblebee and Just Jade.  These In-Colors are retiring, so I thought I would send them out on a happy card.  It is a bright and cheery card, isn't it?  I think it will make someone that I'm thinking of smile when I send it to them.  

For the Tulips today, I made 3 tulips and used every tulip die cut in the set to make the flowers, stems, and leaves.


Two of the tulips were made from the Abstract Beauty Designer Series Paper, but the top right tulip was die cut from Basic White cardstock and then the edges were colored a bit with a Blending Brush and Bumblebee Ink.  How did I do?  That was my first attempt at coloring these flowers.  It's interesting because the die cuts fold in order to create the flower, so you have to pay attention to which side of the cardstock you color.  Or you can just do what I did, and color both sides! 

The sentiment is also from the Flower Tulips Stamp Set and I used a die from Stitched So Sweetly to cut it out.  Stitched So Sweetly Dies are probably my favorite set of dies, and they are retiring!  If you have been admiring these dies, don't dawdle as they will soon be gone forever!

For the inside of the card, I stamped a Bumblebee Tulip and because the inside peeks out above and below the right flap, I added a strip of the Abstract Beauty Designer Series Paper.  


This abstract Beauty Designer Series Paper measures 4" x 7", so since my left flap needed a 3" wide piece of DSP, I had 1" left that I used for the inside.  That way it also continues the same pattern on from the front!


You can see a complete product list below, and if you would like a tutorial with all the cutting dimensions and step-by-step instructions, you can download a copy by using this link.


Product List

Monday, April 18, 2022

ABSTRACT BEAUTY TULIPS

It's Monday and time for a new featured bundle of the week.  This week I'm going to be sharing cards made with the Flowering Tulips Bundle.  My Tulips have started poking their heads out!  Have yours?


I have had this bundle for a couple of months, and I have played with the tulip stamps, but had not yet tried the dies.  I had been avoiding them as I was a little intimidated trying to figure out all the pieces.  I found my best guide was the Jan-June Mini Catalog images and particularly the one on Page 14.  It showed four different tulips using every one of the dies that make the tulips.

But after a bit of playing, I decided it would be helpful if I had a little "cheat sheet" for a quick reference.  So this is what I made.


For my first attempt I wanted to keep the process simple, so I used the beautiful Abstract Beauty designer series paper to cut out my tulip bits!


Using this paper saved me from figuring out how to shade my flowers and with such beautiful paper, how could I go wrong?  I just love all the touches of gold on this paper.

While playing with all the tulip pieces, I also learned that it really wasn't overly critical which die-cut pieces I used to mix and match. I even put the bud "up-side-down" on my card because I liked how it looked.

For today's card I used a couple of the retiring in-colors, Magenta Madness, and Just Jade.  The narrow ombre rectangle behind the tulips is also from the Abstract Beauty designer series paper collection.


Both of the die cuts behind the Tulips were made with the Ornate Layers Dies.  I'm sad to see these retire, but no worries, there will be plenty of new things to love!


To decorate the inside of my card and the front of my envelope, I used two of the tulip stamps from the Flowering Tulips Bundle.  Sometimes I have issues aligning two-step stamps, but these are very forgiving, so it makes it fun, easy, and no-stress!

If you would like a tutorial with all the cutting dimensions and step-by-step directions, one is available for download at this link.

I hope you enjoyed the card.  It looks like Spring, doesn't it?  If you have any comments or questions, please leave me a note and I will do my best to help you!

Below is a list of the products I used for today's card.


Product List