Showing posts with label Ornate Layers Dies. Show all posts

Monday, April 18, 2022

ABSTRACT BEAUTY TULIPS

It's Monday and time for a new featured bundle of the week.  This week I'm going to be sharing cards made with the Flowering Tulips Bundle.  My Tulips have started poking their heads out!  Have yours?


I have had this bundle for a couple of months, and I have played with the tulip stamps, but had not yet tried the dies.  I had been avoiding them as I was a little intimidated trying to figure out all the pieces.  I found my best guide was the Jan-June Mini Catalog images and particularly the one on Page 14.  It showed four different tulips using every one of the dies that make the tulips.

But after a bit of playing, I decided it would be helpful if I had a little "cheat sheet" for a quick reference.  So this is what I made.


For my first attempt I wanted to keep the process simple, so I used the beautiful Abstract Beauty designer series paper to cut out my tulip bits!


Using this paper saved me from figuring out how to shade my flowers and with such beautiful paper, how could I go wrong?  I just love all the touches of gold on this paper.

While playing with all the tulip pieces, I also learned that it really wasn't overly critical which die-cut pieces I used to mix and match. I even put the bud "up-side-down" on my card because I liked how it looked.

For today's card I used a couple of the retiring in-colors, Magenta Madness, and Just Jade.  The narrow ombre rectangle behind the tulips is also from the Abstract Beauty designer series paper collection.


Both of the die cuts behind the Tulips were made with the Ornate Layers Dies.  I'm sad to see these retire, but no worries, there will be plenty of new things to love!


To decorate the inside of my card and the front of my envelope, I used two of the tulip stamps from the Flowering Tulips Bundle.  Sometimes I have issues aligning two-step stamps, but these are very forgiving, so it makes it fun, easy, and no-stress!

If you would like a tutorial with all the cutting dimensions and step-by-step directions, one is available for download at this link.

I hope you enjoyed the card.  It looks like Spring, doesn't it?  If you have any comments or questions, please leave me a note and I will do my best to help you!

Below is a list of the products I used for today's card.


Product List

Friday, November 19, 2021

SOME MINTY WHIMSY! IS IT TOO MUCH?

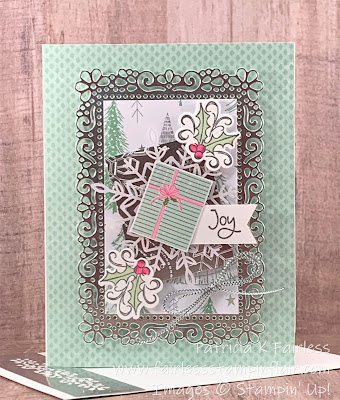
I need your help today to solve a personal dilemma!   Is today's card over-the top?  Is there too much going on or do you like it?


When I first finished the card I loved it.  When I look at it in person, I still love it, but when I look at it in the picture on the post, I'm having my doubts.  I always have trouble photographing shiny things and this card definitely has a lot of shine and glimmer going on.  Maybe it is just my photographic challenges that are messing with me on this card.

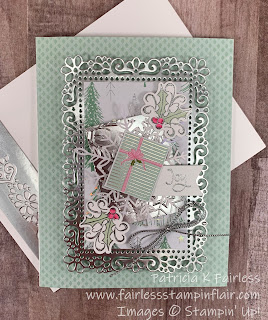
The face of the Thick Basic White card is covered with the Mint Macaron Paper from Whimsy & Wonder Designer Series Paper (DSP).  I used the medium size die from Ornate Layers Dies to cut the silver background layer for the Whimsical Trees designer series paper.


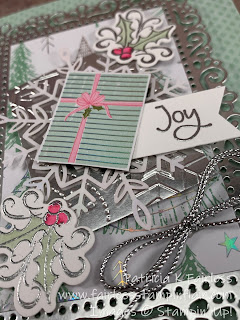
Another small layer of foil is laid on an angle over the Whimsical Trees.  That layer is embossed with the snowflake embossing folder from the Wintry 3D embossing folder pack and then an iridescent Wonderful Snowflake is adhered on top of it.  A package was fussy cut from the packages paper from the Whimsy & Wonder DSP and popped up on top of the snowflake with dimensionals.  Silver embossed and colored holly decorates two of corners.


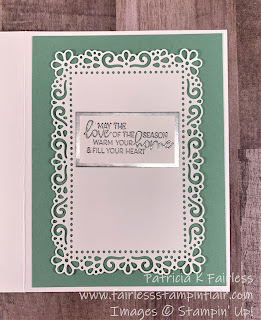
The inside of the card also has some unplanned shimmer going on.   After I silver heat embossed my sentiment on the die cut Ornate Layer, I somehow managed to get a smudge on it that had nothing to do with any of the inks I used on the card.  It must have been one of those "inky fingers" issues.  Rather than throw the ornate layer away and start over I decided to emboss a separate sentiment on basic white and mat it with silver foil.  You have to admit that the over-the-top inside is in keeping with the front of the card.

I suppose that sometimes we can have too much of a good thing.  I'm thinking this card may be one of those times.  But honestly, it does look much prettier in person.  So, it is definitely getting mailed to someone this Christmas.  Would you like to be that someone?  

You can access a free tutorial by using this link, and a full product list is provided below.


Product List

Wednesday, October 6, 2021

NEW LAYOUT FOR CHRISTMAS

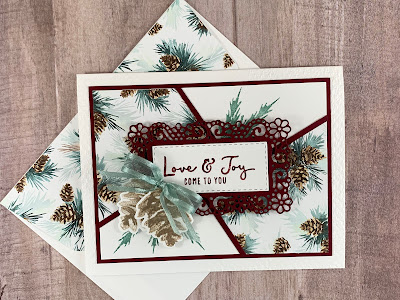
I have a new layout to share with you today.  Well, at least it is new to me.  I wish I could say that I created it, but I didn't.  I saw a similar card on Pinterest by Jo Blackman that I loved, so I decided to CASE it.  I could not actually figure out all the technical details of how she created her layout, but my ending visual appearance is similar so I achieved my goal.


To create the two corner sections, I used the Painted Christmas Designer Series Paper from the Painted Christmas Suite that I'm featuring this week.  

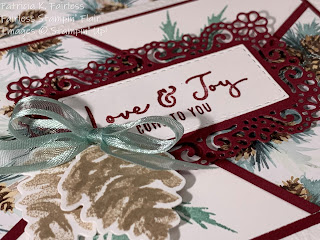
The sentiment was created with the marker-to-stamp technique so that I could put the first two lines of the sentiment on the front of the card and the last two lines from that same sentiment on the inside of the card.  The sentiment is from the Christmas to Remember stamp set, which is also part of the Painted Christmas Suite.

It was quick and easy to die cut the sentiment with one of the Stitched Rectangles dies.  It fits perfectly on the Merry Merlot die cut that I made with an Ornate Layers die.  These Ornate Layers dies make such pretty backgrounds for sentiments or to showcase your card's focal element.

I used a stamp from the Christmas Season Stamp set to create the Soft Succulent "branches" on the white corners of the card front.  This stamp is actually meant to provide the center accent for the holly leaves, but I thought it coordinated nicely with the design of the branches on the designer series paper.  I just love how Stampin' Up!'s products all coordinate!

The two pinecones on the front were stamped with Crumb Cake and die cut with a coordinating die from the Seasonal Labels Dies--another item from the Painted Christmas Suite.  A Soft Succulent bow adds the finishing touch to the card front.


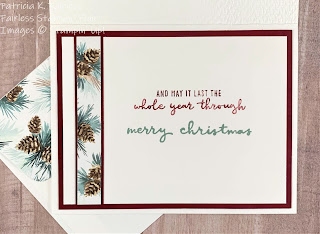
To dress up the inside of the card I added a strip of the same designer series paper bordered with Merry Merlot.


The Merry Merlot sentiment is the last two lines from the sentiment used for the front, and the Soft Succulent "Merry Christmas" is also from the Christmas to Remember Stamp Set.

If you would like to try to create this card (or CASE your own similar design), a free detailed tutorial is available as well as a complete product list is provided below.

I'd love to hear if you decide to give it a try.  Leave me your questions and comments below!


Product List