Are you on cuteness-overload yet this week? Please meet Coco, my Christmas Kitty.
She's named after my neighbor's cat who likes to come visit me when I'm in my crafting area.
Sometimes she likes to stay outside just looking in.
And sometimes she likes to come in and talk to me. Coco (the neighbor) is very chatty.
I think Christmas Coco is much more demure. At least she looks like she is, doesn't she? The only thing she told me was that she needed a nice cozy place to sit, and that she wanted her bed to match the flower she was holding. Once she made those requests (and I complied) I haven't heard a peep out of her. She just sits in her Moody Mauve bed holding her flower and looking cute! Coco the neighbor could take some lessons from Christmas Coco.
Coco's background was made with designer series paper (DSP) from the Winter Meadow DSP collection and her bed was made with the Rustic Crate Bundle.
The front and inside sentiments are both from the Very Best Occasions stamp set.
Today it is time for a Christmas Card. Last week I indicated I was going to challenge myself to make a Christmas card using whatever stamp set I was featuring each week.
This week the challenge was too easy!
This Rustic Crate Bundle comes "ready for Christmas" with its Poinsettia bouquet ready to fill the crate. All I had to do was stamp the image and grab my Stampin' Blends (Real Red & Granny Apple Green) and color it and then die cut it with the coordinating Rustic Crate die.
Black and White with a pop of red has always been one of my favorite color combinations. So, for this card I decided to make a black and white background using the Double Embossed Enamel Technique. For this card I used the Countryside Blossoms embossing folder. To learn more about this technique, you can watch this Learning with Friends video that premiered yesterday on my YouTube Channel.
INSERT VIDEO LINK
To make the crate for this card, I simply die cut the crate from Basic White cardstock and then used a sponge dauber to lightly rub some Black Memento ink on the die cut. Since this die also creates an embossed woodgrain surface, by adding a little black ink, it makes the grain on the crate really pop.
I had to search my stash for a small "Merry Christmas" stamp and found this Happy Christmas in the retired Itty Bitty Christmas Stamp Set. It may be an old set, but it is a keeper! I die cut the sentiment with the new Deckled Circles Dies and then used a sponge dauber and Real Red ink to add a bit of color on the edges.
This Rustic Crate dies also include a die for the handle which was die cut from Basic White.
To complete the card front I wanted a bit of sparkle. What is a Christmas card without sparkle? I think it is a requirement, don't you?
So, I wrapped the card front with Glittered Organdy White Ribbon and added a gold Iridescent Pastel Gem in the center of each flower.
As I mentioned in my video, I typically make my technique sheets a little larger than I need. I do this for a couple of reasons. Sometimes the edges of a Technique Sheet don't turn out all that well and if the size is larger than you need, you can trim off any unsightly areas. But the BEST reason to make the technique sheet a little larger is because when you trim it down to size, you have leftover scraps to decorate the inside of the card and or the envelope. I didn't have much extra on this one, but I did have a couple of narrow strips that I could add to the inside and the front of the envelope. This ties the inside to the card front and by also adding a strip to the envelope it ties the whole ensemble together.
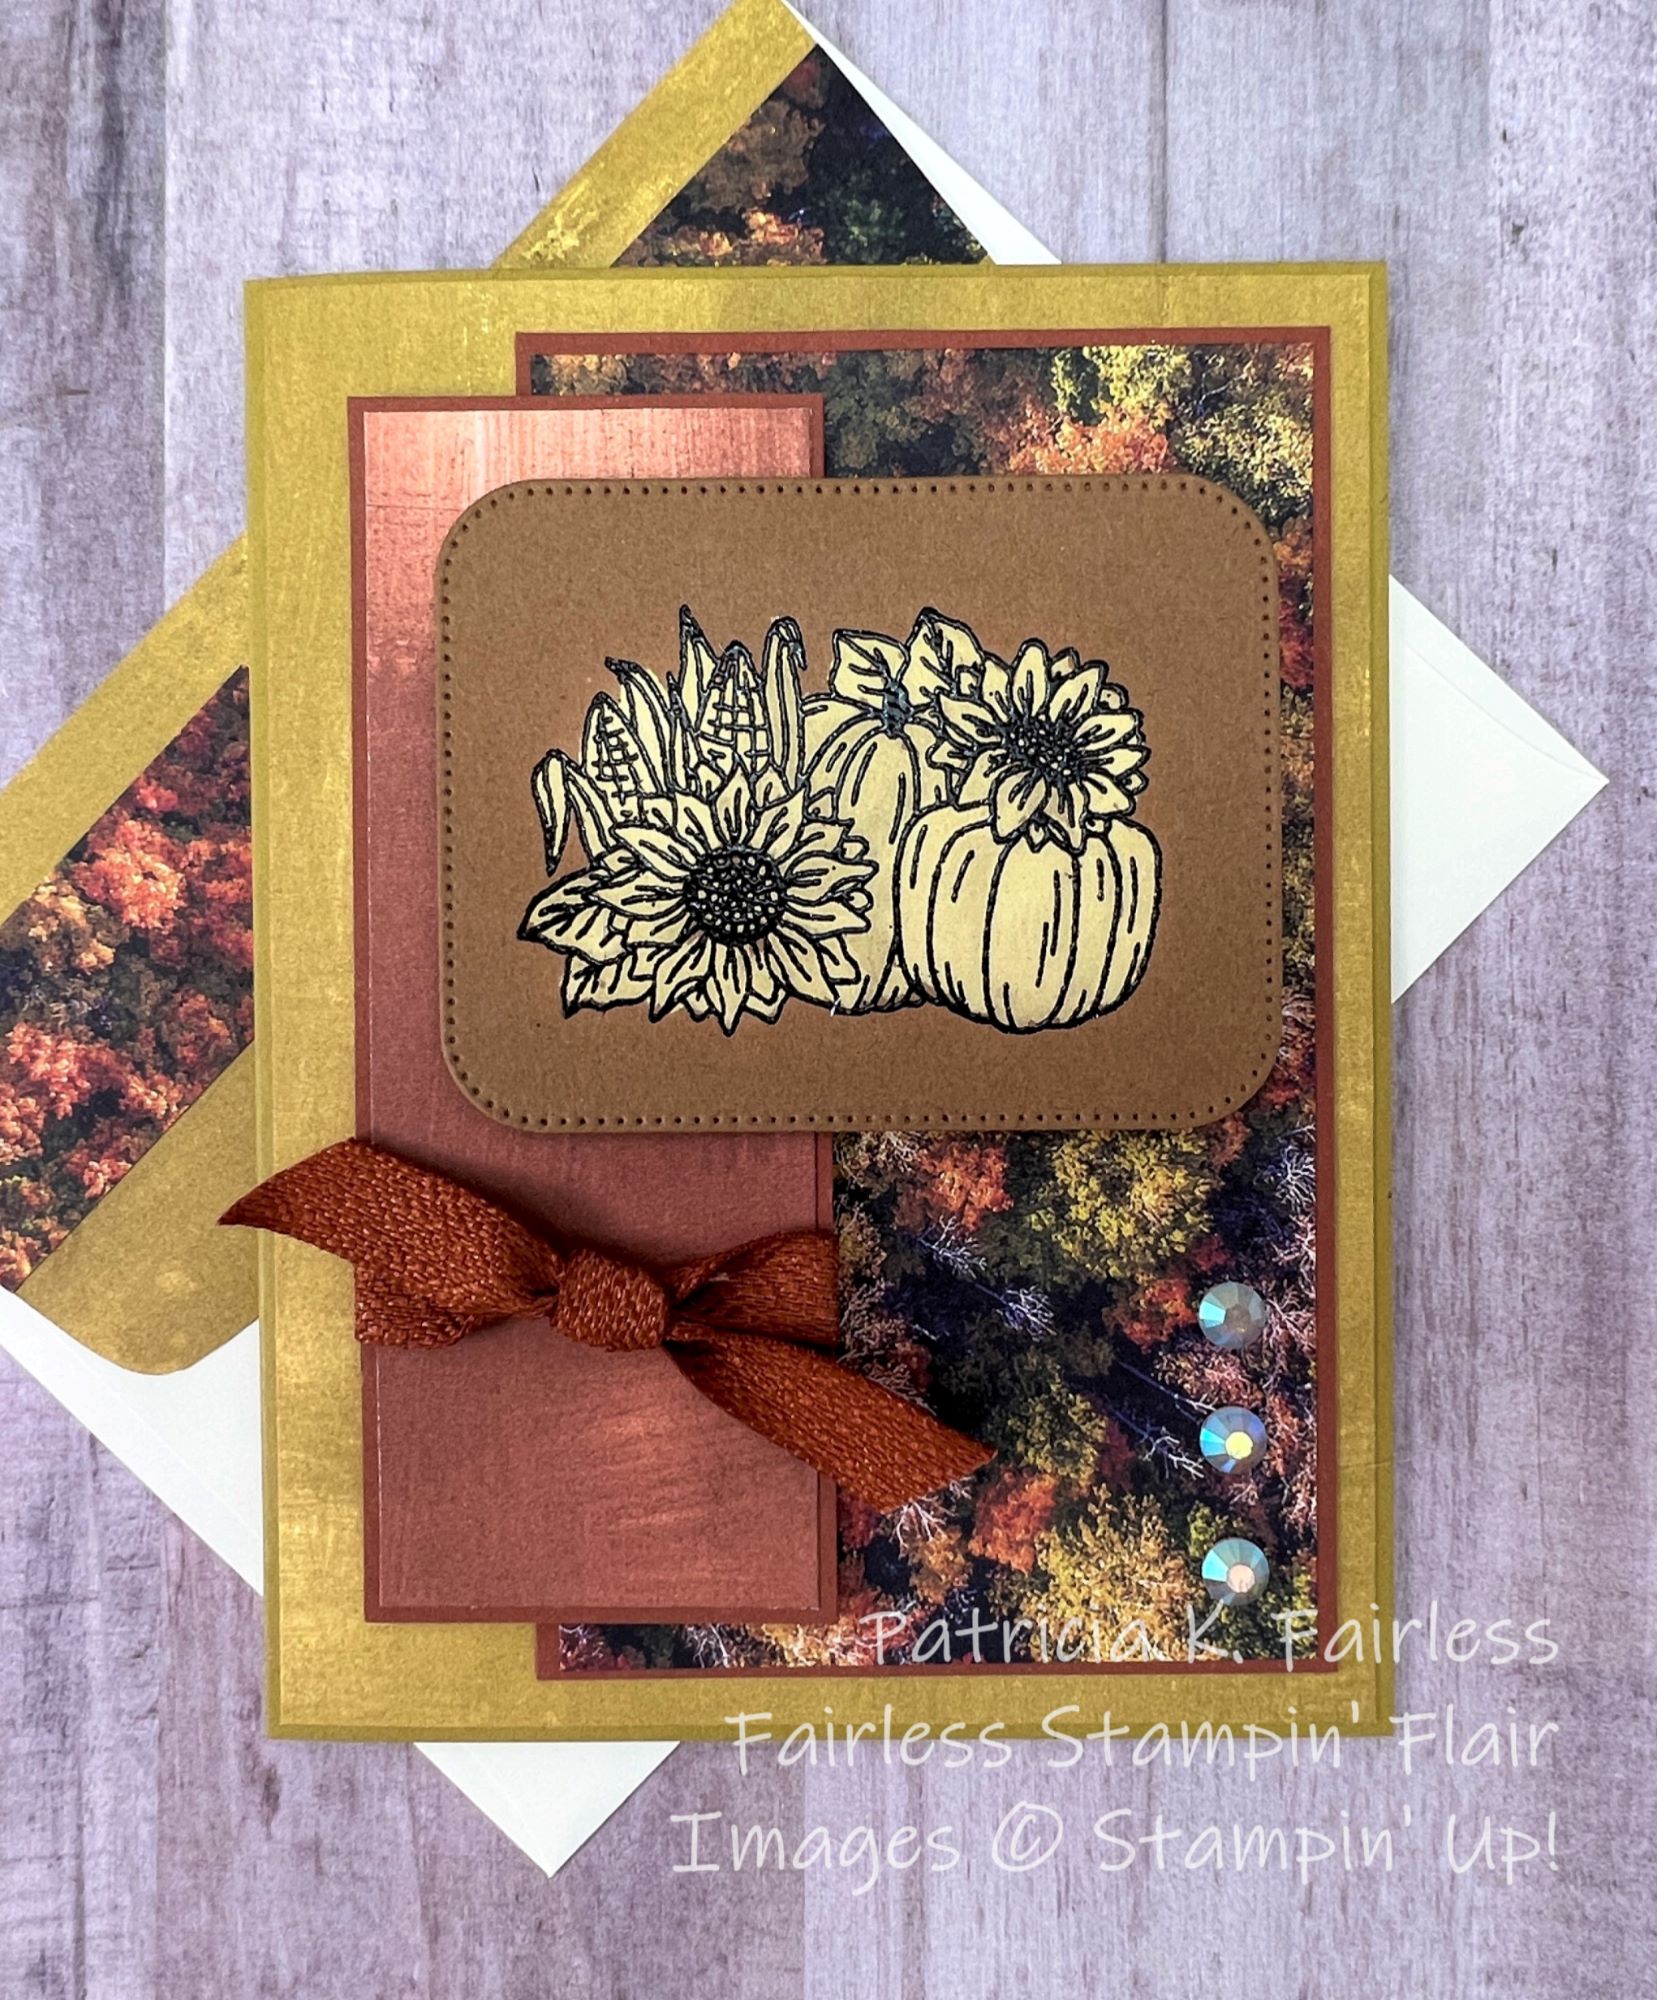
Today I am using the Pumpkin Bouquet from the Rustic Crate Bundle. I am sharing two cards that use the Bleached Images Technique in two different ways.
For the first card I stamped the image with VersaMark Ink on Pecan Pie cardstock and then heat embossed it with Black Embossing Powder. Regular Household Bleach was then brushed over the image and set aside to dry. The bleach removed the Pecan Pie color from the cardstock which left me with the "creamy white" image as shown.
For the second card, I used Black Pigment ink to stamp the image, again on Pecan Pie cardstock. This time I heat embossed it with clear embossing powder. The end result is the same for both methods so use whatever type of products you have.
After bleaching the 2nd image in the same manner as the first, I colored the image with Stampin' Write Markers. Normally, my go-to coloring medium is Stampin' Blends, but I found that the colors were not as bright when I used Blends as they were when I used Stampin' Write Markers. Perhaps the alcohol ink in Stampin' Blends reacts differently with the bleach.
I have a Learning with Friends video on YouTube if you would like to learn more about using each of these bleaching methods. This video gives you several tips and helpful hints on how to use the Bleached Image Technique. It will also show you a couple of additional cards that I made using this technique.
Here is a close-up photo of the image on the second card colored with Stampin' Write Markers.
Which do you like the best? The bleached only image or the colored image?
Each card has a unique layout and uses different Designer Series Paper (DSP). The first card uses DSP from the Fresh as a Daisy Collection and the All About Autumn Collection. This All About Autumn DSP is definitely one of my current favorites. Both sides are gorgeous!
For the second card with the colored image, I used the Glorious Gingham DSP as I wanted to compliment the colored image not detract from it.
For more information on each of the designer series paper collections, you can click on the images in the Product List below.
To decorate the inside of my cards, I used a simple matted strip of the same DSP as was used on the card front.
Here is the card with the Pecan Pie Glorious Gingham DSP. The Pumpkin Pie matting gives it a pop of color.
If you would like detailed tutorials for today's cards, please use the links below to download free copies.