Showing posts with label Scallop Contours Dies. Show all posts

Friday, April 19, 2024

GOODBYE TO NOTES OF NATURE

It seems like I just fell in love with this Notes of Nature bundle, and it is leaving us already!  This is definitely a stamp set I was hoping would carry over into the new catalog or ONLINE EXCLUSIVES, but alas, it is not.  


Today's card is a collage card made with a Pebbled Path card base and the Natures Sweetness Designer Series Paper (DSP).  This DSP is a gorgeous Specialty collection with lots of gold foiled accents.  Thankfully, this DSP is carrying over into the 24-25 new Annual Catalog.  That makes me happy!


I used two different patterns of the DSP for this card -- the White and Gold "plaid" design and the Pebbled Bath and Gold script.

I used various stamps from the Notes of Nature Stamp set to create the little sentiment birthday collage on Watercolor Paper.   Can you find the birthday sentiment?   Ink colors used for stamping were Pebbled Path, Copper Clay, Mossy Meadow and Black.  After stamping a Water Painter was used to grunge up the sentiment a bit.  

I rarely make collage cards, and I don't feel like I am very good at them.  I love seeing this style of card, so I'm trying to practice and get better at them.  Do you have a style that you feel you need to practice?  The three little leaf stems were also all made with Watercolor Paper.  The larger one was stamped and then watercolored with Mossy Meadow ink.  The two other stems were die cut and then watercolored with Pebbled Path and Copper Clay.  All three were tucked behind the upper left corner to add some texture to the card.  

The sentiment and Pebbled Path Script DSP were die cut with the Scalloped Contours Dies.  This is a die set that has been around for a while, and it is retiring at the end of the month.  These dies are 30% off while supplies last.


To see all products remaining on the Last Chance List, visit my Stampin' Up! Store.  Use the Menu to Navigate to the Last Chance Products.

I added my favorite birthday sentiment from Happy Labels (also on the Last Chance List)  to the inside of the card, and then finished it off with a strip of the same DSP as used on the card front.


You can download a tutorial for today's card by using this link.

A list of all products used is shown below.  Many are on the Last Chance List, so if there is a retiring product that you like, don't wait too long.  They are only available while supplies last.


Friday, April 12, 2024

IT'S A GOOD DAY

I hope you woke up this morning and decided it is a good day to have a good day!

For my last Filled with Happiness card this week, I have a simple Front Flap Fun Fold to share.


It's basically just a little card on top of the full size card.  Two cards in one, or a twofer!

This image is the third image sentiment in the Filled with Happiness Stamp set and might be my favorite one.  I'm not typically drawn to fruit images, but I love the sentiment itself.  I believe we can control much of our daily "moods" by making a conscious decision when we get up in the morning that "today is going to be a good day!"  It may not be a perfect day, but it is much more likely to be a good day when I start it with a positive attitude.

Since there was a fruit image on the stamp, I decided that these were going to be lemons.  Not because they particularly look like lemons (wrong shape), but because I liked the colors on this designer series paper pattern from Delightfully Eclectic.  And this paper looks like lemons.  All the rest is creative license (or my imagination)!

This DSP pattern has Bubble Bath stripes with Daffodil Delight, Crushed Curry and Bubble Bath "lemons".  They must use Bubble Bath lemons to make Pink Lemonade -- my favorite!  Since the lemons have Garden Green leaves, I started with a Garden Green card base, a color I don't use often except at Christmas.

The scalloped Bubble Bath Shimmer paper was die cut with the Scallop Contours Dies.  Sadly these are on the Last Chance List, but happily, they are 30% off.  These dies have been around for a while and I was not surprised to see that they were retiring.  If you don't already have them, you should consider purchasing them.  They are awesome!

Since there are two cards in one, that means there are also two card insides to decorate.

I decided to make the card so it could be used for any occasion.  The simple hello from filled With Happiness on the inside of the little card keeps that portion of the card generic.  I masked the "miss you" portion of the stamp to purposely keep it generic.


And leaving the inside of the main card sentiment-free allows me to make it whatever I want it to be when the need arises.

Use this link to download a FREE TUTORIAL that includes all cutting and scoring dimensions as well as step-by-step assembly directions.

The product list below summarizes the products I used.

Product List

Wednesday, April 12, 2023

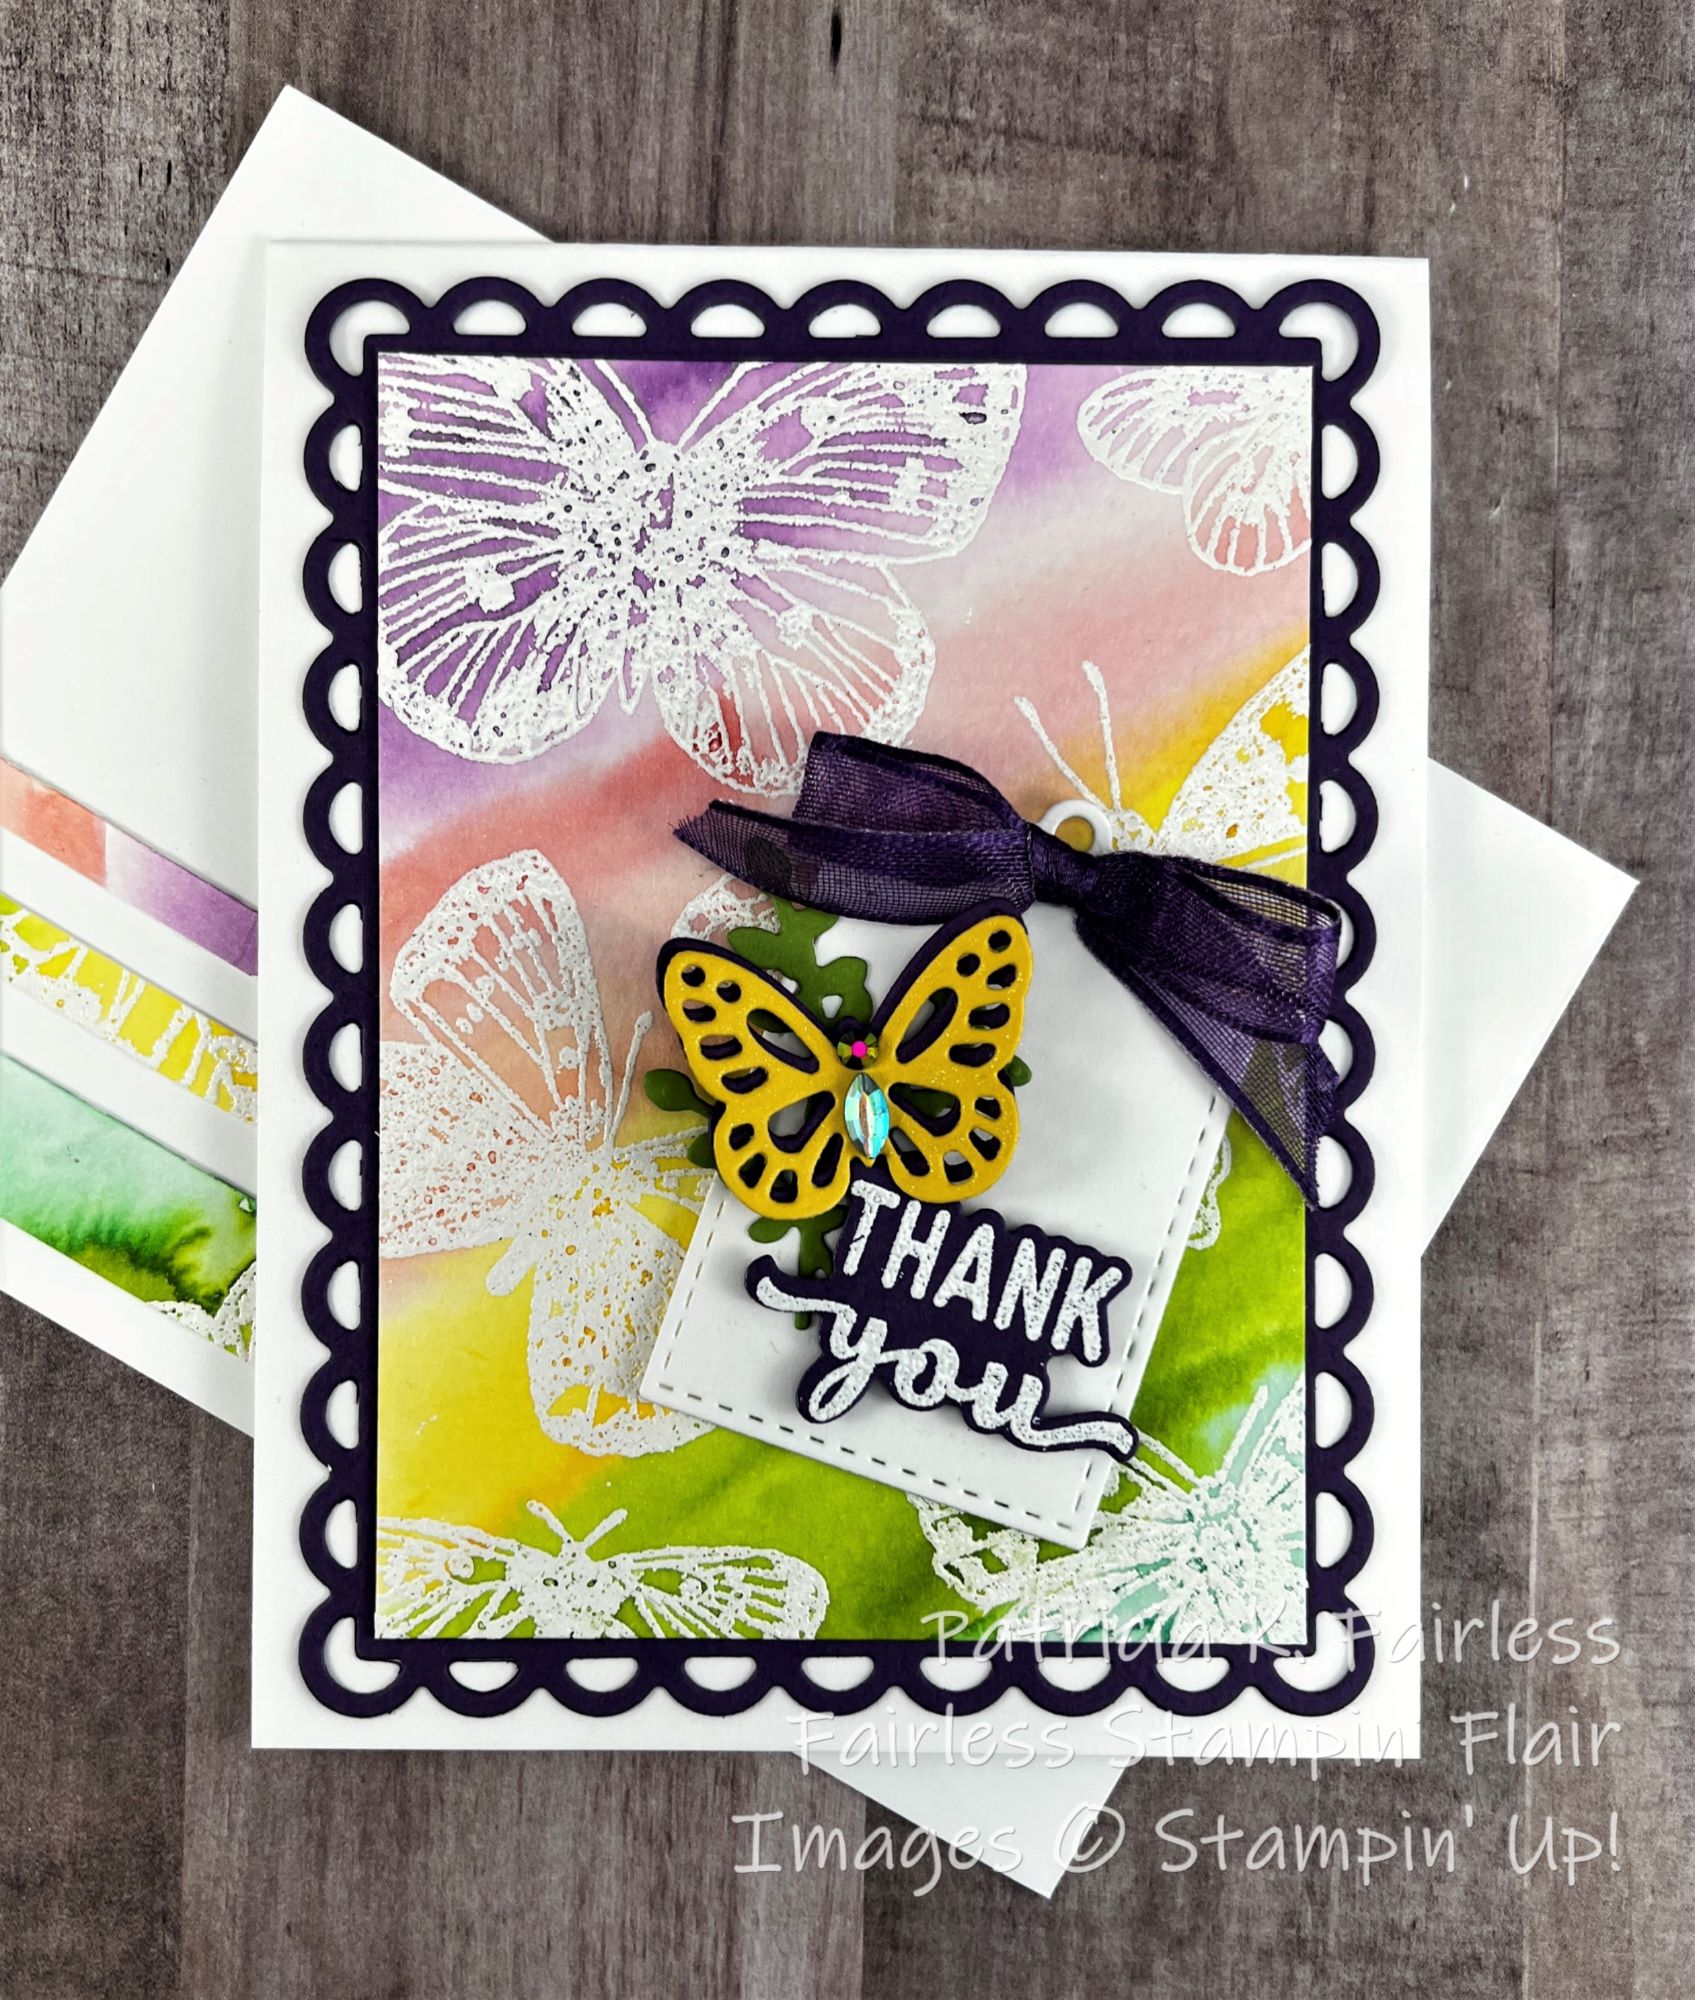
BUTTERFLY BRILLIANCE

I have a very pretty thank you card to share with you today.


This card was made using the Watercolor Resist Technique that I shared a few weeks ago on Connect to Create.  If you missed the video on YouTube, you can still watch the replay.  This is a fun technique that makes beautiful backgrounds.


Once the Watercolor Emboss Resist background was completed, I trimmed it to size and mounted it to a Gorgeous Grape die cut using the largest Scallop Contours Die.  I was so happy to see that these dies and their coordinating stamp set, Color and Contours, is returning in the new catalog.  Happy Day!  I love the scalloped rectangle dies in this set.


The tag and the decorative die cuts used on the tag are from Designer Tags Dies which are also returning in the 2023 - 2024 Annual Catalog.

This cute little tag was so easy to make with just a few runs through the Stampin' Cut & Emboss Machine.


The sentiment, from Charming Sentiments, was stamped with Versa Mark on Gorgeous Grape Cardstock and heat embossed with White Embossing Powder.  With one quick run through the Stampin' Cut & Emboss Machine using the coordinating Sentiment Silhouettes Die the sentiment was "fussy cut".


Since I had made my Technique Sheet a little larger than I needed for the card, after trimming it to size I had some leftover strips to decorate the inside of my card and the front of the envelope.

If you would like a tutorial with all the details on how to make this card, please use this link to download a free copy.

A completed Product List is shown below.  Click on any image to learn more about that product.

NOTE: Since I made this card the Stamparatus has now sold out, so it is no longer available.


Product List