Showing posts with label Stampin' Up! Card of Encouragement. Show all posts

Wednesday, April 26, 2023

SEEING DOUBLE?

Today's card may make you see double.  It has double windows and double the fun!
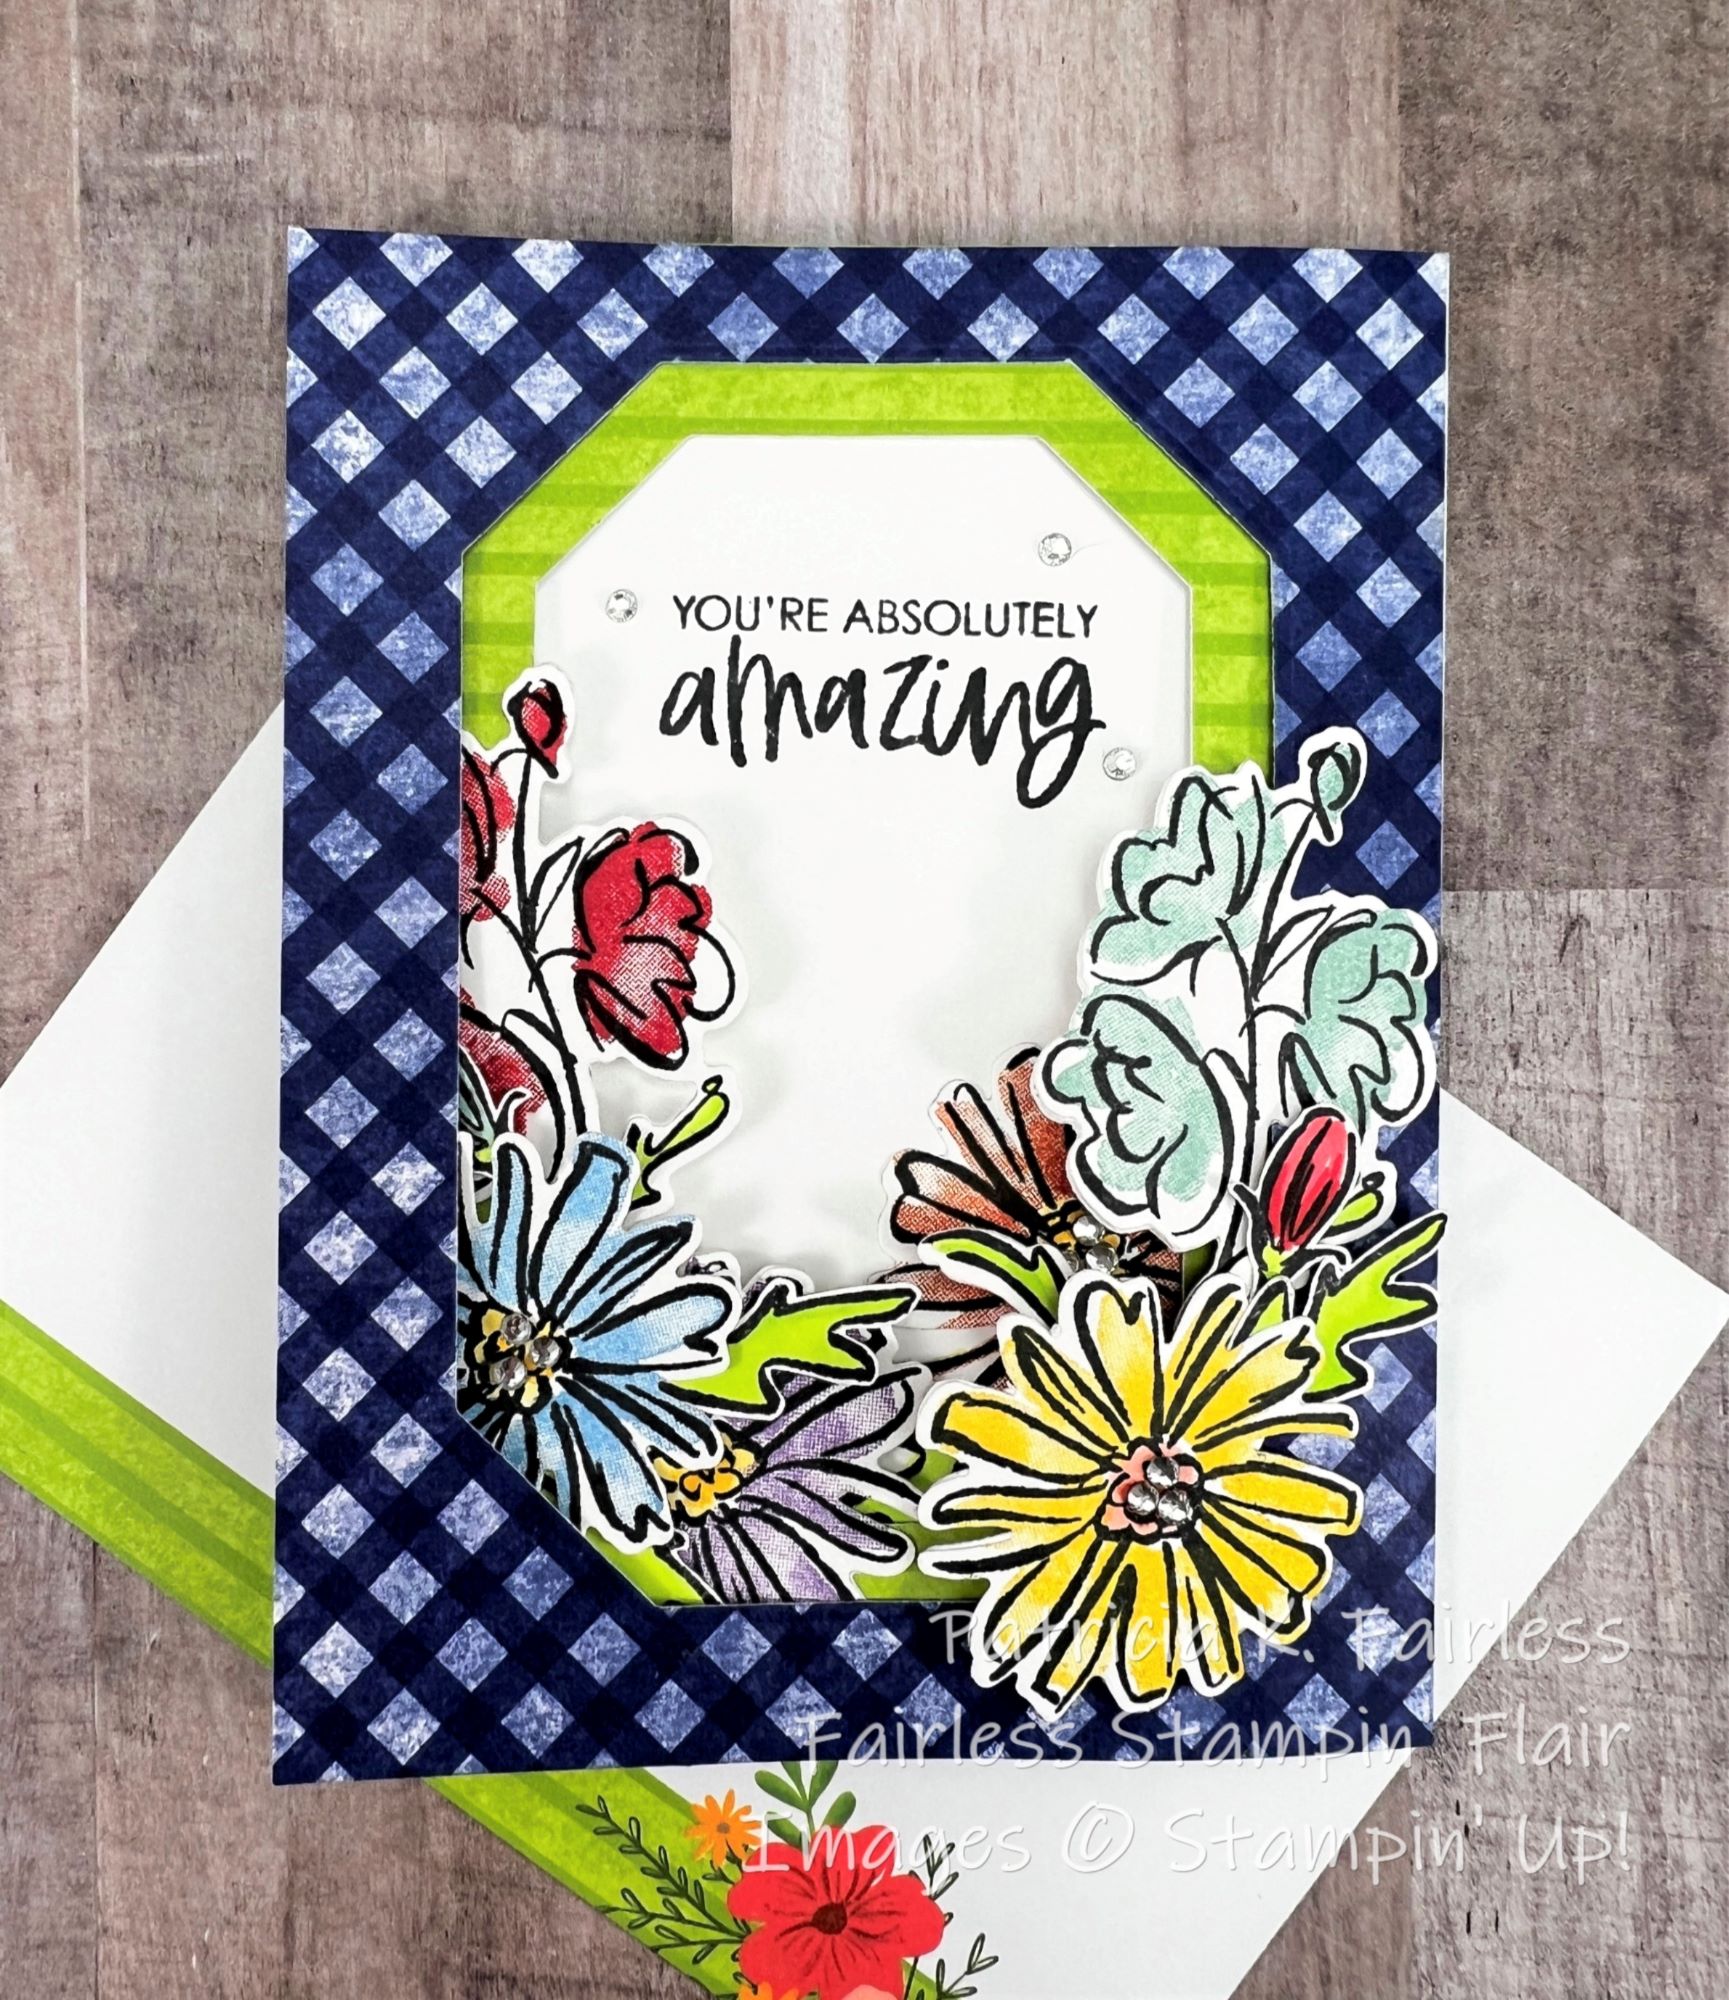

I learned how to make this Double Window Fun Fold earlier this month at a Creativate Retreat.  Brandy Cox demonstrated how to make this card, and she made it look so easy that I had to try it.

I decided that I would save myself some work and use the beautiful Tea Boutique Cards and Envelopes for my card bases.  I'm embarrassed to say that I have had these cards and envelopes for many, many months, and I never used them.  Why?  I don't know.  Probably because I put them someplace where they were out of sight, out of mind.  Now that they are on the Last Chance List for 60% off, I decided I better at least use a couple of them.


Since this Double Window card uses two card bases, I decided to use two different ones from the Tea Boutique set.  I chose the Starry Sky diagonal check for the top window and the Parakeet Party stripes for the second window. 

You can also use designer series paper to cover the front of your two card bases, but these Tea Boutique cards let me save that step!

Last week my Pre-Order arrived with the Country Corners bundle, and I decided to use those dies for my windows. These are part of a new bundle, and I can see myself using these dies A LOT!

The above photos show the card fully closed.  Now I am going to open it for you step-by-step.  Below you see the Starry Sky card base starting to open to the right.


The next photo shows it a little further open.
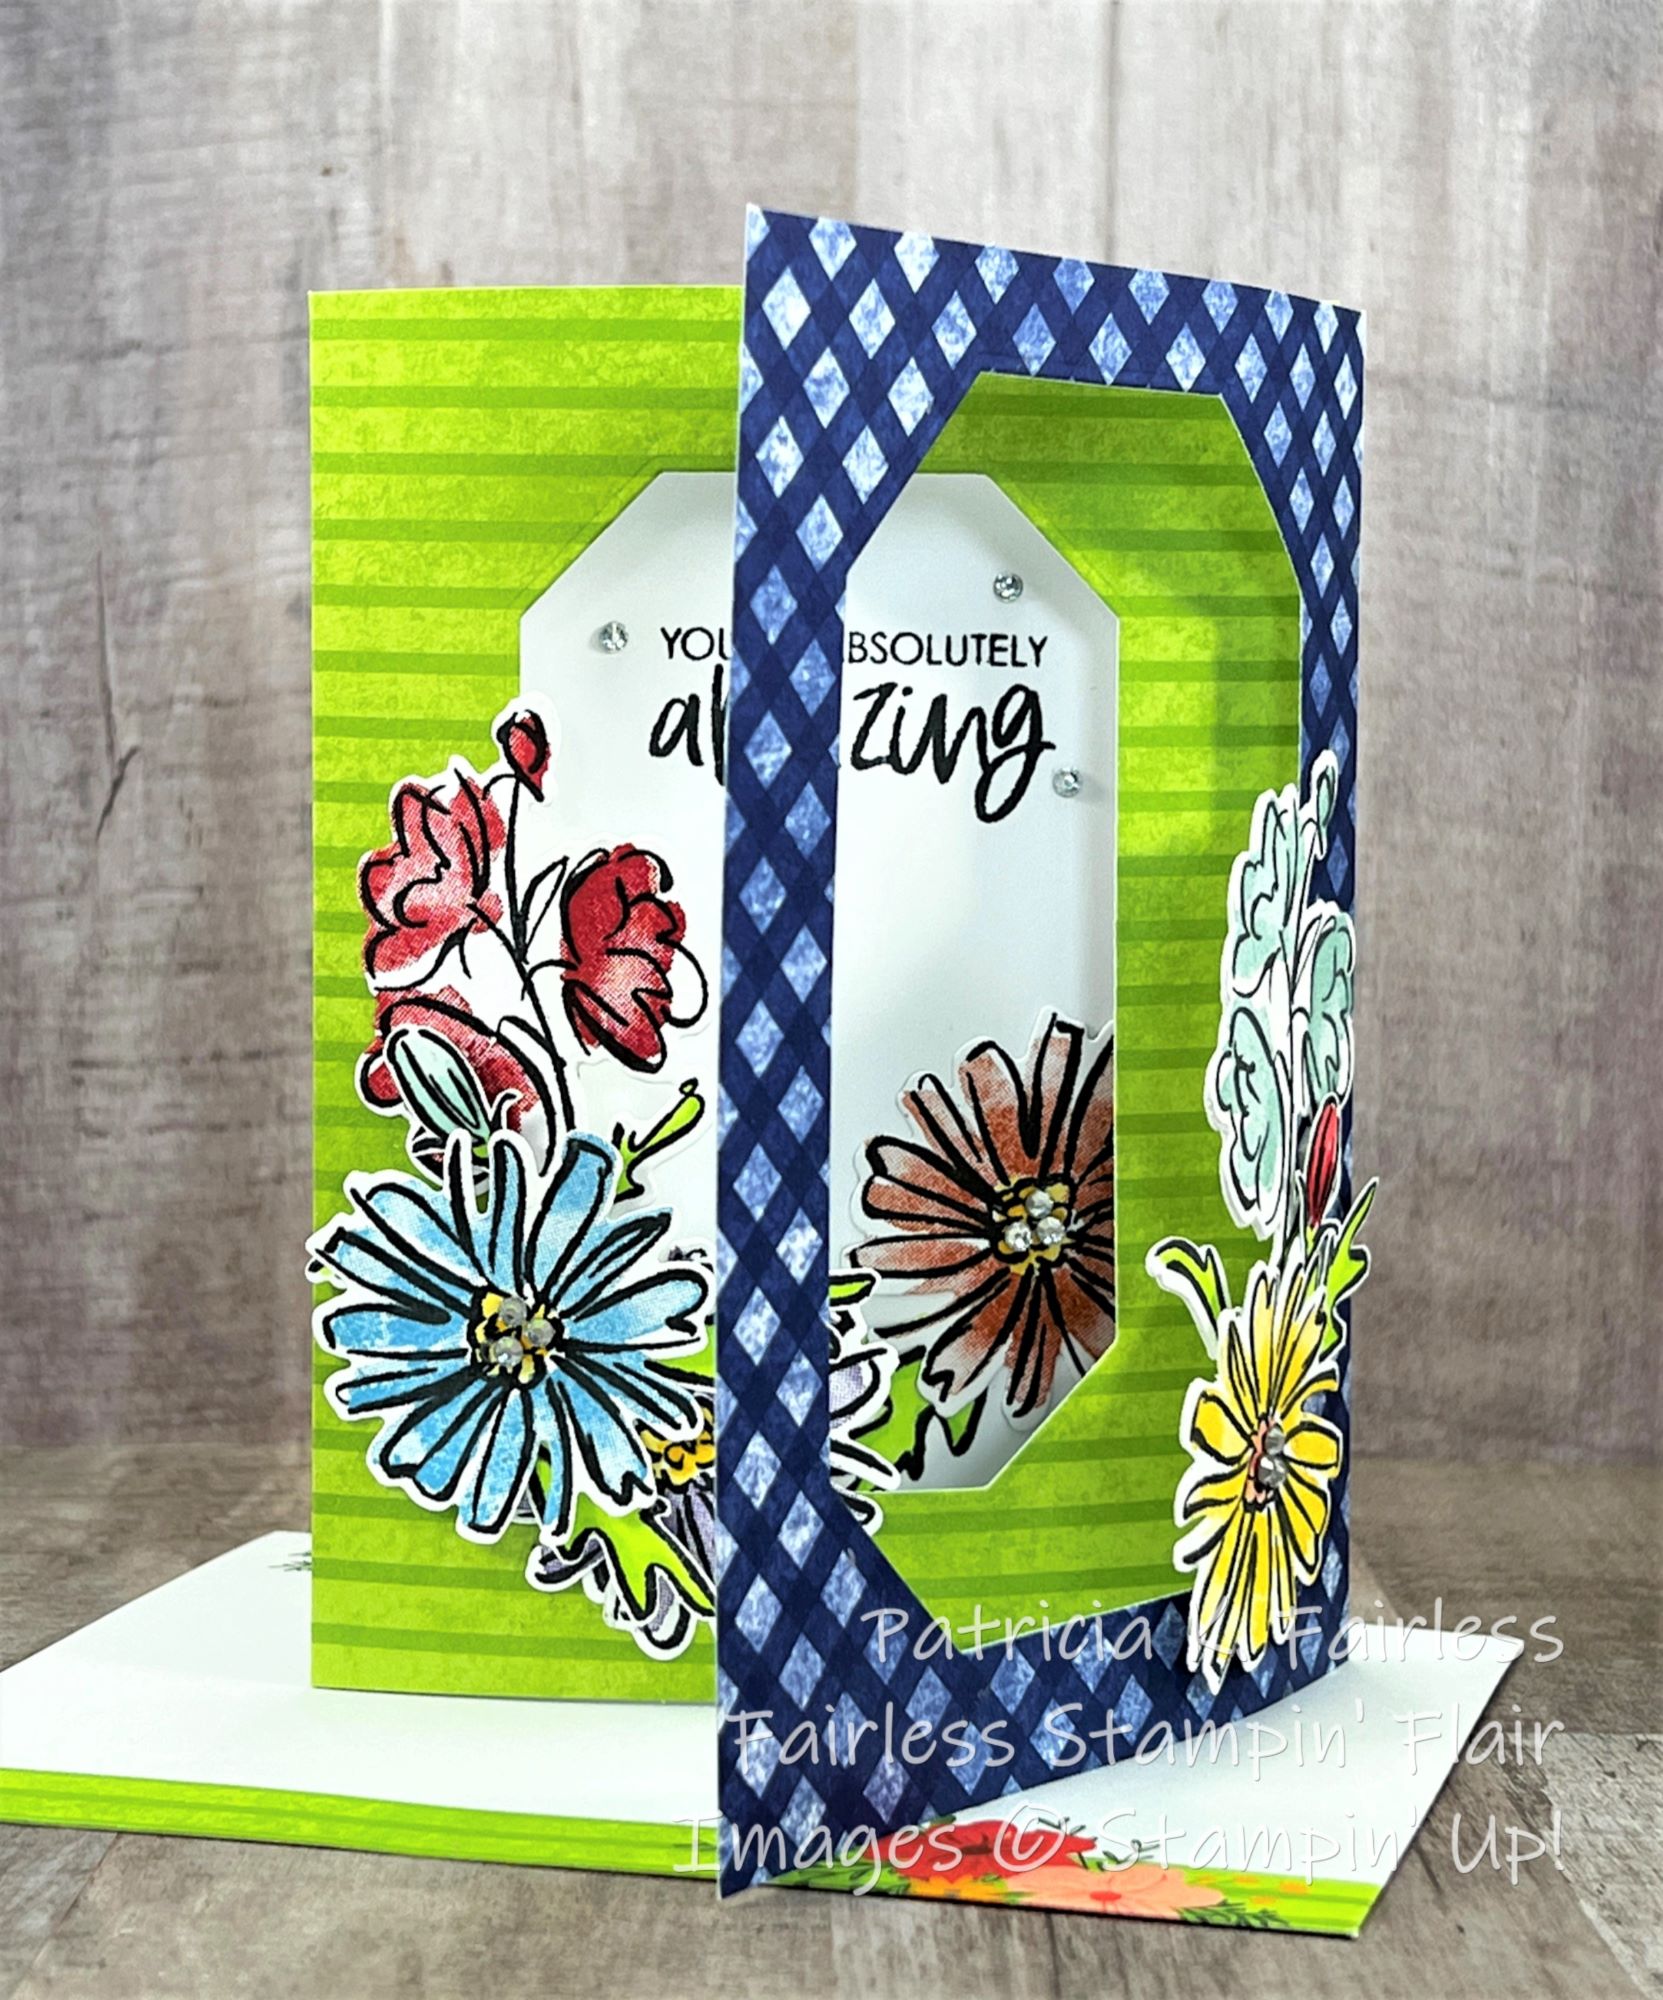

You can now start to see that the large bouquet of flowers that you saw in the first photo is built layer by layer on each window.

The following photos show the Starry Sky Window fully open.


As we open the Parakeet Party window...

The inside of the card is revealed.  Can you see how the layers of flowers build on each other as you close and open windows?  Isn't that fun?

My bouquet of window flowers was made with the Colors and Contours Stamp Set and coordinating dies.  It made me so happy to see that these are both returning in the new 23-24 Annual Catalog!  I wasn't quite ready to say goodbye to these favorites.  But remember, you can use any stamp set you have to make this card.  It doesn't even have to be flowers!  Use your imagination.

If you would like a tutorial to make today's card, please use this link to download a free copy.  It is a lot easier than it looks!

For a list of the products I used, please reference the images below.  For more information on any product, just click on its image and you will be taken to my Stampin' Up Store where you can see all the details and purchase items you would like.

The Countryside Corners dies that I used for my windows will be available on May 2, 2023.  Can you believe it?  That is less than a week away!

Product List

Monday, December 26, 2022

THE DESERT FRAMED

Well, I have already figured out that this week my challenge is going to be to type "Desert" and not "Dessert".  With so many Christmas goodies everywhere I think I have Dessert on my brain!

I've called today's card "The Desert Framed".


I had fun experimenting (that's another way of saying I goofed.) with the frames dies that are part of the Desert Details Bundle.  The coordinating dies that come with this bundle have two different frame dies.  I also used the Delicate Desert 12" x 12 Designer Series Paper (DSP) that is part of the Suite.


I first used both the largest outer frame die and the smaller inner frame die nested together to cut the single piece of DSP.  Then I realized that I should have used only the largest die because I really just wanted that scene as my background.  The plan in my head didn't have two separate pieces for the background.  

Well, my boo-boo, led me to rethink my card.  I decided to die-cut a couple more pieces of just the "frame" from Thick Basic White cardstock to add some thickness to the frame portion, so it was raised up a bit from the rest of the DSP. 

After cutting an additional two frames, I got tired of die-cutting, so, decided to adhere the two Thick Basic White and the DSP frames together to see how it looked.  When I laid the center DSP piece within the frame I wasn't really satisfied with the variation of height between the frame and the background.  It still seemed too flat. 

Rather than die cut more frames (did I mention, I was tired of die cutting at this point?), I wondered what it would look like if I used a sponge dauber and added a little shading around the edge of the inner background DSP piece.  I used Soft Succulent Ink on the Soft Succulent part of the pattern and Pale Papaya on the Pale Papaya portion of the pattern.  That did the trick!  It made it look like the frame is thicker than it really is!  And it was faster than die cutting and gluing more layers together.  


Next, I went to adhere my frame assembly to the front of the Basic White card base.  Hmmm...  I wasn't very happy with that either!  It looked like it was sitting out in the desert all by itself and it didn't look like it belonged.  It looked lonely!

So that meant more thinking and experimenting.  I wondered how a color wash on the front of the Basic White Card Base would look.  But I wanted it to look like it was an extension of the scene, so I made a couple of pencil marks on the Basic White front panel to show me where the color change needed to occur.  Then I used my Water Painter to color wash Soft Succulent and Pale Papaya ink on the front Basic White Panel in approximately the same area as those colors on the DSP.  I liked that better.  What do you think?


The Large Flower was stamped with Pale Papaya ink and the "bush" was die cut from a piece of patterned Soft Succulent DSP.  I used the inside scraps from those Thick Basic White frames for the flower and also to cut an extra bush to give the DSP bush a little more substance.


I didn't put too much thought into the inside of the card.  I was "thought-out".  I simply stamped a Pale Papaya flower and double matted it.

As you can see, this card evolved as it went.  Sometimes our original "plan" just doesn't work, or like me, I "goofed" and had to figure out how to salvage what I'd done.  It's always a pleasant surprise and I love it when a mistake results in something better than the original plan.  It was a bit of a journey getting there, but in the end, I am very pleased with my evolution card.  What do you think?

If you would like a tutorial for this card, you can download a copy at this link.

The information on the Sneak Peak Products is as follows.  A complete list of currently available products that I used for today's card is listed at the end of this post.

  • Delicate Desert Suite - Item #160537
    • Includes the Desert Details Bundle, 2 Designer Series Paper Collections, Faux Velvet Pale Papaya Ribbon & Gold Faceted Sequins
  • Delicate Desert DSP - Item 160521
  • Desert Details Bundle - Item #160532
    • Includes the Stamp Set and Coordinating Dies

The above products will be available on January 5, 2023.

Product List
1/4" Copper Trim
1/4" Copper Trim
[144179]

Monday, September 5, 2022

SAIL THE OCEAN

I know that there are still a couple of weeks of summer left, but since today is Labor Day, it always seems like the official beginning of Fall.  However, I'm not giving up so easily on summer! So, this week, I'm featuring the Oceanfront Stamp Set.  I want at least one more week of enjoying all things water and what better way to do that than with a Stamp Set called Oceanfront.


Today's card uses an old favorite Fun-Fold called a Joy Fold.  This is a super easy fun-fold, and today's card combines the Oceanfront and Let's Set Sail Stamp Sets with the Celebrate Everything Designer Series Paper. 

I could celebrate Labor Day, but since I don't really have any Labor Day traditions, I'm just going to celebrate that it is still "officially" summer with a sail on the ocean!  How do you celebrate Labor Day?  Do you have Labor Day Traditions?

A Joy Fold card is basically made up of two separate simple cards.  The large Thick Basic White base card is made with a 1/2-flap on the front.  I thought these two Pacific Point patterns from the Celebrate Everything DSP were a bit nautical -- or at least could be made to work with a nautically themed card.  The inside of the large base is covered with the Chevron Design and the 1/2-flap is covered with the Checked Design.  Both are matted on Pacific Point.

The Small card is made with Pacific Point cardstock and measures 3" x 8-1/2" and is scored at 4-1/4".  The fold of the small card is on the right and basically interweaves with large card base.


The scene on the front of the small card was made with stamps from the Oceanfront Stamp Set.  The water, made with Pacific Point ink, was stamped-off several times so it was not so dark.  The sky is stamped with Petal Pink.

I chose the sentiment, "faith over fear" from Charming Sentiments because for me to go sailing on the ocean in a little sailboat boat like this, I would need a LOT of Faith to conquer my Fear!  My personal opinion is that the larger the body of water, the bigger the boat needs to be!  LOL

Actually, I do love this sentiment.  There is so much in life where we need to rely on our faith to conquer our fears.


For the inside, I added another sentiment from Charming Sentiments.  I thought it seemed appropriate to pair with the Faith over Fear sentiment.

If you would like a FREE TUTORIAL for this card, one is available to download at this link.

A complete list of the products I used is shown below.  For more information on any product, just click on the image to learn more.

Product List