Showing posts with label BEE MINE Suite. Show all posts

Wednesday, February 7, 2024

BETTY THE BEE AND HER VALENTINE TRIANGLES

On Monday, your Valentine inspiration came from Baxter the Beaver.  Today you are meeting Betty the BEE.  She has been a very busy bee and wants to show you her special Triangle Fold card.


In fact, she got so busy making her card that she missed one of the steps, but she decided she liked it anyway.


Betty attended the Creativate Retreat with me a couple of weeks ago, and that is where she learned how to make this card -- well not "exactly" this card because like I said, she forgot a step.

She thought her card was the perfect card to send to someone that she knows likes to display the cards she sends.  She said it is so pretty and colorful and sits up so nicely all on its own.


Her card also has a special "secret" pocket where she can slip in another little card -- or maybe even a gift card or some of that green stuff.  But since Betty has been spending all her money lately on "other stuff", she decided that she would just tuck another cute little card in her secret pocket.


Betty also wasn't feeling very talkative today, so she just wants to show lots of pictures of her card.  She said to tell you that pictures show off her card better than a bunch of words anyway.

But I do notice that she put herself front and center on the little card.  She has surrounded herself with lots of friends on the triangles but wanted to be all alone on the tiny card to make sure you knew the Happy Valentine's Day wish is from her!
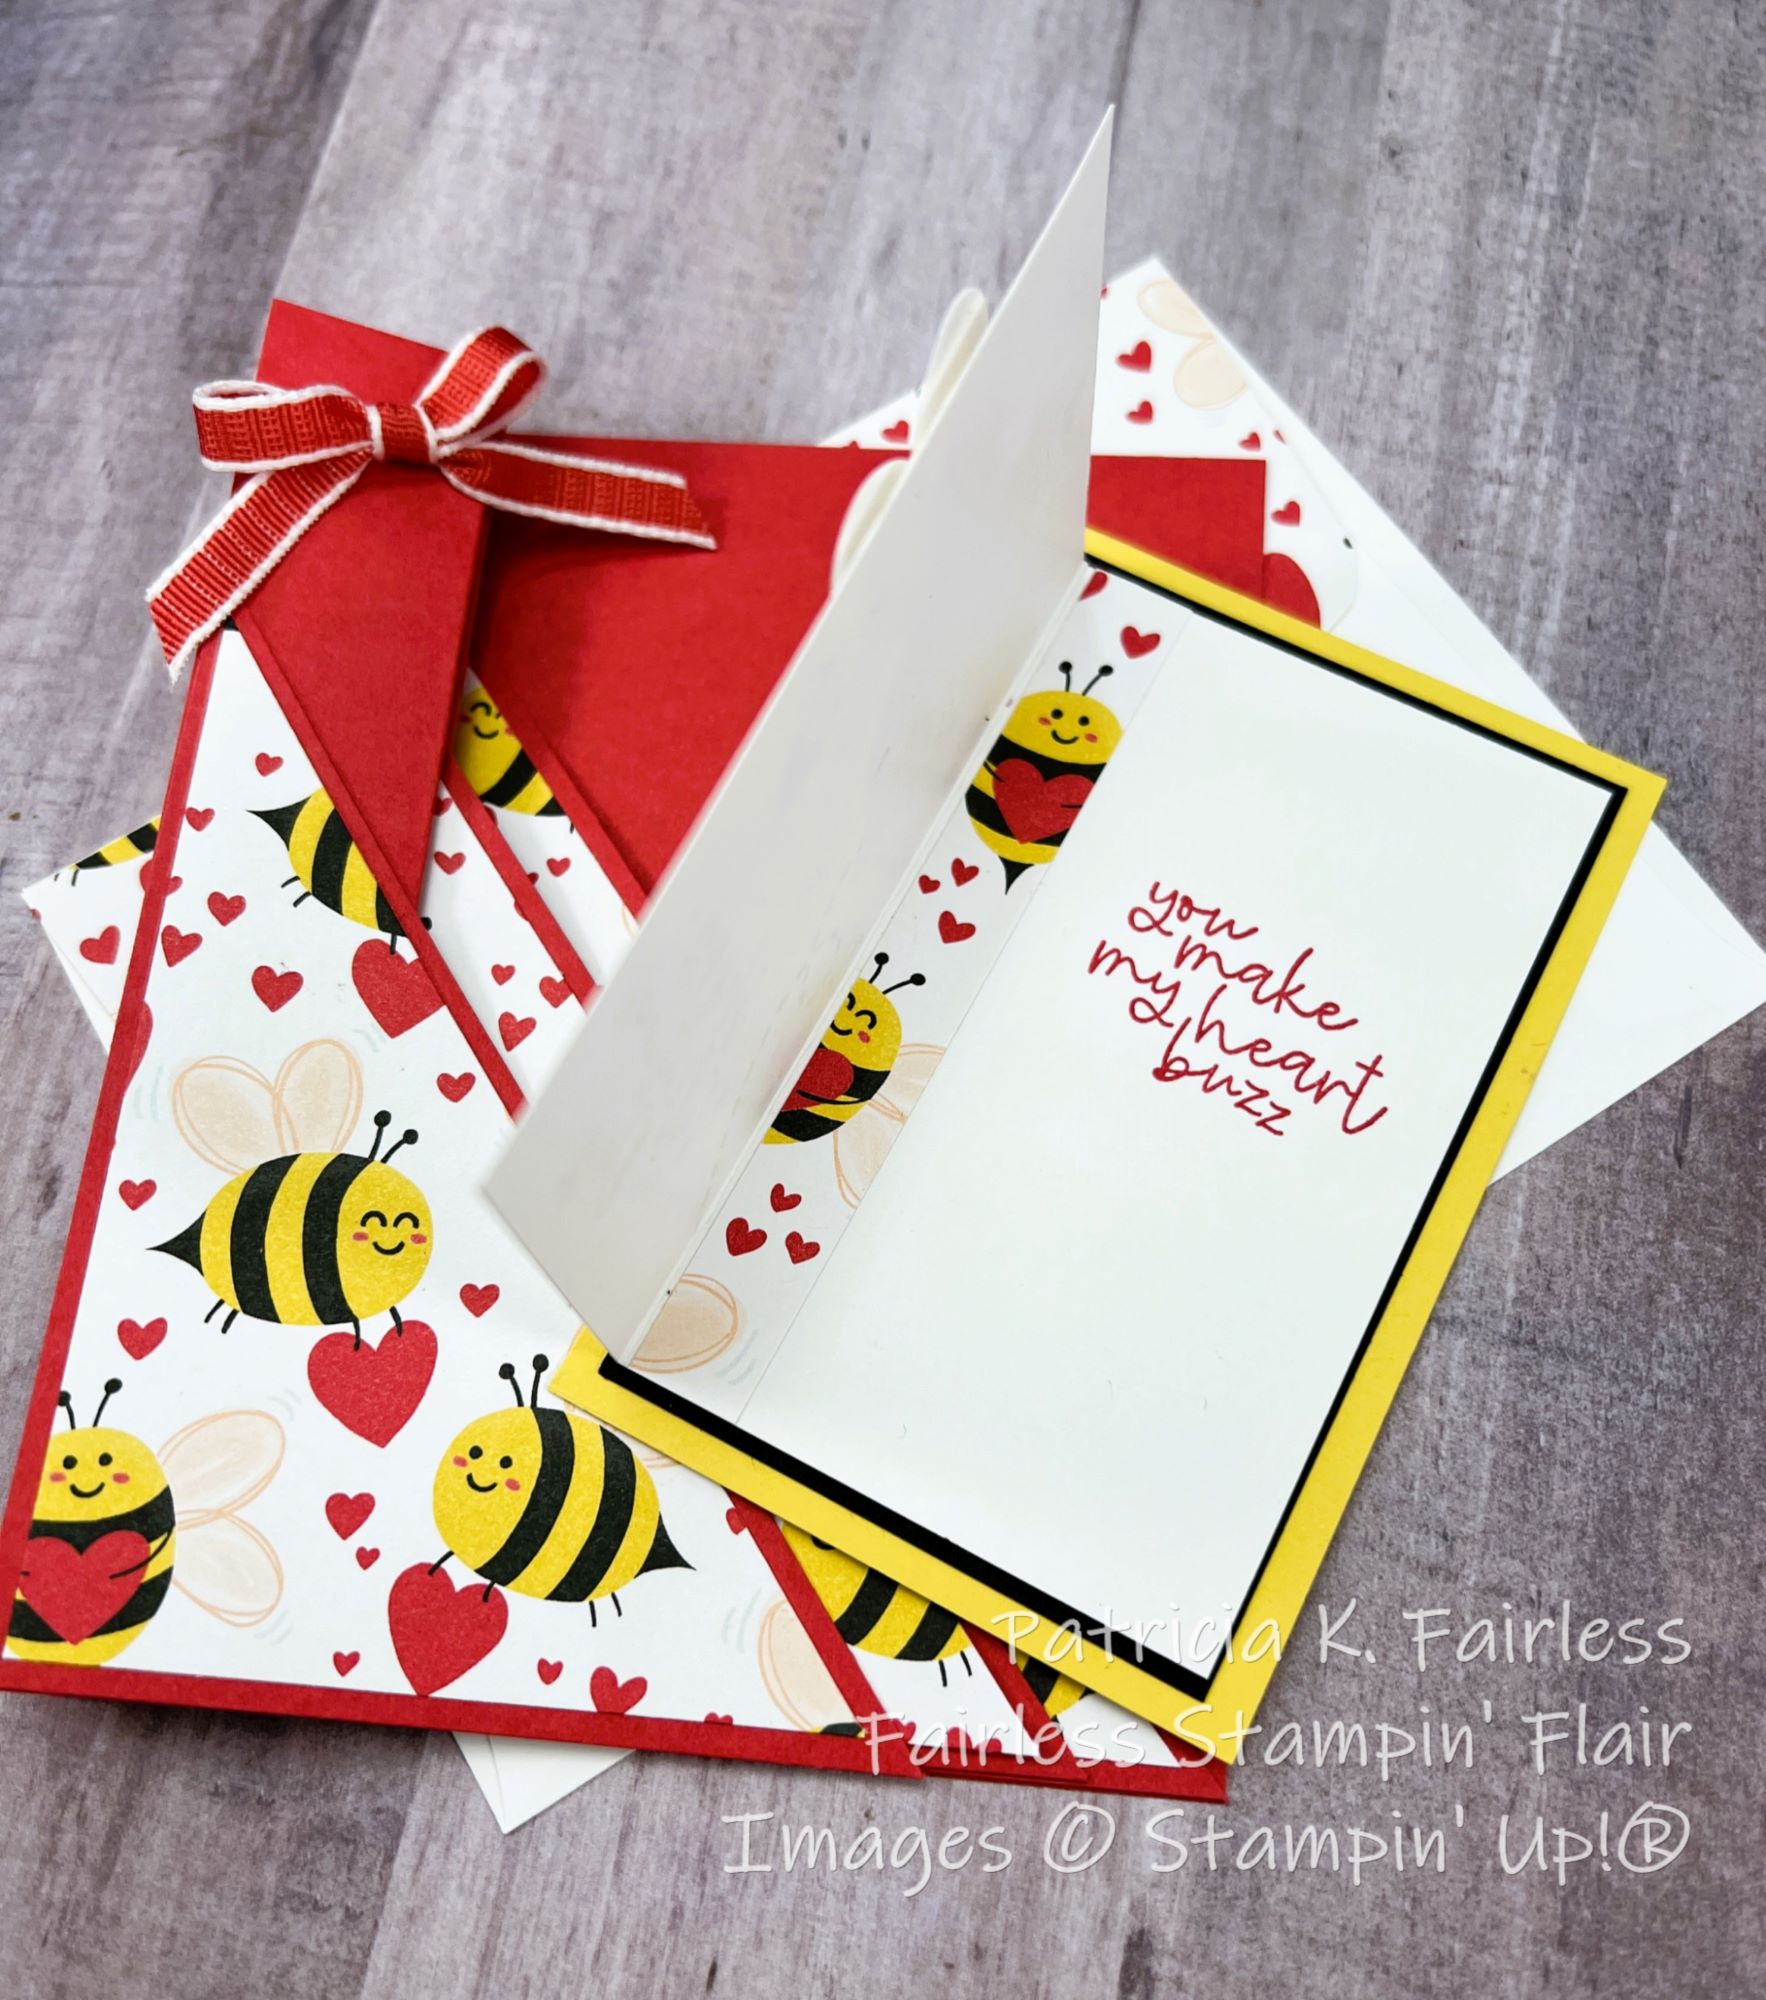

Betty says to tell you to be sure to download the free tutorial.  That way you will be able to see which step she missed while she was so busy buzzing around!

A list of products used is shown below.

Product List

Friday, November 24, 2023

BEE MY VALENTINE BRAIDS

I hope you had a Blessed Thanksgiving Day yesterday.

Today, I'm sharing my last sneak peek for this week with the BEE MINE Suite Collection.

Two weeks ago on my Learning With Friends video I shared the Braiding Technique.  The Braiding Technique is often used for the "fold" part of the card like in the Christmas card at this link.   But today's fun Valentine's Day Card shows an alternative way to use the braiding technique to provide an accent on the front of your card.

Here the braid runs down the center of the Petal Pink Panel.  If you missed the Leaning with Friends video where I demonstrated how to do braiding, you can watch the replay here.


Let me introduce you to Petal Polly.  She's so exciting to be here today that she is flitting all over the place as you can see by the "bee trail" that's she has left in her wake.  She's so happy that she just sparkles everywhere.  She thinks it is her sparkling personality, but don't tell her that I gave her some assistance with a little Wink of Stella!

She also brought several friends with her to send her Valentines's Day wishes of happiness.  Some are flying quietly on the pretty designer series paper, and she found some golden friends in a retired stash of embellishments!  She didn't want to leave them behind so she insisted they be included.

Petal Polly also said she absolutely needed to buzz by on the inside of the card because she wasn't finished telling you how much you mean to her.


She wanted to make sure that you knew you make her heart buzz!

If you would like a tutorial for Petal Polly's card, you can use this link to download a copy.  This tutorial includes instructions for making a braid and the template to use for cutting your cardstock.

In addition to the BEE MINE Suite of Products, Petal Polly used the following current products to make her card.


Product List

Wednesday, November 22, 2023

BEE MINE CASCADING FUN FOLD

I have a new fun fold to share with you today--at least it is new to me. I first saw this foldon 2 Big Cirls Crafting.  I'm calling it a cascading Fun Fold because the two panels on the front of the card are attached to the multi-fold card front which is cut so that it cascades downward. 

This is what the card looks like when it is partially open.

You are probably thinking that it looks difficult to make.  But the two most difficult things about this card were trying to figure out how to explain it in a tutorial and then to take pictures so that you can fully understand the card.  Photography is not one of my best skills.

There was a metric diagram on the site where I saw the card, but I tweaked it a bit so it worked better with Imperial dimensions.  I included my template for cutting and scoring of the Daffodil Delight card base in the tutorial.  You can use this link to download a copy.

The Daffodil Delight Plaid and the Sweet Sorbet Daisy panels are just adhered to sections of the fun fold.  They can be decorated any way you like.  

For my card I used the BEE MY VALENTINE BUNDLE which is part of the BEE MINE SUITE COLLECTION.  I am featuring sneak peaks of this suite all week.  Demonstrators that attended OnStage on November 11 were given the opportunity to purchase this Suite early so we could stamp along with the OnStage demonstration.  It will be available for everyone to purchase with the launch of the 2024 January - April Mini Catalog.


The above photo lets you see the first two panels of the card.  The sentiment is from Bee My Valentine and was die cut with a die from Sending Smiles Dies.  The bees and flowers are also from Bee My Valentine.  The bees were punched with the Bee Builder Punch, which is part of the bundle, but the flowers were fussy cut.  After I finished fussy cutting them, I realized I could have stamped the Tuxedo black stems directly on the designer series paper and then would have only had to fussy cut the 3 flowers.  But by the time I thought of that I already had them cut.


This photo lets you see all three panels.  The bright and colorful designer series (DSP) paper is from the 12" x 12" BEE MINE Collection.

When this fun fold is closed you could use areas hidden behind the two front flaps for a place to add additional sentiments or write a personalized note, but I chose to use the back of the card.


The above image also lets you see what I meant by a cascading panel.  I stamped the Happy Valentines Day sentiment from the stamp set as well as the cute little flowers on Basic White and then matted the panel to Sweet Sorbet cardstock before adding it to the back of the Fun Fold.

I hope you will download the tutorial because once you see it, I think you will realize that it isn't as difficult as it may first appear.  If you have any questions, please leave me a comment with your questions.  I'm always here to help!

The currently available products that I used for this card are listed below.  Since the BEE MINE SUITE products are a sneak peak, they are only available for demonstrators to purchase at this time.  If you already love them, you can always sign up as a demonstrator so you can then purchase new products early, too.  I'd love you have you on my team.

Product List

Monday, November 20, 2023

SNEAK PEEK - BEE MINE FOR SIMPLY MONDAY

Happy Monday!  This week I am sharing sneak peeks of a new suite of products that will be in the 2024 Jan - April Mini Catalog.  If you are thinking..."WHAT? Spring Mini, already?"  I know, it is a way away, but since it is so cute, I was excited to share it with you!

This particular BEE MINE Suite was an early purchase made available to those demonstrators that participated in OnStage on November 11.    I thought maybe you need a bit of a break from Christmas Cards.  We've been looking at Christmas cards since July, so for this week, let's look at "love" cards for a few days.


Today's card shows the BEE MY VALENTINE Bundle which includes a coordinating BEE BUILDER Punch. I also used the BEE MINE 12 " x 12 Designer Series Paper (DSP), Sweet Sorbet Bordered Ribbon and the Adhesive-Backed Hearts & Flowers -- all which are part of the suite.  In addition the Suite included Square Pillow Boxes -- which I have not played with, yet.

The design was totally CASED from a card we made at the November 11 OnStage Event.  I changed up the DSP, added a Pool Party Layer and the Ribbon, but the layout is exactly the same as the one demonstrated at OnStage.

This card lets the DSP do most of the work.  I used two different patterns on the top and the bottom and did a little stamping on the Pool Party Strip to provide interest and then added the sentiment "You make my heart buzz" with Tuxedo Black Memento Ink.  

The bee is quick to make.  Just stamp the body with the two-step stamps.  Stamp the wings and antennae with Black Memento and then punch out all the pieces with the BEE BUILDER Punch.  Use a little adhesive to attached the wings and antennae to the back of the body. 

I did add a little pool party color wash to the wings with my Water Painter, but I could just as easily have used the two-step stamp process with the heart stamp that provides color for the wings.  I also like to add a little bit of Wink of Stella on the wings to make them sparkle.


For a FREE tutorial with all the step-by-step directions, click on this link to download a copy.

To dress up the inside of the card I added a little strip of the Petal Pink honeycomb patterned DSP bordered with Pool Party.  The inside sentiment is another stamp from the BEE MINE stamp set.

For a list of the few current products used in addition to the BEE MINE Suite see below.  

Product List