Today's Everyday Arches card gives our happy little rabbit, Willy, a place to get out of the rain.
As you can see, Willy loves dancing in the rain, but sometimes he needs a break to dry out. And based on the look of the sky, the rain isn't done yet, so I'm glad Willy found a safe haven under his arched door.
Willy is from the Playing in the Rain stamp set. I used this beautiful stormy sky designer series paper (DSP) from Everyday Skies. It reminded me of the sunrises I often see out my window in the morning. A sunrise that looks like a storm is coming.
Willy doesn't worry about storms. He's got his bright yellow slicker and umbrella, so he is prepared. And he can't wait to splash around in the puddles forming in front of his door, Willy's striped Cajun Craze door was also created from the Everyday Skies DSP, and the arched frame around the door which protects him from the rain was made using two Everyday Arches dies and Night of Navy cardstock.
Willy is determined not to let the rain prevent him from dancing. He is embracing the journey as his card suggests. Isn't he cute? He even put on a cute little bowtie for his jaunt in the rain.
The inside of the card is decorated with a scrap strip left over from the front Everyday Skies DSP.
This week all cards will feature the Playing in the Rain stamp set and coordinating Dies. This is such a fun, happy stamp set. It's hard not to smile when you see these little guys.
It's Simply Monday and today's card is quick and easy to put together. Whenever I want a quick card, I reach for designer series paper and who doesn't love a great gingham.
Today's card features the Glorious Gingham Designer Series Paper. What drew me to this paper was not just the gingham pattern, but also the colors that are in the collection. All the included colors are either returning colors or new colors. I used two of the returning colors, Berry Burst and Blueberry Bushel and both of the gingham patterns, a medium size diagonal gingham and a tiny gingham. Check out the Product List below to see all the colors.
Mr. Rabbit told me in no uncertain terms that he wanted a Blueberry Bushel raincoat as he danced among the Berry Burst Flowers. I didn't want any arguments, so that is what I pieced together for him. As long as you have nice sharp paper snips, paper piecing is quick and easy. Just stamp the image on the designer series paper you want to use and then cut it out. Paper Piecing is an excellent way to use up those tiny scraps!
If you are not familiar with the Paper Piecing Technique you can watch this video that I made some time ago, and you will see just how easy it is.
After I finished coloring Mr. Rabbit with my Stampin' Blends, I just put his gingham Blueberry Bushel raincoat on him, and he was ready to dance in the rain.
To keep the card simple and quick I did minimal coloring on Mr. Rabbit. Using Stampin' Blends I gave him some Light Bubble Bath ears, nose and cheek and used Light Smokey Slate to add some gray shadowing. I used the Color Lifter for blending all the shadows, so the edges of the shadows were well blended and not too distinct.
The inside of the card was decorated with a strip of the Berry Burst diagonal Gingham. It adds a bit of pizzaz but is simple and quick.
For a complete list of the supplies I used, please refer to the Product List below. To learn more about any items, just click on the image and you will be taken to my Stampin' Up! store.
I hope today's card made you smile. Mr. Rabbit is such a happy little guy who loves to dance in the flowers -- even when it is raining!
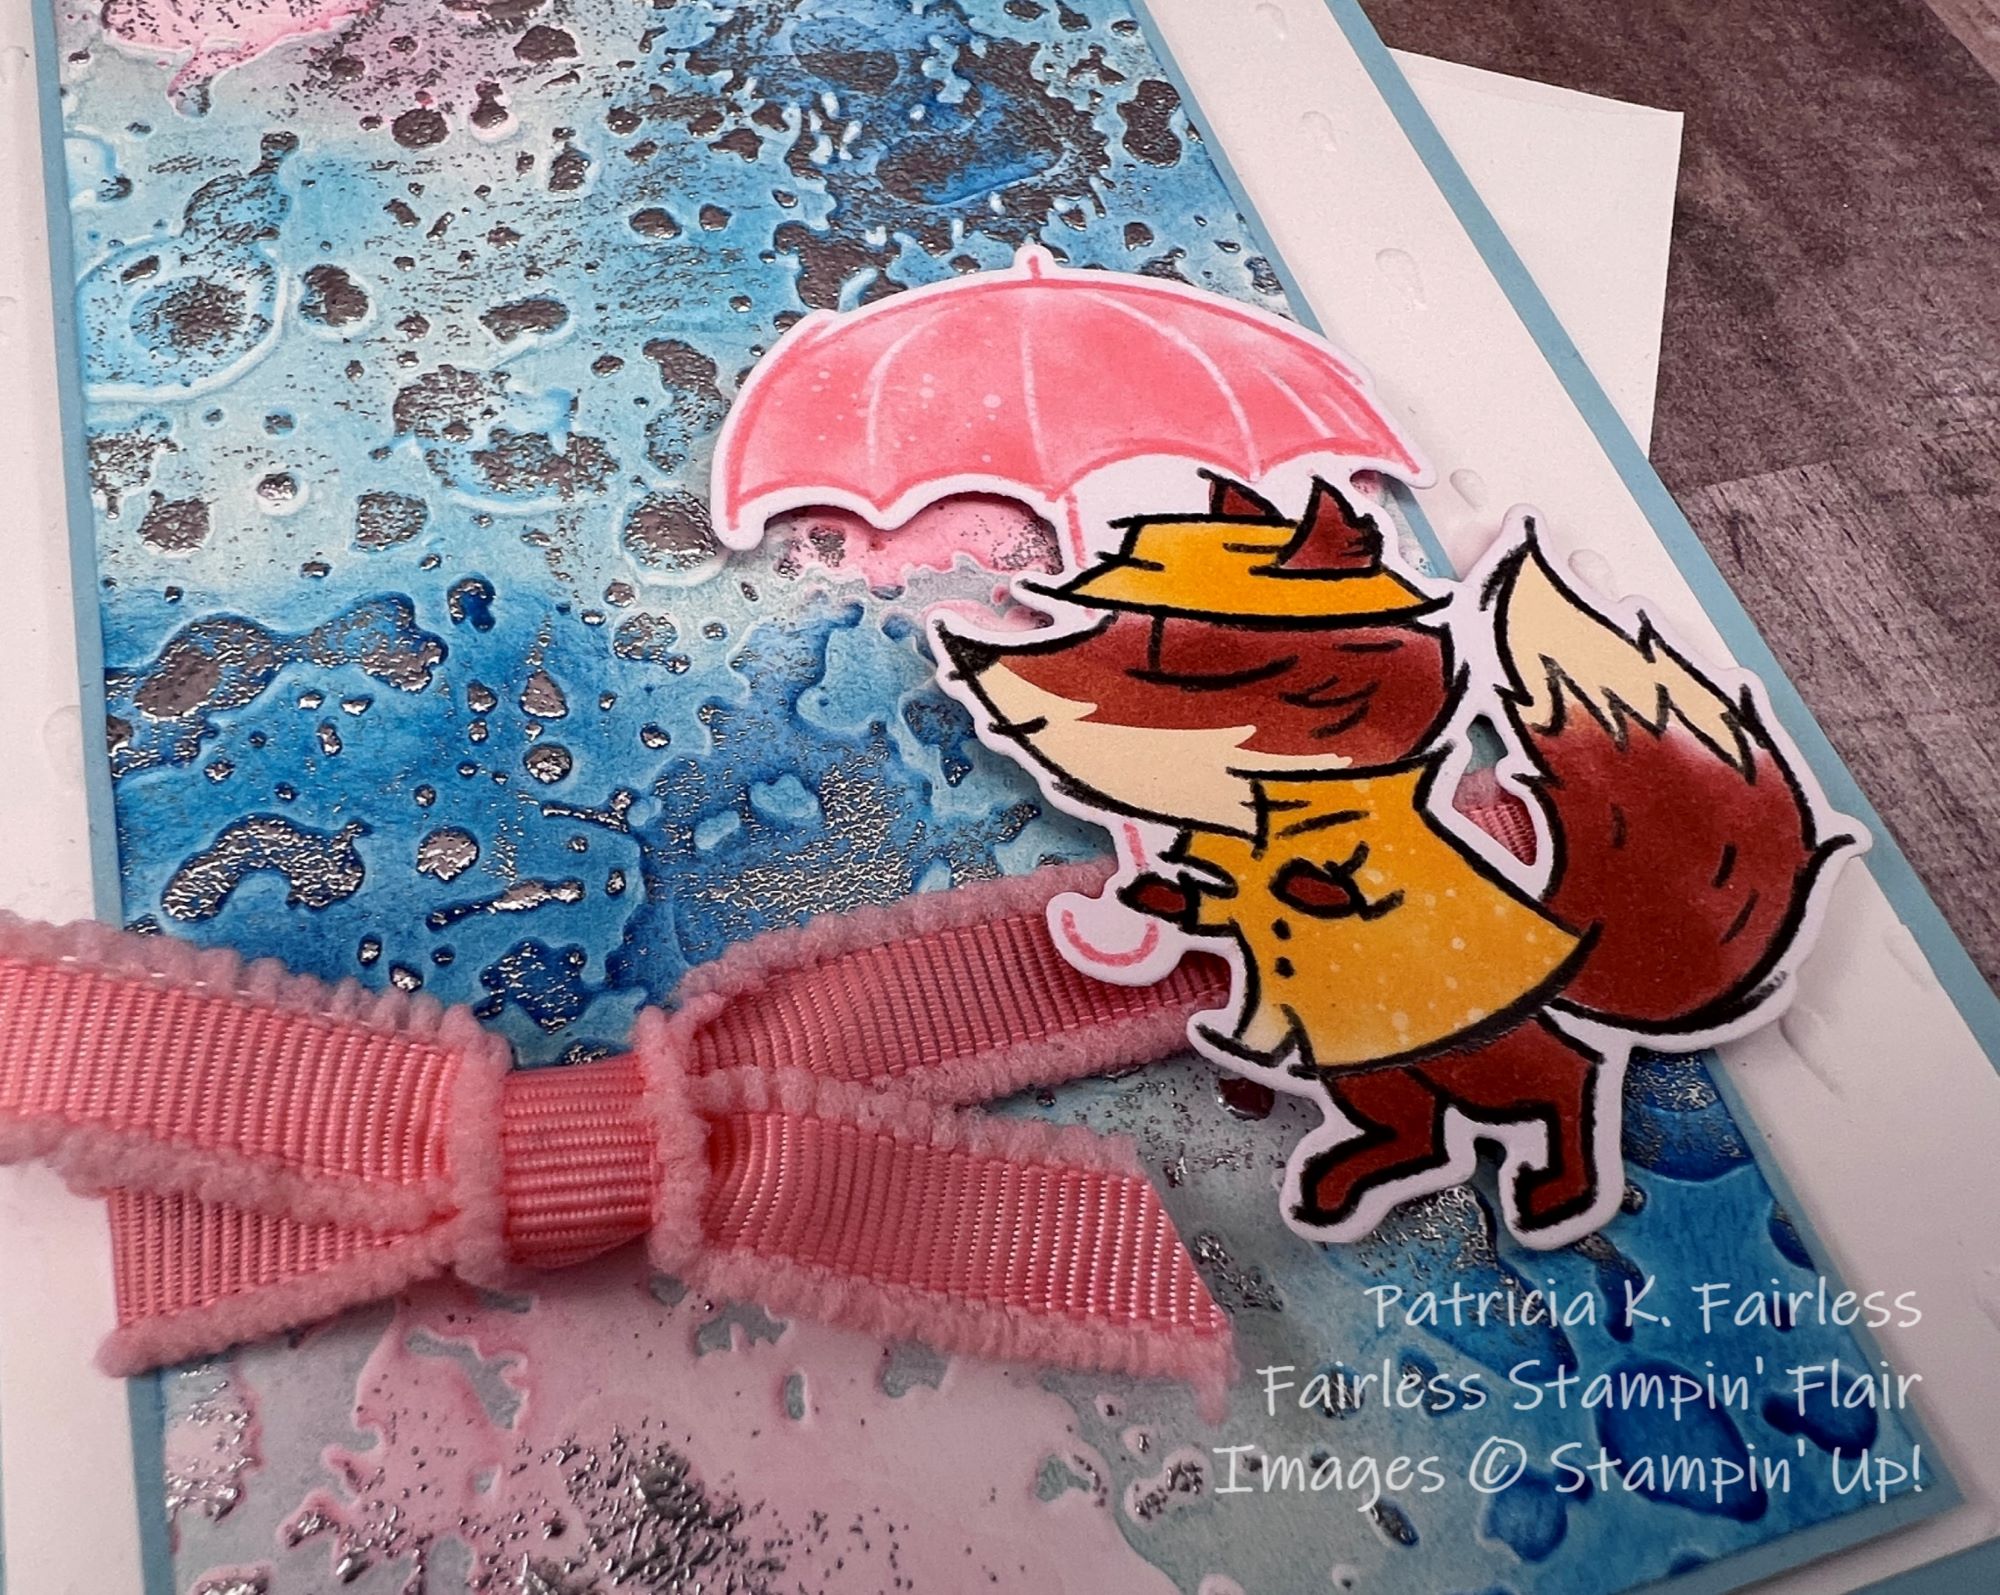
For my last Playing in the Rain card this week, I'm sharing a card that I made using the Faux Patina Embossing Technique.
This is one of my favorite techniques to make beautiful backgrounds.
Usually with this technique, I've used rich, darker colors to give the background an aged patina look, but for this card I decided to experiment with some brighter colors. Since my Foxy Friend is taking a walk in the rain, I wanted to give him a pretty sparkling background, so I used 3 shades of blue, Balmy Blue, Tahitian Tide, and Pacific Point. Then I added a little touch of Flirty Flamingo, so it looked like the sun was trying to peak through--plus the Flirty Flamingo matched Foxy's umbrella. For the Shimmer and Shine I used Silver Embossing Powder to really lighten it up. I wish you could see it in person as the coloring really is stunning!
Foxy was die cut from the Rain or Shine Designer Series Paper with one of the coordinating Rainy Day dies. Love how easy that is!
If you would like to learn how to make your own Faux Patina Embossed Background, you can watch this video to see just how easy it really is.
I hope you will use this technique to have some fun with your favorite embossing folders and ink colors.
As I was playing with the technique this time, I also experimented with trying it on my envelop flap, and it worked wonderfully! Sometimes certain techniques don't work well on envelopes because of the different types of paper, but this technique turns out just as pretty on our Stampin' Up! envelopes as it does on cardstock. I did the technique directly on the flap of my envelope, i.e. It isn't a separate piece of cardstock.
For the inside of the card, I thought it was best to keep it simple.
I used a mat of Flirty Flamingo layered between two pieces of Basic White cardstock. Don't forget to sometimes vary the widths of your borders a bit. By having the border on the first layer of Basic White just a little wider than the Flirty Flamingo border, it adds just a little more interest than if both borders were the exact same width.
All products used on the card are shown below. For more information on any specific product, just click on the image.
If you have not yet had a chance to check out the ONLINE EXCLUSIVES that were released last week, you are going to want to take a look. There are some really fun and exciting new products. Did someone say, "circle punches" are back?


")
")


 Designer Series Paper")


")


 Designer Series Paper")


.JPG)


")

 Designer Series Paper")


 Frayed Grosgrain Ribbon")
")