Showing posts with label Thinking of You Card. Show all posts

Thursday, October 8, 2026

SUNFLOWERS AND PLASTIC WRAP

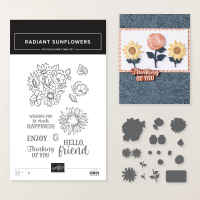
This card uses a simple and fun technique that uses Plastic Wrap to create the unique background behind the Sunflowers.

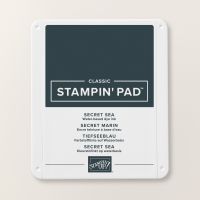
Just scrunch up a piece of plastic wrap, tap it on your ink pad and then tap it on your paper.  Voila!  You have an interesting background.

Here's a video that shows you just how quick and easy the technique is!

In the video I created an alternate version of today's card.  Rather than creating the technique background on the arched die cut, it was created on the front card layer.  

Which do you like best?

The only stamping on these cards is the sentiment!  The rest of the design is made using the Radiant Sunflower Dies and the Everyday Arches dies.

The sunflowers were made with two die cuts in different colors.  Twist the top sunflower layer a bit and you see the accent color behind the yellow sunflowers.

The sentiment from Radiant Sunflowers stamp set was die cut with the smallest Everyday Arches die.  This small die is the perfect size for the "Thinking of You" sentiment, and it keeps the "arches" theme going!

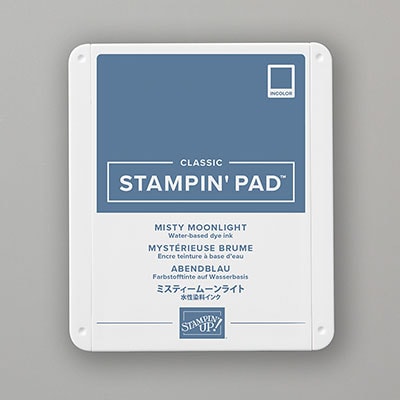
I kept the inside of the card clean & simple.  I pulled the two main colors from the card front, Cajun Craze and Misty Moonlight, to create double mats for the Very Vanilla message layer.

Since I'm not sure yet how I will use the card, I left it sentiment free.  If desired, I can easily add a sentiment when I'm ready to use the card, or I can just write a personal note.

Use this link to download a PDF tutorial.

A list of the products used is shown below.

Product List

Monday, August 3, 2026

FERN & FLORA TEMPLATE TIME

This week I am going to use the Fairless Stampin' Flair sketch #9 to create the cards.  Sketches (or Templates) are a great resource when you are having a creative block.

For the last couple of years, when I came across a card with an interesting or unique layout I'd create a quick sketch so I wouldn't "lose track of" the idea.  

The sketch for this card has several pieces which provides a great way to show off pretty designer series paper.

After I make the sketch sometimes I attempt to add dimensions to the sketch as reference.  I'm not sure if having the dimensions is helpful or if it tends to limit the creativity.  In making the cards for this week, I think it is a little bit of both.  I found myself modifying the sizes to better fit the card and to accommodate the design of the paper or the "tool" I was using.

For example, in this card I wanted to use a Stylish Shape die or a punch cut the circle, but I did have a die or a punch that was 2-1/4" in diameter.  I used a Stylish Shape die, but the circle is closer to 2-1/2" in diameter.  With the slightly larger circle some of the other rectangles also looked better balanced if I changed their size.  

My advice is--use the sketch for inspiration, but don't necessarily take it too literally.

I used various designs from the beautiful Moonlit Flora Designer Series Paper (DSP).  There are so many gorgeous designs in this collection that choosing which ones to use was the most difficult part.


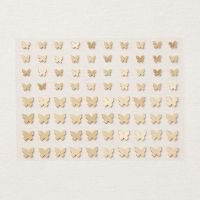
The butterflies for today's card were made using the Butterfly Flight Hot Foil Bundle.  The bundle includes the butterfly Hot Foil Dies and coordinating decorative masks that you can use to color the butterflies after foiling them.  It makes five different butterflies at once, so it gives lots of options for size and shape of the butterflies.  I used one on the front, one on the inside and one on the envelope.  Happily I have 2 left over to use on other projects!

The sentiments on this card were all from the Prayers & Promises Stamp Set.  You can learn more about all the products used on the card by clicking on the images in the list below.

For the specific dimensions that I ended up using on this card download the FREE TUTORIAL at this link.

Product List
Monday, July 20, 2026

BUTTERFLY FLIGHT HOT FOIL

This is Technique Week.  Each card this week will feature at least one fun technique.  Today's card actually uses three different techniques.  It is a Shaped Card made a "new" way -- at least new to me -- that also incorporates Hot Foiling and Decorative Masks.

To create the shaped card base I used the largest die from Scalloped Blooms Dies.  

Normally with "shaped cards" you will see a small, flat, hinge area either on the side or top of the card.  For some die cut shapes, the small flat area is no big deal.  But with a scalloped shape like this it is nice to have the full scallop without a flat section. 

Wondering how I did it?  As with most things I do, I wasn't the one that figured it out.  I learned from a friend, so I'm going to share it with you in the video below.

Since last week I demonstrated the new Hot Foil System, I did not show how to do that again in the video, but I did show you how to use the Butterfly Flight Masks to color the Hot Foiled butterflies.  

Aren't the butterflies pretty?  That pink foil sure does shine!  The Butterfly Flight may be my favorite Hot Foiling Bundle -- at least so far.  The bundle includes the Hot Foil Dies and Decorative Masks.  There is not a coordinating stamp set, but with the masks you don't really need stamps.

A slightly different camera angle shows even more shine!  The sentiment is from the Scalloped Blooms Stamp Set.

The Hot Foil Die and the coordinating decorative masks create five butterflies in different sizes and shapes.  One of the cutting dies in the Butterfly Flight Hot Foil Bundle die cuts all five butterflies at once.

Since I only used three of the five on the card front, I used another one on the inside.

When you make a shaped card, you may need to modify the mat(s) on the inside to fit.  Just trim the edge that interferes with the fold.  The Basic White message layer fit well without any trimming.


I used the fifth butterfly on the envelope flap.  They are way to pretty to go to waste!  This scalloped card does require a square envelope. 

Use this link to download a PDF TUTORIAL with dimensional information and step-by-step directions.

A list of products is shown below.


Product List