Showing posts with label Two-Tone Cardstock. Show all posts

Monday, May 25, 2026

A SILLY BEAR & TIME WITH FRIENDS

This week I am going to be using the Silly Old Bear Suite.  This is such an adorable suite of products -- even if you aren't a Winnie the Pooh fan.  The Sweet Old Friends Bundle includes all of Winnie the Pooh's friends.  Not being a Winnie the Pooh aficionado, I never realized he had so many friends!  I had to Google him to figure out who they all were.

Today Pooh is taking a walk with his friend Piglet through the Hundred Acre Woods where they all live.

The scene from Silly Old Bear Designer Series Paper (DSP) was die cut with one of the Sweet Words and Labels Dies which is also part of the suite.  Pooh & Piglet were also die cut from the DSP using the Sweet Old Friend Dies.  

See, I wasn't fibbing when I said it was an easy card!


The card base is Secret Sea cardstock.  I cut a 5-1/2" x 4-1/4" layer for the card front from Two-Tone Secret Sea Cardstock and embossed it (dark side up) with the Hundred Acre Woods 3D embossing folder.  A light sanding highlights the raised areas and reveals the inner white core of two-tone cardstock.


The sentiment is from the Sweet Words & Labels bundle.

This is a Mega Suite with two bundles, Designer Series Paper, and an Embossing folder.  The little die cut leaves that I used to accent the sentiment are from the Sweet Old Friends Dies.


I wasn't sure how many leaves I wanted for the card front, so I just die cut several from Two-Tone Old Olive cardstock.  Some were cut with the dark side up and some with the light side up.  After completing the front I had a LOT left-over, so I used them along the Old Olive Two-tone strips on the inside of the card.   

I haven't used Two-Tone cardstock a lot, but I'm really starting to love the fact that I now have two shades of the same color.  This inside decoration demonstrates what two shades can do for you.  "It just does something to it", don't you think?  

This was one of Mom's go-to phrases when she was asked a question about why she did something a certain way or added some ingredient to a recipe.  She'd say, "It just does something to it!"  That's how I'm starting to feel about Two-Tone cardstock.

For all the dimensional details and step-by-step assembly instructions, use this link to download a PDF Tutorial.

A list of the products I used is shown below.

Product List

Monday, May 11, 2026

2026-2028 IN COLORS WITH FERN & FLORA

This week I am going to be showing off our beautiful new 2026 - 2028 In Colors.  The five new colors are Barely Blush, Crisp Cantaloupe, Golden Glow, Peaceful Pine and Hydrangea Hue.

This card features the five new colors in a strip across the front of the card.  The colors are placed on the card in the order listed above.

I'm still trying to decide which one is my favorite.  At the moment I keep bouncing between Peaceful Pine and Hydrangea Hue -- but if history repeats itself, I'll probably find a new favorite once I start playing with these colors a bit more.

Do you have a favorite?

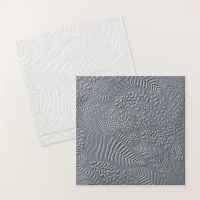
The background for today's card was made with the lighter side of Garden Green Two-Tone cardstock.  I embossed it with the brand-new Fern & Flora Embossing folder from the new Moonlit Flora Suite Collection.  Then I sanded the embossed surface lightly to reveal the white inner core of the two-tone cardstock.
Doesn't this easy technique give a nice effect?  

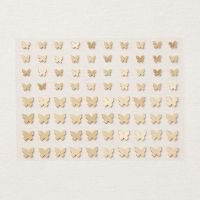
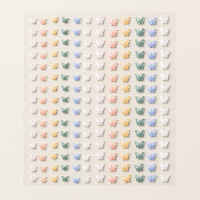
The die cut fern and the sentiment are both from the Fern & Flora Bundle.  And can you see the three tiny butterflies?  These adorable butterfly embellishments are also in the new May - August catalog and come in all the 2026-2028 In Colors.

I left the inside of the card sentiment free but added a larger strip of the embossed and sanded two tone cardstock to coordinate with the card front.

You can also see a peek of the envelope flap made with the same technique, but for it I used the dark side of the Garden Green two-tone cardstock to create just a bit of contrast.

Use this link to download a FREE TUTORIAL with all the details.

The products used for the card are shown below.  Click on any image to learn more or make a purchase.

Product List

Friday, November 14, 2025

FESTIVE SNOWMAN

I saved my favorite card this week to last.  There is something about these adorable Festive Friends characters that just make me smile every time I use them!


Today I using the tearing technique with the Two-Tone Cardstock.  I've used the "tearing" technique on and off over the years, but it was usually associated with a "vintage" or "grunge" style of card.  And since I don't often make cards in that style, I tend not to use this technique much.

When you tear Two-Tone cardstock it gives you a white edge which I like--not at all vintage.    In fact, I really like the torn appearance for snow drifts like these.


I used Cloud Cover two-tone cardstock and alternated using the dark and the light sides.

Depending on the direction you tear the cardstock you will get the white edge on either the dark or the light side.  So, pay attention to the direction you tear.  When you tear it, the back side of one piece will have the white edge and the front edge of the other piece will have the white edge.   For my snow, I just flipped one of them over and used both pieces.

Before creating the "snow", I used a Blending Brush and Secret Sea ink for the sky.  I envisioned a dark night sky with a full moon.  However, I initially forgot to mask the moon.  So, I placed a 1" circle mask over the inked area and added more ink.   I kept it lighter near the moon and darker farther away, creating a clear outline.  The result was unexpectedly pleasing -- a fortunate crafting mistake.

The small trees on the horizon line and the large trees on the left were die cut with dies from Light & Wonder Dies.

The little snowman from Festive Friends Stamp Set was given a bright, multi-colored hat with Stampin' Blends and his scarf was colored with one of the colors in the hat.  

The sentiment is from Festive Friends and was die cut with the Traditional Label Die.  Did I say how much I love the Traditional Labels Dies?  They are SO VERSATILE with many different shapes and sizes.


To provide a base of snow for my snowman on the inside of the card I added a couple of leftover torn strips from the card front.  The sentiment is from the Jolly Holly stamp set.  This is another stamp set that has received a LOT of use this season -- this greeting in particular.  I like that it is tall and narrow in shape and the sentiment sounds like me.

Use this link to download a tutorial with all the details of today's card.

A list of the products I used is shown below.

Product List