
On Monday, we were hunting for Seashells along the beach. Today we are walking through a gentle snowfall. It kind of sounds like Michigan weather!

I belong to a Coffee Club and each month we have a card making challenge. This month our challenge was to use Vellum on our card.
Vellum is something I often forget about using, so I really enjoyed this challenge as it reminded me how versatile Vellum can be. You can stamp images on it and color them in various ways. You can use it as an accent piece to soften the appearance of a card. You can dry emboss it, and the embossed areas turn white. Or you can do what I did today, and heat emboss on it.


This was my first attempt at using her triangle tip, and it works! I am actually really happy how my first attempt worked on the top half of the card. My spacing on the bottom isn't as good, but there is still a huge improvement from what I normally have!
My snowflakes are heat embossed on Vellum Cardstock with White Embossing Powder. The vellum was then layered over Boho Blue. I love how Vellum "softens" the appearance of whatever you layer it over. The Boho Blue actually looks darker in the photograph than it does in real life.

Boho Blue is not an intense blue, but with the Vellum layered over it, it is even softer in color.
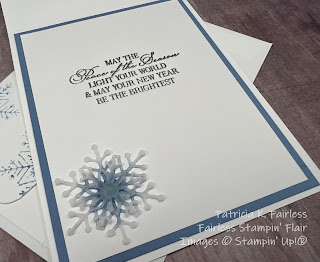
The sentiment is from the Brightest Glow Stamp Set. It was embossed with Silver Embossing Powder and die cut with a Nested Essentials Die. The Boho Blue die cut behind the sentiment was made with a Chic Die. Three different size snowflakes were also cut from Basic White cardstock using Chic dies. After die cutting, I used a sponge dauber to add a little Boho Blue ink to the center of each snowflake. Then they were layered together with dimensionals and added to the card front.

A Balmy Blue In-Color dot was added to the center snowflake assembly and then a couple more were added on the card front.
See the Product List below to see all the products used on this card.
Since this card was made for a Vellum Challenge, I was originally going to make the snowflake on the front of the card with Vellum, but when I laid it in place it got sort of over-powered by the background. So, set it aside -- just in case...

After I heat embossed my silver sentiment on the inside, I decided to lay my vellum snowflake in the corner. It looked so much better on the inside than on the front -- so it had a new home and avoided the trash!
")
")


 Glittered Organdy Ribbon")


")

No comments:
Post a Comment