Showing posts with label Amazing Silhouette Bundle. Show all posts

Friday, January 7, 2022

EMBOSSED TREE SILHOUETTE

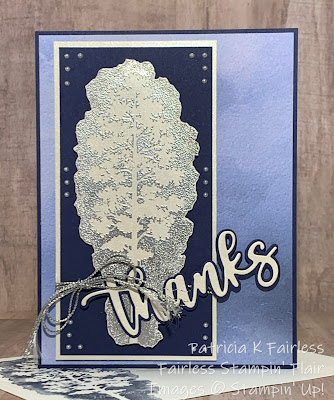
Today I am using the third and last stamp from the Amazing Silhouettes Bundle.  It is a beautiful tree, and if you peruse Pinterest or other websites to look for ideas, you may have noticed that this stamp from the set seems to be receiving the most love -- or use.


I wanted to try to make a winter thank you card.  As I mentioned on Monday, I need to refill my stash of thank you cards, and I just love how simple these Amazing Thanks Dies are to use.

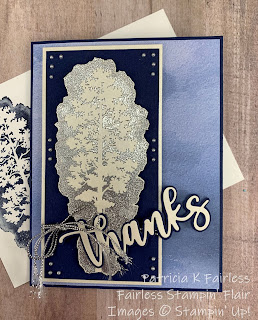
To make this card I stamped the tree on Pearlescent Specialty Paper with VersaMark Ink.  Have you seen this Pearlescent Paper?  It is a beautiful winter white paper with a soft pearly sheen.  After stamping with the VersaMark, I heat embossed with silver embossing powder and then fussy cut the tree.  To make the tree look like it was shining in a dark moonlit sky, I mounted the tree on Night of Navy cardstock with dimensionals.  The Night of Navy was then mounted on another panel of the Pearlescent Specialty Paper.

The sky background was created with Beauty of the Earth Designer Series Paper.  Does it get any simpler than that?

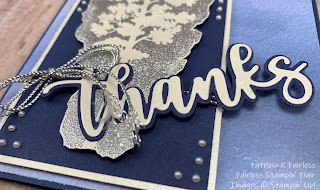
The sentiment was die cut with the Amazing Thanks Dies in Night of Navy and Pearlescent Specialty Paper.


To continue the  pearlescent design theme, I added several little white pearls around the Night of Navy panel to draw the eye even more to the beautiful silver tree silhouette.

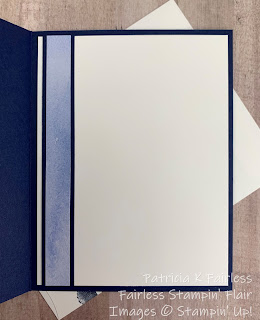
And what about the inside...


It's simple, but not forgotten.  A simple strip of the same sky DSP from Beauty of the Earth is set off with a Night of Navy border, but it leaves plenty of room to add a handwritten "Thank You".

Even though this is a simple and straightforward card to make, it makes me happy when I find a card I like and the creator has provided dimensional information.  So, if you like this card and would like the cutting dimensions, they are provided on this FREE TUTORIAL.

A complete list of all products used is shown below.


Product List

Wednesday, January 5, 2022

FLOWER STEM SILHOUETTE & BABY WIPES

Today I'm using the Flower Stem from the Amazing Silhouettes Stamp Set to make a card for someone that I think is amazing.  The Amazing Silhouettes Bundle is now available.  At $44 this is a very economical bundle but add an ink pad or some other item from your wish list and you will qualify for a free Sale-a-Bration Item.

You are probably wondering, where is the "silhouette"?  Well, on the card front it's not that easy to actually see a silhouette, is it?  But if you really want to see the image that this stamp creates when stamped only once, you can see it below on the inside of the card.

To make the card front I created my own background paper using the Baby Wipe Technique and this same flower stamp.

I created my "ink pad" from Baby Wipes with the following reinker colors:  Soft Suede, Bermuda Bay, Shaded Spruce and Mango Melody.  I think stamped the silhouette stamp multiple times to completely cover the Basic White cardstock panel.  I found that it worked best if I cleaned the stamp between each application or the colors started to get too muddy for my taste.

I had intended to put a panel over the "background" with just a single image of the flower silhouette, but I was not happy with how it looked.  I loved the background, but adding something on top of it, just didn't look right, so I decided to just let the "background" become the "foreground"

I added the beautiful White Frayed Ribbon that was another Prize Patrol gift from Stampin' Up to all participants at ONSTAGE@HOME back in November.  I then used the three "you are amazing" dies from the Amazing Thanks Dies to create the sentiment.  These dies are available separately or as part of the Amazing Silhouettes Bundle.


I cut the background letters from Bermuda Bay cardstock and the foreground letters from Basic White cardstock.  As I mentioned in my post on Monday, these layers are so easy to assembly.  You know how sometimes it can be a bit difficult to layer letters and get them aligned the way you like?  These are so easy to align and if you are a bit off -- no one will ever know. Gotta love that!  

To finish the card, I added three Black Classic Matte Dots to the card front.  The layers behind the "background" are Bermuda Bay and Soft Suede.

What do you think?  Thumbs up?  Thumbs Down?

If you would like a tutorial with all the dimensions and step-by-step instructions, you can find one at this link.   

A complete product list is shown below.


Product List

Monday, January 3, 2022

BUTTERFLY THANKS SILHOUETTE

HAPPY NEW YEAR STAMPING FRIENDS!

I'm starting this year by using a Stamp Set that was given to us as a Prize Patrol item at ONSTAGE@HOME back in November.   It's called Amazing Silhouettes, and it will be available for purchase tomorrow, January 4.   I'll be honest and admit that I had not put ink to these stamps until now.  I was struggling a bit with how to best showcase these Silhouette Stamps.

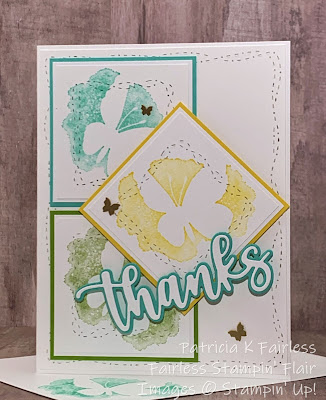
There are three stamps in this set and today I've used the Butterfly Silhouette.


This stamp set is part of the Amazing Silhouettes Bundle (Item # 157819) which includes the Silhouettes Stamp Set and the Amazing Thanks Dies.  You can purchase each separately, but if you buy them as a bundle you save 10%.   Since the stamp set was a prize, I purchased the dies as part of my pre-order in December.  I am so pleasantly surprised by these dies.  I LOVE them.  They are so easy to use and pack a big punch for a small amount of effort!

Since I am running low on thank you cards, I decided to use the "thanks" die today, but the die set also includes dies for the words "you", "are", and "amazing".  


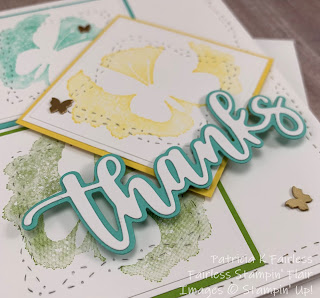
Each word has two dies -- a thicker background for the letters which you can see in Coastal Cabana on this card, and a coordinating die which has thinner script letters that you see in Basic White on this card.  Doesn't that Coastal Cabana background piece, just make the sentiment pop?  It was also so easy to cut and align the two pieces.  Alignment is extremely forgiving!


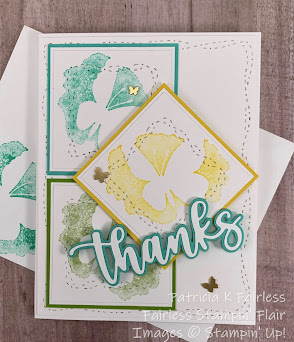
To create today's card, I stamped the butterfly silhouette 3 times, once each in Coastal Cabana, Daffodil Delight and Granny Apple Green.  After stamping, I used the Stitched with Whimsy Dies to add the stitched squiggles.  Each time I see the pattern these Stitched with Whimsy dies create, I think of butterflies flitting around.  I then matted each butterfly to a 1/8" larger Basic White rectangle and then to coordinating color mats and adhered to the card front.

Do you see the three little Brushed Brass Butterflies (Item 158136) on the front of the card?  These were another Prize Patrol item that Stampin' Up! gifted us at ONSTAGE@HOME.  This was my first year to participate in this event, and I'm so glad I did.  It's great when EVERY attendee wins a prize -- and we all won three prizes this year--the Amazing Silhouettes Stamp Set, the Brushed Brass Butterflies, and some beautiful white ribbon that you will see in Wednesday's post.

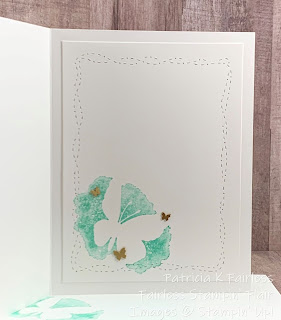
To makes sure the inside of the card was not forgotten, I stamped another butterfly silhouette with Coastal Cabana and also used one of the larger Stitched with Whimsy Dies to outline the Basic White cardstock with the stitching.


I added a few more of the Brushed Butterflies, but left the inside sentiment free, so I will have plenty of room to add my handwritten note of thanks.

If you would like a detailed tutorial with all dimensions and step by step directions, one is available at this link.

The two sneak peek products used are:

Brushed Brass Butterflies - Item # 158135
Amazing Silhouettes Bundle - Item # 157819

A list of all current products used is shown in the list below.


Product List