Showing posts with label Beautiful Butterflies Bundle. Show all posts

Friday, August 15, 2025

USE THOSE LEFTOVERS - TAKE THREE

The "leftovers" on today's card are the pretty Faded Water Stenciling background and the Glimmer Paper butterfly!

Even though my week of "leftovers" is nearing its end, I still have a huge number of leftovers in my two boxes.  So, I'm going to continue to make an effort to continue to find ways to use these beautiful elements.  They were made with love and should be used to continue to send paper hugs!

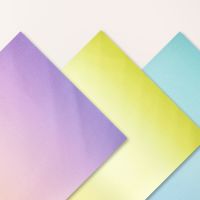
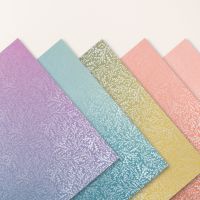
I found this Faded Water Stenciling Background in my collection of technique sheets and thought it was pretty with the butterfly die cut from Pastel Ombre Glimmer Paper.  

Here is the video for the Faded Water Stenciling Technique.

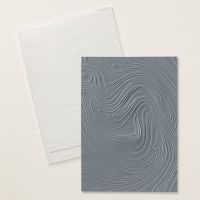
I feel like the So Swirly embossing folder design coordinates nicely with butterflies so I used that to provide texture to the card front..

Black Sparkle Gems on the body of the Butterfly add a little additional shimmer and shine.

The challenge with designing around "leftovers" is that there isn't always an extra ready-made element to use on the inside of the card.


To keep it clean and simple, I embossed about one inch along the left side of the Basic White cardstock with the So Swirly embossing folder.  Then I stamped the sentiment from Beautiful Butterflies.

Use this link to download a tutorial for the card.

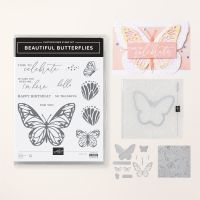
A list of products used is shown below.  Since Tahitian Tide and Starry Sky are retired substitute any ink colors of your choice.

Product List

Monday, June 9, 2025

ELEMENTS OF TEXT & BUTTERFLIES

I decided to challenge myself this week to use a stamp set that is great for creating "backgrounds", but I wanted to see if I could use it in ways that would have it play a larger part in the design of the card.  I'm not sure how well I achieved my goal, but it was definitely a challenge.

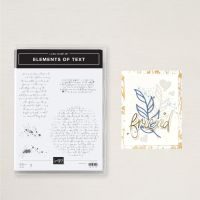
The stamp set I am featuring is the Elements of Text stamp set.  The set includes three stamps that are text and two stamps that are speckles or splotches -- whatever you like to call them.  This is the stamp set.  As you can see there is a fairly large rectangular text stamp, a smaller rectangular text stamp and a large circular text stamp.  

The two speckles stamps are similar, just different in shape and distribution of the speckles.

These types of stamps are typically used to add texture and interest to a card background or other images but are not necessarily the "focal" point of the card.

For today's card I stamped the large rectangular text stamp with VersaMark ink on Basic White cardstock.  I then heat embossed the image with white embossing powder and used the embossed resist technique to add Soft Sea Foam ink over the script to make it pop a bit.

The frame from Thoughtful Designs Specialty Paper (DSP) was die cut with a Sentimental Framing Die.

Elements of Text doesn't include any greetings -- unless maybe you can read the tiny text (I can't).  So, I looked through my stash and found this scripty "hello" in Beautiful Butterflies which fit perfectly on another Sentimental Framing die cut.

Since I had the Beautiful Butterflies stamp set pulled for its sentiments I decided to die cut a couple of the smaller butterflies from Basic White.  To add little pop of color to the butterflies I used a sponge dauber with Flirty Flamingo and Soft Sea Foam ink.

When I die cut the frame I ended up with a skinny "scrap" from outside the die cut.


Had I planned it ahead of time I probably would have cut my original DSP a little larger to have a wider "scrap" frame.  But since I didn't plan ahead I used it as is.  I think it still makes a nice attention grabber for the inside sentiments which are also from Beautiful Butterflies.

For more specifics on today's card, you can download a tutorial using this link.

A list of products used is shown below.

Product List

Friday, February 28, 2025

BEAUTIFUL BUTTERFLIES AROUND THE DOORS

Today we have some beautiful silver butterflies fluttering around our front door!


This Open Door Fun Fold is an impressive card that is sure to WOW your special recipient.


I used several embossing folders to give lots of texture to our elegant card.  The "walls" on the side of our double doors were embossed with the Exposed Brick 3D embossing folder.  Our "roof" was embossed with the Dashing Details 3D embossing folder.  And the protective "awning" that is "covering" our doors was embossed with the Beautiful Butterflies embossing folder.

When making an "all-white", or any monochromatic card, consider adding lots of texture.  It is a great way to create interest.

As you slowly start to open the "awning", you see more of the beautiful, brushed silver doors.  Both sides of the double doors are covered with Brushed Silver Foil.


As you continue to raise the awning, the doors automatically open and you are welcomed inside.

Once inside you can give your recipient a special hug with your personal message.

Maybe you are thinking, "This Fun Fold looks complicated".  Yes, it may be a little more than some, but no worries, I showed you all the tips and tricks of making this Open Door Fun Fold during my Learning with Friends video.  If you missed it when it premiered yesterday, you can still watch the replay.

In the video I used the Storybook Friends Bundle and Storybook Moments Designer Series Paper, the that's just the "decor" of your card.  The mechanics are all the same!

In addition to the video tutorial you can download a written tutorial that includes all details you need.  There are several diagrams with dimensions and step-by-step directions to make the Fun Fold.  Use this link to download a copy.

Wednesday, February 26, 2025

BEAUTIFUL BUTTERFLY CARD BASE

I promised earlier in the week that you would see a card sometime this week made with the Beautiful Butterflies Dies that creates a butterfly-shaped card base.  Today is the day!

Isn't this a FUN card!  There is a special die in the Beautiful Butterflies Dies that when you lay it on a folded piece of cardstock you get a butterfly-shaped card that opens at the top.  I have some tips for using this die.

  1. Look for the little marks on the top of the die and line those marks up with the fold on your cardstock.  You may be tempted to line the die up with the fold, but you want to line up those little marks with the fold.
  2. Because you are cutting two layers of cardstock (I used Thick Basic White cardstock), run the die back and forth through your die cutting machine at least twice as the little antenna need an extra trip or two through the machine to make sure they are fully cut.
  3. Do not run the straight edge for the fold through your die machine first.  Lay your die on your plate so that one of the wings goes through first. The effort will be lower and it will cut better.

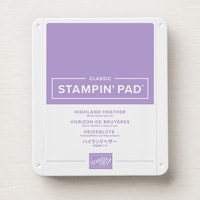
There are two different stamps to stamp the wing detail on your card base.  I stamped mine with Highland Heather ink, but don't sweat too much about figuring out which one to use in which wing section.  They are slightly different, but it isn't obvious (at least to me) which one goes where.  

If you know which one to use in each quadrant of the butterfly, please leave me a comment.  As an engineer, I thought for sure, it must make a difference.  As a result, I spent way too much time trying to figure it out.  In the end all the combinations looked fine to me.


I have another "hint" about the butterfly's body. 
  • The body dies that come in the set felt too small for the card base, so I put a narrow piece of Basic Gray behind just the body section in the center of the card base die.
  • Then I just cut from the "tail" to the "head" with my paper snips.  
I liked the proportion better with the larger body.

The top wings were die cut from Pastel Ombre Glimmer Paper.  Oh, so sparkly & pretty!


For the inside, I simply stamped the Time to Celebrate sentiment from the Beautiful Butterflies stamp set with Tuxedo Black Memento ink and a small butterfly with Highland Heather ink.


A list of the products I used is shown below.  For more information on any product, just click on the image and you will be taken to my Stampin' Up! store.  Once there you can get all the details or make a purchase.

Product List