Showing posts with label Go to Greetings Stamp Set. Show all posts

Sunday, March 31, 2024

LET'S GO FISHING ON SHARE IT SUNDAY

Happy Easter Stamping Friends!  

Today is the Crafty Collaborations Share it Sunday Blog Hop.  If you are hopping along with us today, or catching up after the Holiday, Welcome.

All this week I will be featuring the Heartfelt Hexagon Bundle from the January - April Spring Mini Catalog.  This bundle is on the Last Chance Sale, but the individual stamp set and punch will continue to be available -- just not at the 10% savings Bundle Pricing.  As you will see this week, it is a very versatile bundle which can be used to make quick and easy cards.

My card today features the Let's Go Fishing designer series paper and a special technique called Embossed Embossing.  If you aren't familiar with the technique, you can watch my Learning with Friends video to see how quick and simple it is.

As I mention in the video, I used the "reverse side" of the Cane Weave embossing folder for the technique.  By "reverse" side, I mean using the side opposite from the Stampin' Up! logo.  

The Boho Blue mat behind the sentiment was made by punching a hexagon with the Heartfelt Hexagon punch and then cutting it in half and separating the two pieces slighting to create a little border.

Everything else is very basic with this card.  The designer series paper (DSP) really does the rest of the work.  The Wavy Trim is also on the Last Chance List for 10% off the regular Price.  The Last Chance Sale starts on April 9, so if you like this trim, stock up before it is gone forever.

To see more details about this card you can download the free PDF tutorial by using this link.

I used the same Let's Go Fishing DSP to add some color to the inside of the card.


The sentiment is from Go to Greetings.  This truly is one of my "go-to" stamp sets, and I love the simple versatility and beautiful fonts.  I will miss it, as it is also on the Last Chance list.

For more information or to purchase any of the products used, click on any of the images below, and you will be taken to my Stampin' Up! store.

Now, if you are ready for some more awesome creativity, hop along with these amazing demonstrators to see what they are sharing on this Easter Sunday.


  Product List

Friday, February 2, 2024

DISH OF DULCE DE LECHE ICE CREAM

I'm going to finish out this week with a dish of Dulce de Leche Ice Cream.  It's another of my favorite flavors.  This ice cream deserves a pretty dish rather than a cone.

My ice cream bowl was made with the Deckled Circle dies and Perennial Lavender Designer Series Paper (DSP).  This DSP is almost as beautiful as Dulce de Leche Ice Cream tastes!  I love this DSP.  The various shades of purple and the flowers are beautiful.


The card and ice cream was made with Very Vanilla Cardstock.  Just a hint of Pecan Pie ink was added to the solid ice cream die cut to give it that hint of caramel color.  The ice cream swirl die cut was given a coat of Wink of Stella -- just because it looked pretty -- not because Dulce de Leche Ice Cream has sparkles.


I used one of my go-to card layouts because it provides a great opportunity to show off pretty DSP.  Both rectangles and the ice cream bowl were made using designs from this gorgeous DSP.  

The Very Vanilla background on the card front was embossed with the Timeworn Type Embossing Folder.  After embossing, I used a blending brush to add just a hint of Blackberry Bliss ink behind where the ice cream would be, so that it would help the ice cream stand out from the background.
 
The mats behind the designer series paper were made from BlackBerry Bliss cardstock which really helps make the colors in the DSP pop.  


Purple Fine Shimmer Gems, a Berry Burst Cherry, and a candy stick add a bit of sparkle and delight to the dish of ice cream.


To decorate the inside of the card, I added strip of the DSP used on the card front.  I did not plan to have the Happy Birthday sentiment from Go-to-Greetings mounted on a Blackberry Bliss mat, but sometimes those design changes arise out of necessity -- not from pre-planning.  I'm sure you can guess what happened.  Yup!  I needed to cover up an oops!  But I think it turned into a "happy oops."  What do you think?

I hope you have enjoyed the "yummy" cards this week.  I know it has tempted me to go buy some ice cream.  How about you?

Product List

Wednesday, December 6, 2023

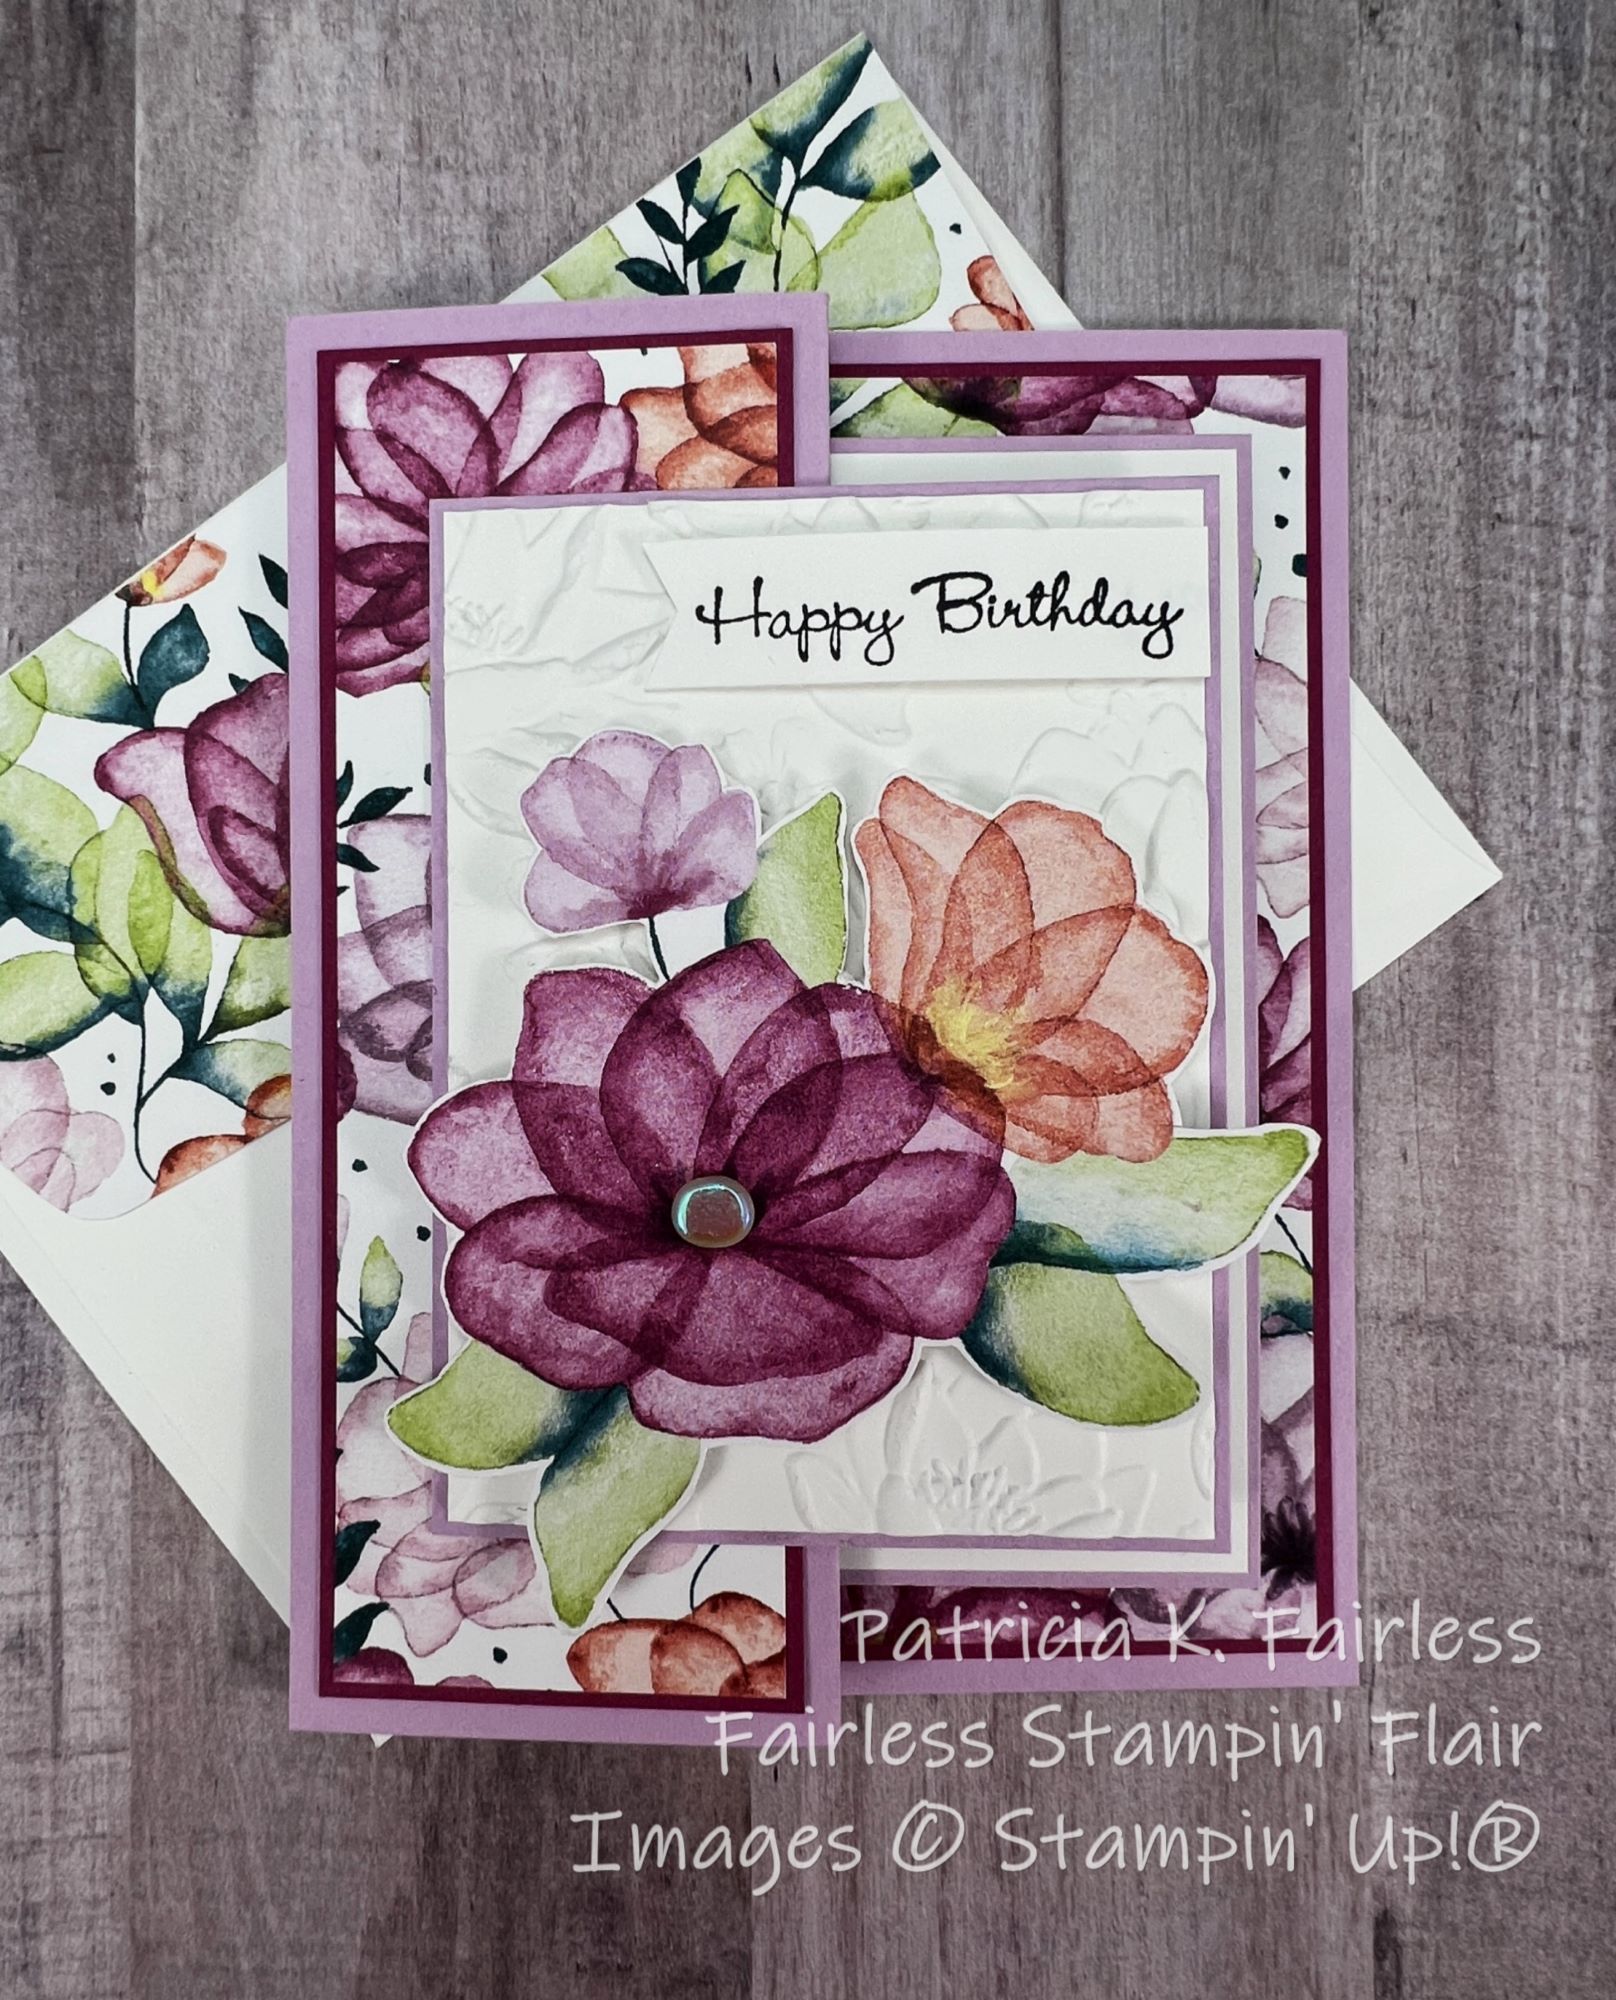
TWO DECKS OF BIRTHDAY FLOWERS

I first saw this Double Decker Fun Fold a few weeks ago on the Demonstrator Planning Place.  Polly Libby share a beautiful card using this fun fold which I had never seen before.

Learning from other demonstrators is one of my favorite things about being a Stampin' Up Demonstrator.  There are so many wonderful creative demonstrators who are willing to share their ideas and know-how.


This card is best appreciated with more photos and less chatting, so today I am going to share more photos with you than words.  However, if you are interested in learning how to make this Double Decker Fun Fold, please download my free tutorial.  It includes additional photos to help understand assembly as well as cutting and scoring diagrams for the card base and the mechanism.


The above photos show the card fully closed.  You can see the middle layer peeking out from behind the top layer.


Above are a couple of photos with the card pulled a little further open.  There is a little mechanism box behind the middle layer which makes it pop up as you open the card.

The embossed Basic White background on the card front was made with the Layered Florals embossing folder.  This is a sneak peak of a new embossing folder coming in the 2024 Jan - April Mini catalog.


This gorgeous paper is from the Delightful Floral Designer Series Paper (DSP) Collection which is an ONLINE EXCLUSIVE.  There is a coordinating Bundle (stamp set & dies) in the Fall Mini called Translucent Florals.  The dies in that bundle coordinate with flowers in the DSP.  However, since I don't have that bundle, I just fussy cut the flowers on the front and middle layers from the DSP.  

The Translucent Florals stamp set and dies will carryover from the Fall Mini but will no longer be bundled.  So, if you love them and don't already have them, be sure to purchase them before the Fall Mini catalog retires to get the 10% bundled savings.

Now that I have made this fun-fold for my first time, I will definitely be making it again.  I like it so much I made myself a fun-fold template sample from retired products so I can easily remember how to do it the next time!

I hope you have enjoyed it also.  Be sure to take advantage of downloading my free tutorial so you can try it, too!  If you ever have questions on my tutorials, please be sure to contact me.


Product List