Showing posts with label Heron Dies. Show all posts

Friday, February 3, 2023

A VALENTINE KITTY

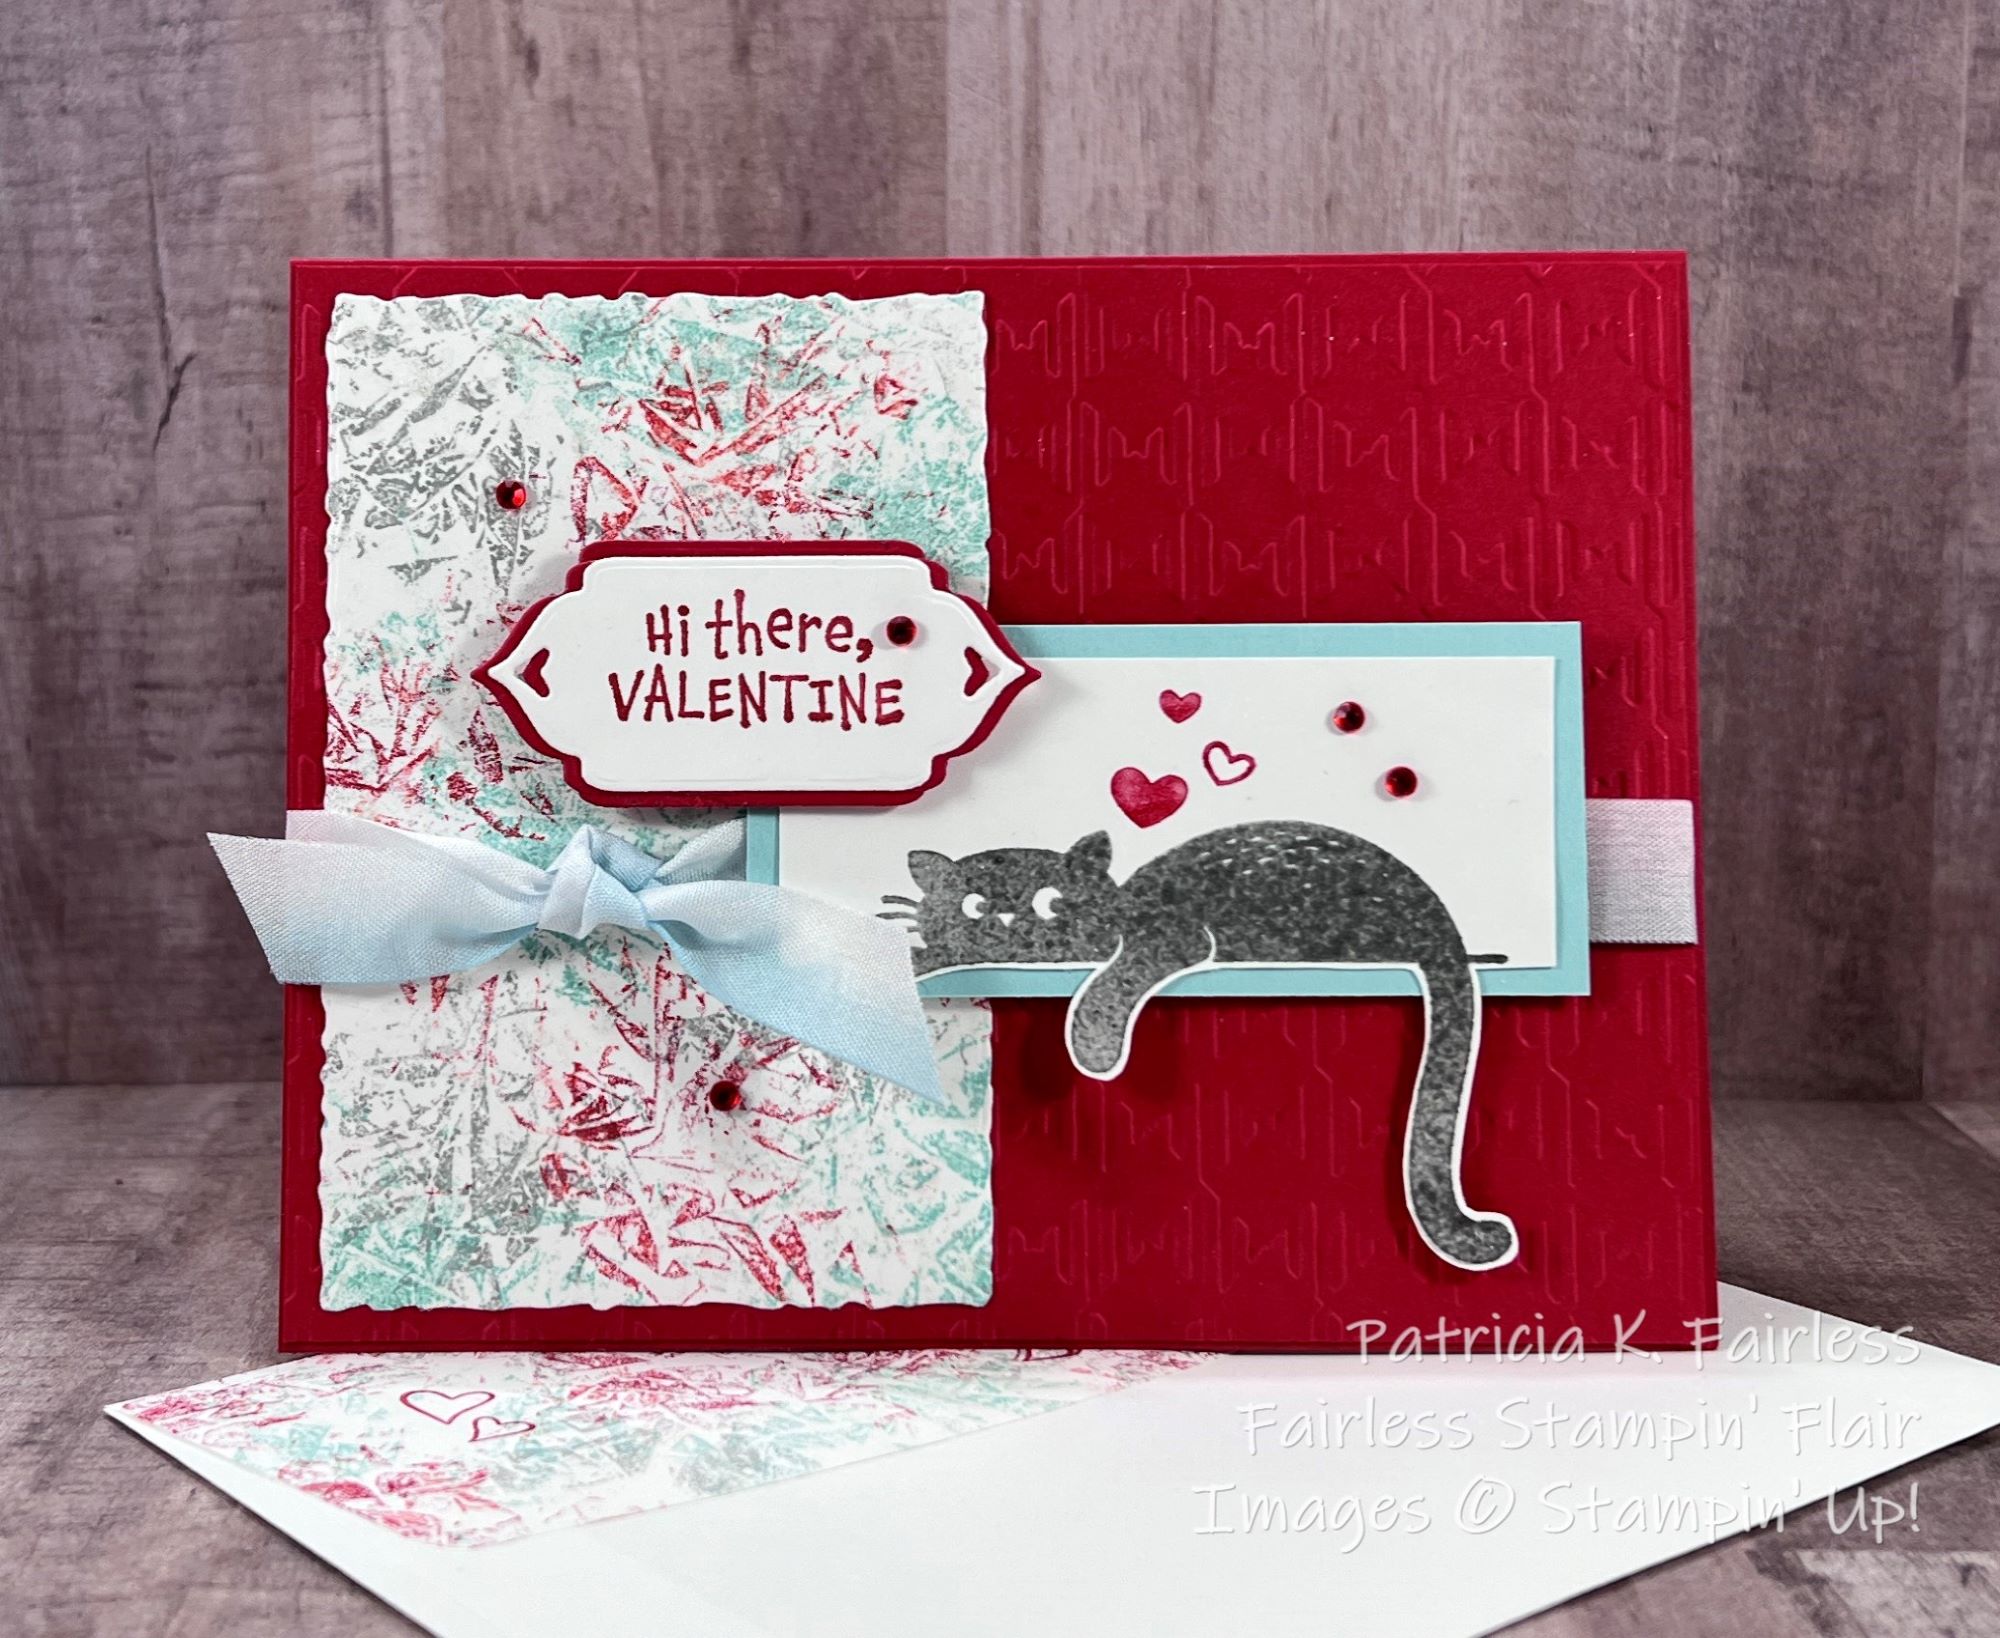
Today I used the 3rd kitty cat from the Love Cats Stamp Set.  This one is sprawled out on a windowsill, a shelf, or the back of the couch -- wherever your imagination wants to put him.  I named him Smoky.  

When my neighbor Coco comes for a visit, she likes to lay on the back of my couch right next to where I am working.  


She can be a chatty little thing, particularly if she isn't getting the attention she wants.


This position doesn't look all that comfortable, but for some reason, she likes it.  It looks like doing those Plank exercises to me!

But I digress.  Back to the card.

The left side of the card uses a long-lost technique that I have revived.  I call it Faux Painting with Plastic Wrap.  I had actually used this technique to paint the walls of my guest bath many years ago.  If you are wondering how I made it, watch this video and you will see just how easy it is.


I also experimented with using the technique on the flap of my envelope, and it worked very well.  Just be sure to slip a piece of scrap paper under the flap before you start.  To keep the Valentine theme going, I also stamped a few little hearts from Country Bouquet on the envelope flap.  You can see them as the envelope peeks out behind the card.


My kitty, Smoky, today was stamped using the Colored Embossing Technique.  I could have simply stamped him directly with Smokey Slate ink, but this is an easy technique to give him a little shine and it seems to enrich his color a bit.  To use the colored embossing technique, follow these simple steps:

  1. Ink your stamp with VersaMark and then ink it with the color of your choice.  Be sure to ink in this order!
  2. Stamp the image on your cardstock.
  3. Heat Emboss the image with clear embossing powder.  

The VersaMark that you have on put on your stamp BEFORE adding the colored ink will cause the embossing powder to stick to the image so you can heat emboss it.

Before adhering Smoky to the Pool Party cardstock mat, I fussy cut around his legs so it looks like he is hanging over the edge of "something".

To decorate the inside of the card I stamped the Valentine sentiment from the Country Bouquet Stamp Set in Real Red ink and then added hearts in Real Red and Pool Party from the Country Bouquet Stamp Set.  This was matted to Pool Party cardstock and then to the inside of the card base.

A FREE tutorial for today's card is available for download at this link.

All Products used are listed below.


Product List

Monday, October 10, 2022

ROLLING MARBLES THROUGH THE HARVEST

I've decided to change my weekly theme up a bit this week.  Rather than using a featured stamp set or bundle all week, I'm going to share Autumn Themed cards.


Today's card features the Natures Harvest Bundle and the fun Rolling Marble Technique to create the background.

I shared this technique recently on Connect to Create, so if you are not familiar with it you can watch this short video to see how it is done.   If you have never tried this technique, I encourage you to do it.  It is simple, quick, and fun! 


After coloring the flowers with the Autumnal Colors, So Saffron, Cajun Craze and Old Olive Stampin' Blends, they were die cut with the coordinating die from Harvest Dies.


Before laying the flowers and die cut crumb cake wheat stalk, I wanted to soften the background just a smidge.  So, I die cut Vellum cardstock with the largest circle die from Stylish Dies and layered it over the background.   I found that the best way to adhere vellum without the adhesive showing through is to use a stamping sponge and add a very thin layer of liquid adhesive to the vellum.  In this case I added it only to the center area of the circle, which is mostly covered, but even where the vellum is visible behind the flowers, the adhesive in that area is not visible.


I used a die from Heron Dies for the sentiment.  I fed two strands of Linen thread through the tiny little hearts on each side of the sentiment.  Since the flowers were adhered with a layer of dimensionals the sentiment was adhered with two layers of dimensionals so it is popped up over the flowers.  The Linen Thread was wrapped around the cardstock and tied in a bow at the left edge of the sentiment.


To complete the inside of the card I added a So Saffron wheat die cut and sentiment stamped in Cajan Craze.  The Basic White cardstock was layered to the same mat colors as I had used on the front: Cajun Craze and So Saffron.

I had to search long and hard to find a "Happy Thanksgiving" Stamp in my stash and this one is from an extremely old stamp set.  So old that it is mounted on a wooden block!  I couldn't believe that I didn't have a current stamp set with a Happy Thanksgiving stamp in it.  I'm going to have to add one to my wish list.

If you would like a FREE TUTORIAL for this card, please use this link to download a copy, and I hope you will give the Rolling Marbles Technique a try.

A list of all current products used for this card is shown below.


Product List

Friday, June 3, 2022

SAILING WITH THE WIND

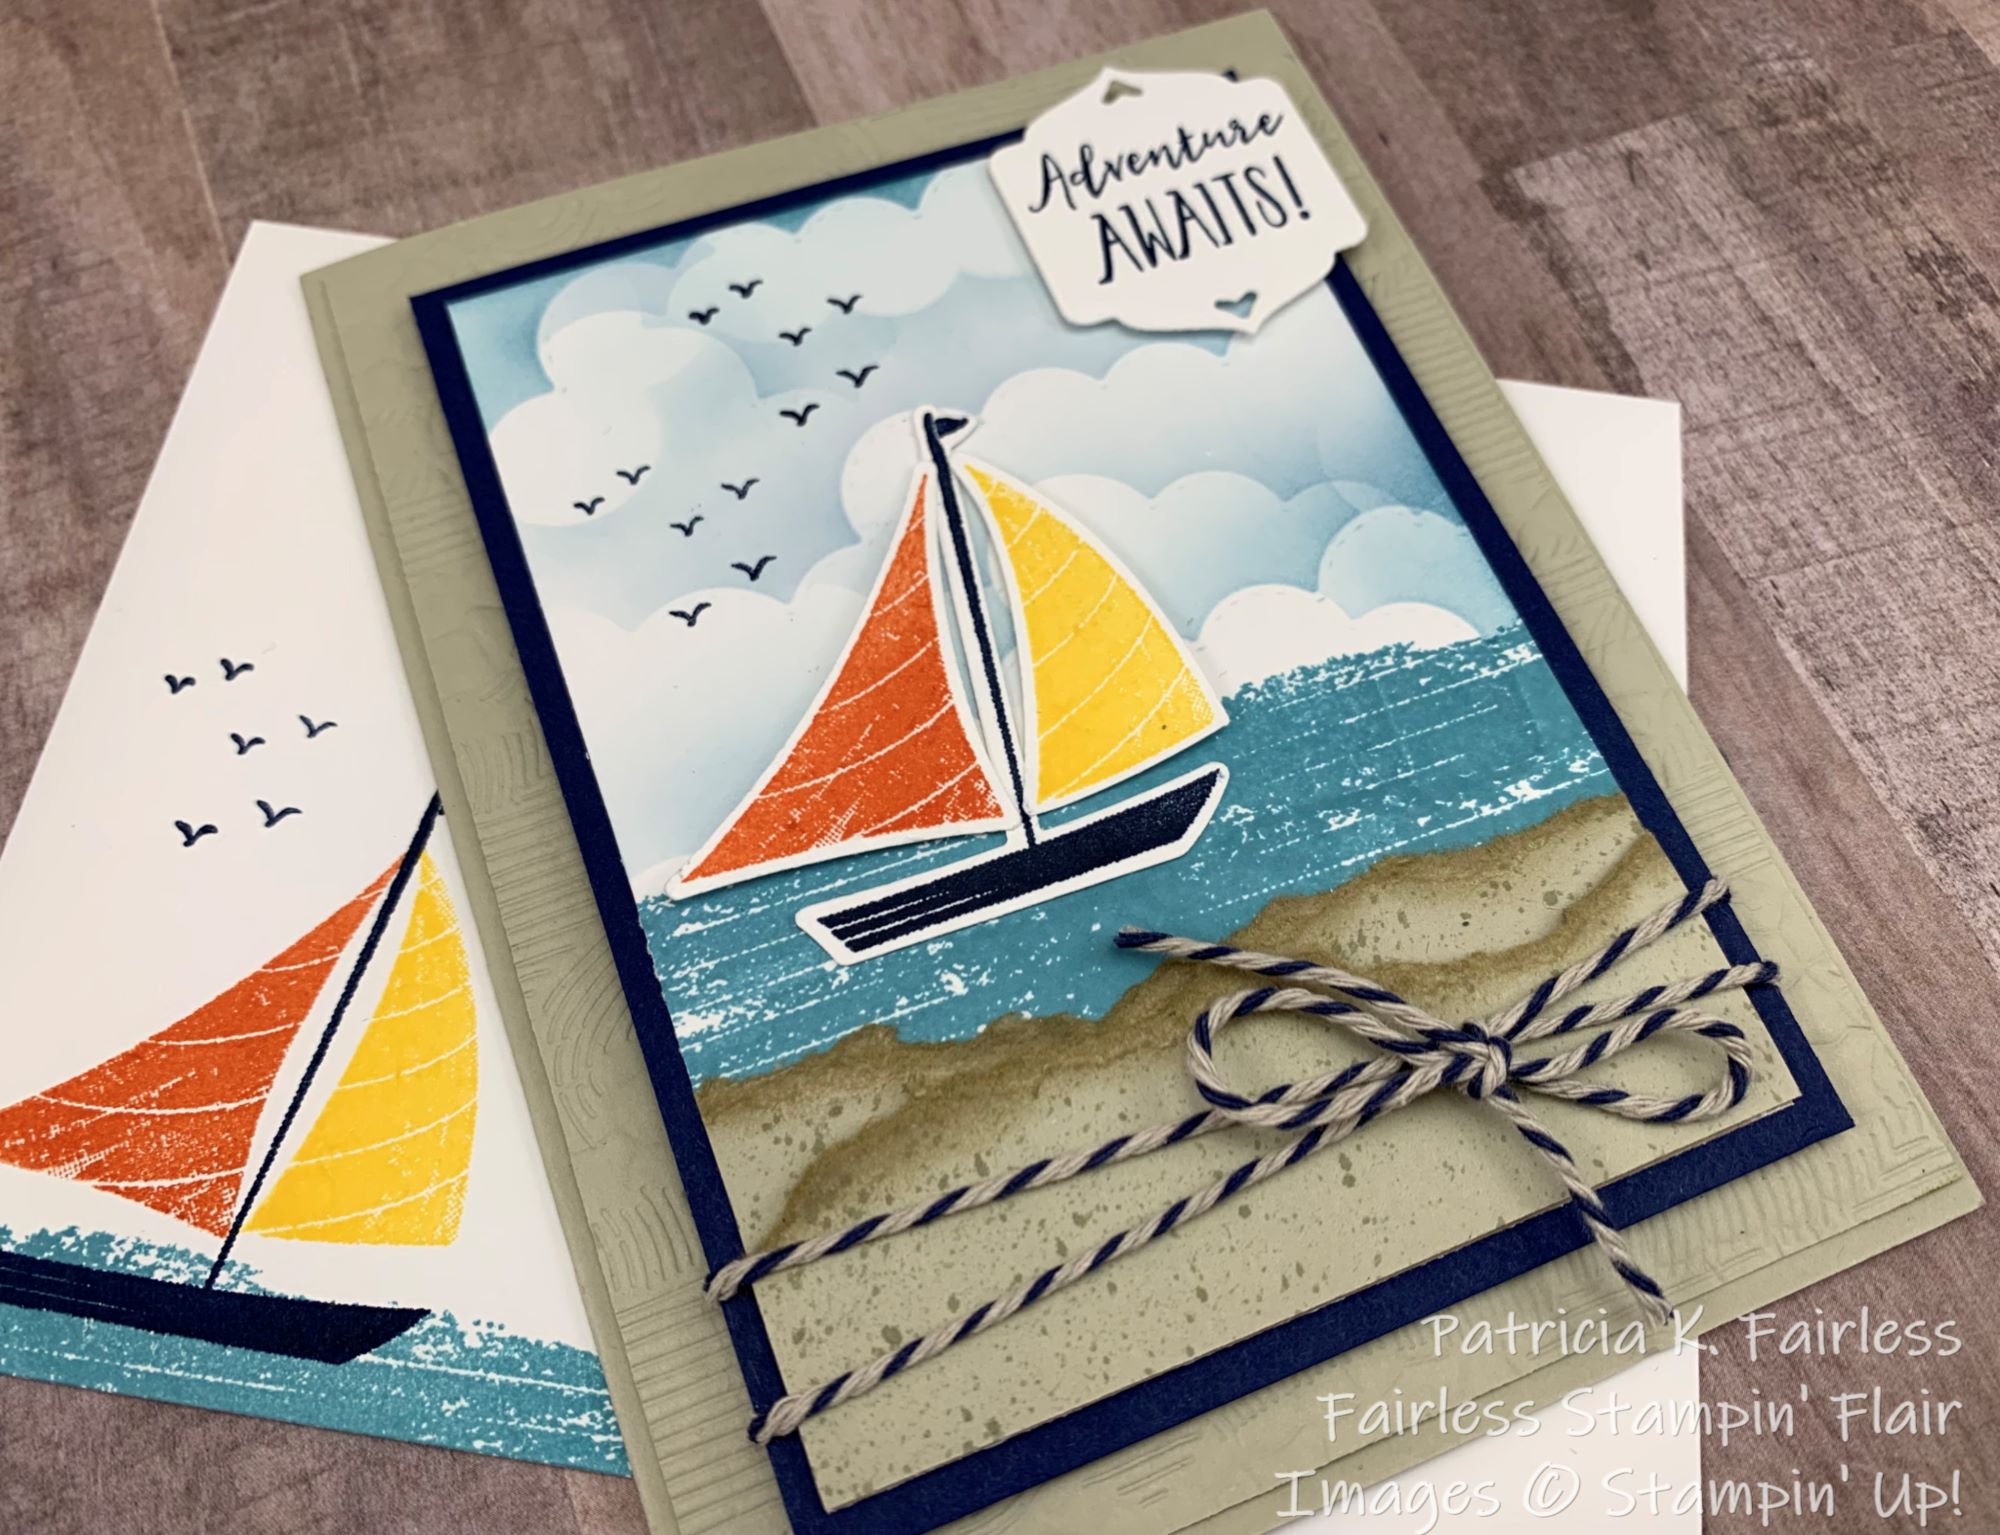
I think the card today is made with a very "Nautically" expected color combination.  Night of Navy and Sahara Sand seems to be a common color combination used on nautical cards, so, I decided to just go with the flow -- or maybe with the wind.


First, I tore a couple of pieces of Sahara Sand to create my sandy beach.  I added speckles by flicking the cover of my Sahara Sand Stampin' Write Marker across the brush end of the marker. This takes a bit of practice, and it is not very predictable where the speckles are going to end up so don't wear a white shirt when using this technique!  Next, I used a sponge dauber to ink the torn edges

The water is stamped with Balmy Blue ink.  To make the clouds I used one of the Basic Border dies to create a mask from copy paper.  I then used my Blending Brush and Balmy Blue ink to make the clouds.


The Bakers Twine that I have wrapped around the bottom portion of the card front is an old, retired Bakers Twine that I have been hoarding.  It's time to start using it.  I believe we should use those things we have so I need to do a better job and stop hoarding embellishments that I love.


The sentiment is from Let's Set Sale, but the die cut was made with a die from Heron Dies.

For the inside of the card, I repeated the same sailboat as on the card front.  It is stamped with Night of Navy for the boat and Calypso Coral and Daffodil Delight Ink for the sails.  You can also see a portion of my coordinating envelope which has the same design.


I hope you have enjoyed this week's cards made with the Let's Set Sail Bundle.  I am not a sailor, but it does make me want to get out on my Pontoon boat and enjoy the water.


A list of products used on the card is shown below.  The Bakers Twine is Retired.


Product List