Showing posts with label 2023 Valentine's Day card. Show all posts

Monday, February 13, 2023

DAINTY FLOWERS VALENTINE CARD

There is only one day left until Valentine's Day.  I've been sharing a few Valentine Cards over the last several weeks, and I have one more to share today.

This week I will be using the Dainty Delight Bundle, and what better way to send Valentine Wishes than with flowers!


Maybe Roses are the typical Valentine flowers and I have nothing against roses, but I think this bouquet of wildflowers is beautiful, too.

I've used the Sale-A-Bration coordinating designer series paper, Dainty Flowers, for today's card.  This paper is so pretty, and it is available for FREE with a $50 purchase during Sale-A-Bration.


For today's card I used 3 different patterns from this pretty paper.  This paper not only has beautiful colorful flowers, but it also has more subtle designs which are great to use when you want the focal point to be on your stamped, colored, and die cut flowers.

I stamped the largest bouquet of flowers from the stamp set with Black Memento and colored them with my Stampin' Blends.  They were then quickly die cut with the coordinating die.  Another vine die was used to cut a vine from Mossy Meadow cardstock and added behind the flower bouquet.


All designer series paper layers were first adhered to the Blackberry Bliss card base before the flowers and vine were popped up with dimensionals over a loop of Night of Navy Ribbon.  Pastel Pearls were added for a little shimmer.

To decorate the inside of my card, I stamped a smaller floral bouquet from the Dainty Delight stamp set and again colored it with my Stampin' Blends.


Don't forget to also decorate your envelope!   My favorite solution for a quick & easy pretty envelope is to add some of the same designer series paper to the flap to make sure your envelope isn't naked!

Use this link to download a FREE TUTORIAL for today's card.

A list of the products used is shown below.

Product List

Friday, February 3, 2023

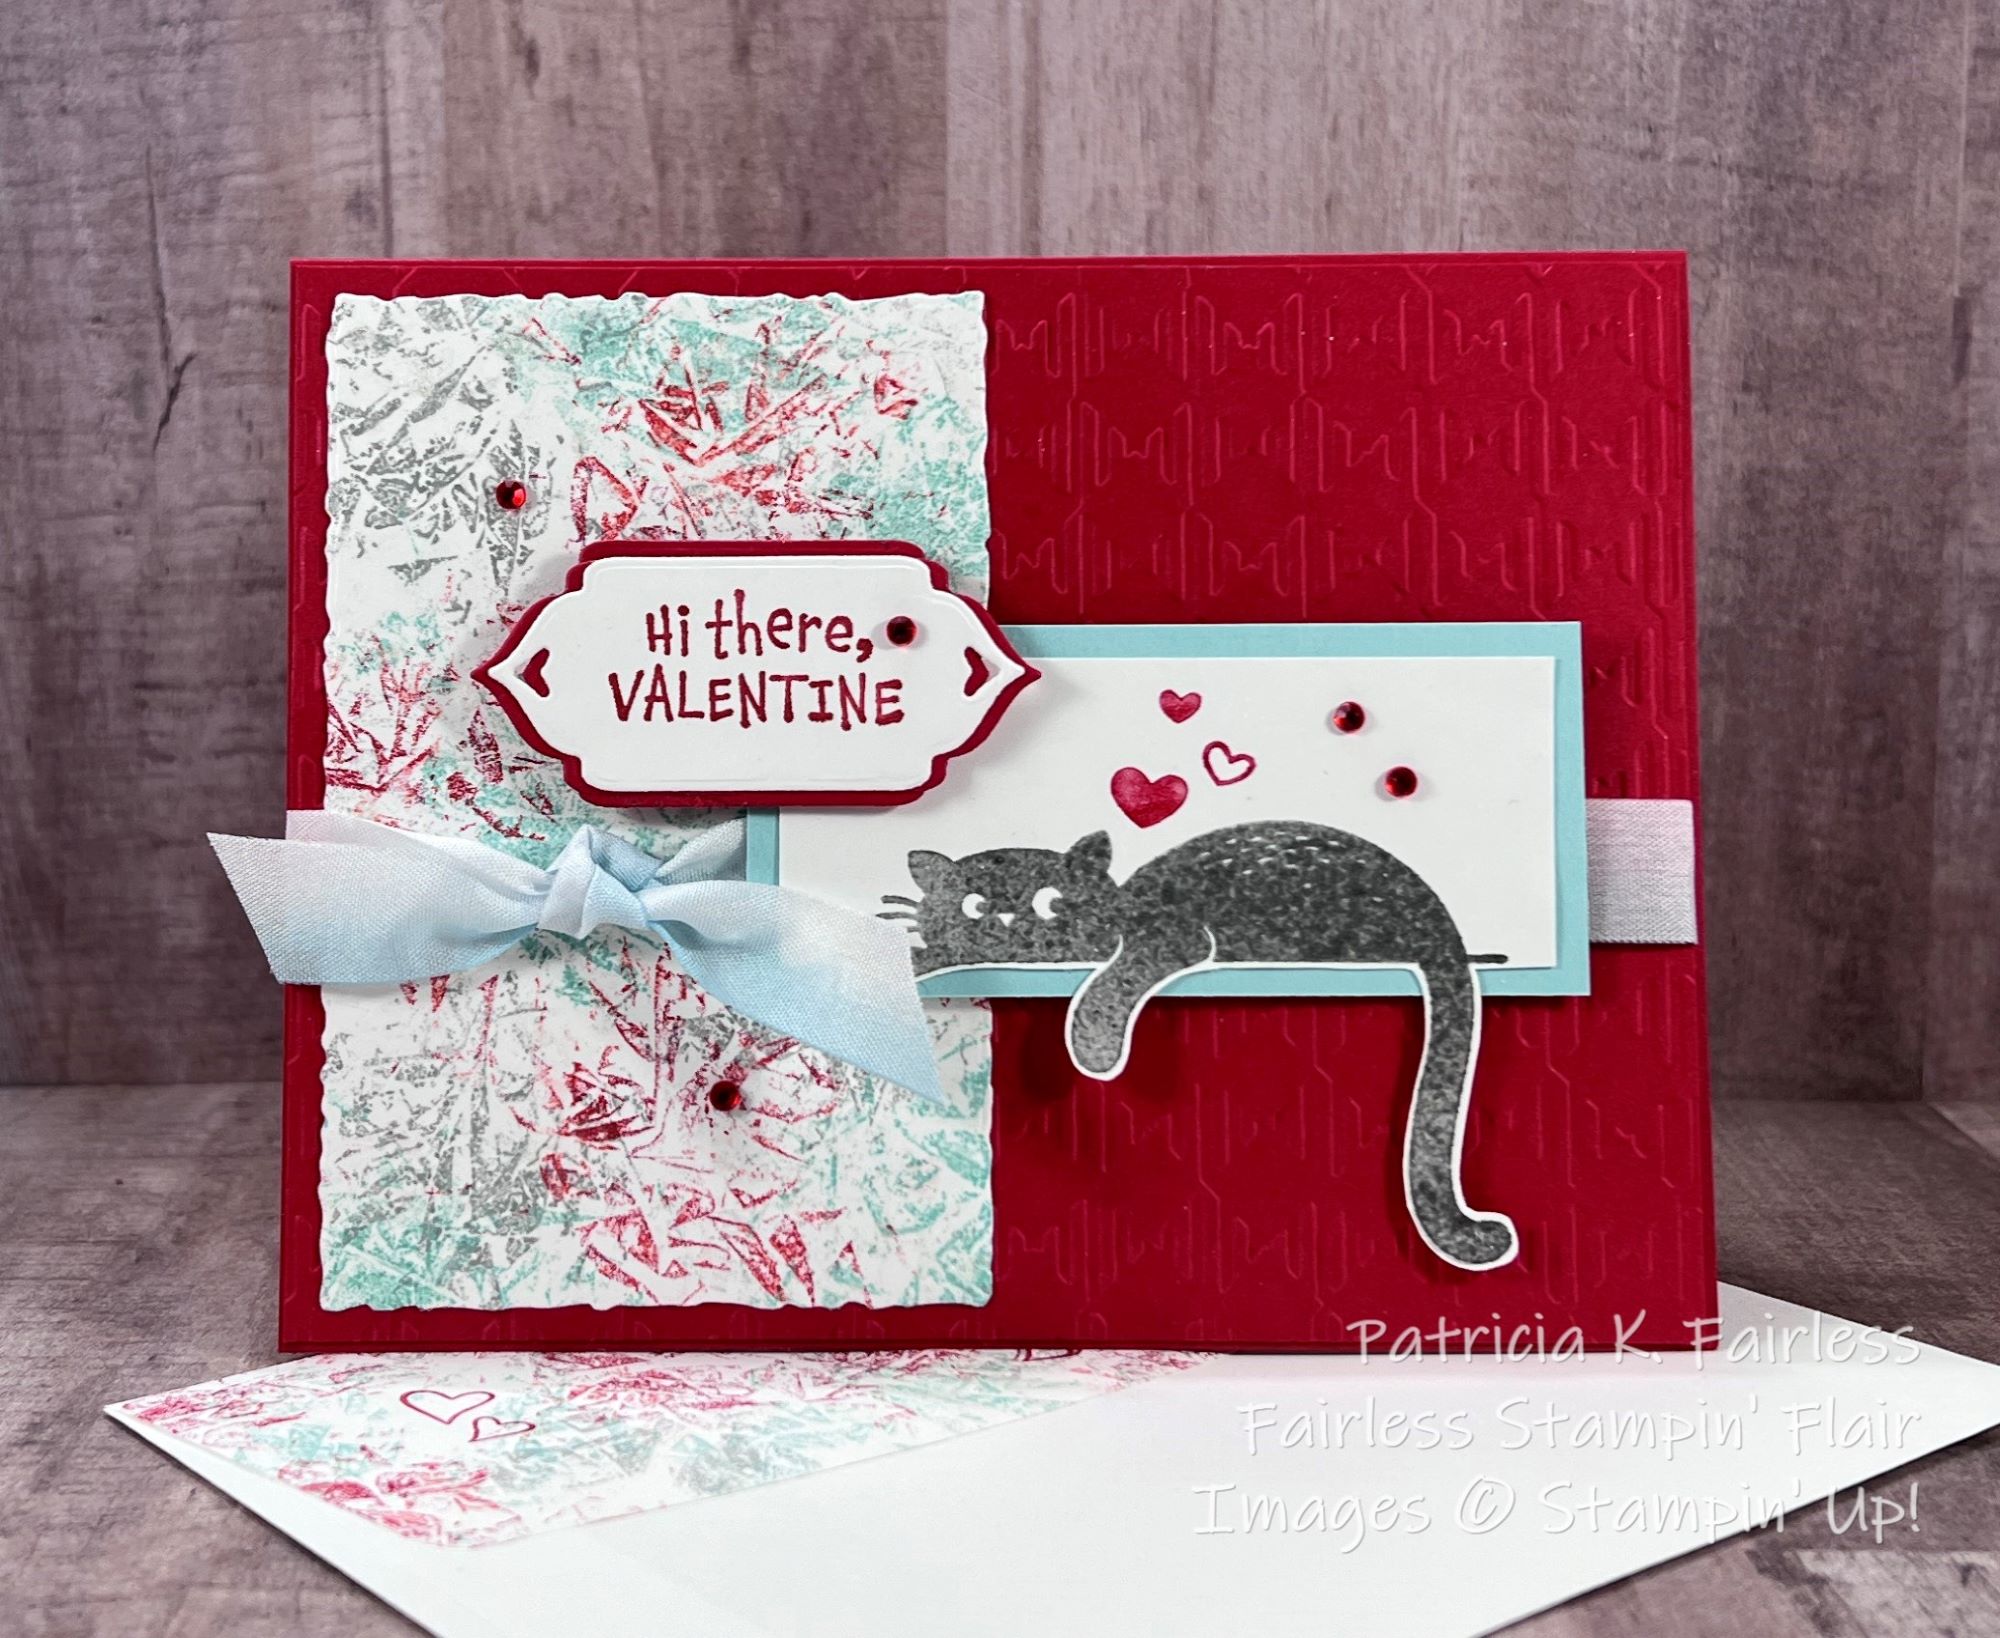
A VALENTINE KITTY

Today I used the 3rd kitty cat from the Love Cats Stamp Set.  This one is sprawled out on a windowsill, a shelf, or the back of the couch -- wherever your imagination wants to put him.  I named him Smoky.  


When my neighbor Coco comes for a visit, she likes to lay on the back of my couch right next to where I am working.  


She can be a chatty little thing, particularly if she isn't getting the attention she wants.


This position doesn't look all that comfortable, but for some reason, she likes it.  It looks like doing those Plank exercises to me!

But I digress.  Back to the card.

The left side of the card uses a long-lost technique that I have revived.  I call it Faux Painting with Plastic Wrap.  I had actually used this technique to paint the walls of my guest bath many years ago.  If you are wondering how I made it, watch this video and you will see just how easy it is.


I also experimented with using the technique on the flap of my envelope, and it worked very well.  Just be sure to slip a piece of scrap paper under the flap before you start.  To keep the Valentine theme going, I also stamped a few little hearts from Country Bouquet on the envelope flap.  You can see them as the envelope peeks out behind the card.


My kitty, Smoky, today was stamped using the Colored Embossing Technique.  I could have simply stamped him directly with Smokey Slate ink, but this is an easy technique to give him a little shine and it seems to enrich his color a bit.  To use the colored embossing technique, follow these simple steps:

  1. Ink your stamp with VersaMark and then ink it with the color of your choice.  Be sure to ink in this order!
  2. Stamp the image on your cardstock.
  3. Heat Emboss the image with clear embossing powder.  

The VersaMark that you have on put on your stamp BEFORE adding the colored ink will cause the embossing powder to stick to the image so you can heat emboss it.

Before adhering Smoky to the Pool Party cardstock mat, I fussy cut around his legs so it looks like he is hanging over the edge of "something".

To decorate the inside of the card I stamped the Valentine sentiment from the Country Bouquet Stamp Set in Real Red ink and then added hearts in Real Red and Pool Party from the Country Bouquet Stamp Set.  This was matted to Pool Party cardstock and then to the inside of the card base.

A FREE tutorial for today's card is available for download at this link.

All Products used are listed below.


Product List

Friday, January 13, 2023

COUNTRY HEART DOUBLE FLIP FOLD

Both cards I have shared this week have been quick and simple cards perfect for beginner stampers.

I would consider today's card better suited to Avid Stampers.  It is not difficult, but there are more steps and definitely more stamping.  A beginner may feel a little overwhelmed.

This is a Double Flip Fun Fold card and uses a Technique called Partial Die Cutting.

Closed Card Front

There are a total of 4 panels on this card that can be decorated as desired.  I thought this was a perfect opportunity to highlight many of the stamps that are included in the Country Bouquet stamp set.  I was also able to use more of the designs that are part of the Country Floral Lane Designer Series Paper Collection.

The Front Flip panel was stamped with the large 2-step Heart.  I stamped the floral portion of the heart with Sweet Sorbet ink and the greenery portion of the heart with Mint Macaron ink.  These are two separate stamps but are very easy to align, so the heart comes together quickly.

Starting to Open

The above image shows the start of the first flip motion in process which occurs when you pull the Sweet Sorbet DSP section to the left.

As you continue to pull the Sweet Sorbet DSP section to the left, you will see the following.

Card Pulled to Fully Open

The inside left panel (2nd panel) is a Gift Card Pocket made with the Country Gingham Designer Series Paper.  I decorated it with a strip of the same DSP as in on the far-right panel and a bit of Sweet Sorbet Metallic Ribbon.

The third panel on the right was decorated with more stamps from the Country Bouquet stamp set.

As you push the DSP floral section of the card to the left, you will reveal the back of the card as shown below.

Card Back when fully closed

This card is beautiful coming and going as every time you make another flip a new panel is revealed.  The fourth and final back panel is decorated with more stamps from the stamp set.  The large lined and striped stamps and the smaller solid Sweet Sorbet heart all coordinate with the Country Bouquet Punch, so stamping and punching makes for quick work.

With all honesty, the most difficult part of this card is deciding how to decorate so many panels.  A portion of each panel is also covered when it is "closed" so you need to pay attention to where you stamp your images.

Because this stamp set includes 6 sentiments that all work wonderfully together, I was able to stamp a unique sentiment on each of my 3 decorated panels.  

My second panel was the gift card holder.  But if you didn't want to use your card for a Gift Card, you could also decorate that panel as desired.

For a tutorial with cutting and scoring templates and step-by-step stamping directions, click on this link.

A complete list of the Products used is shown below.


Product List