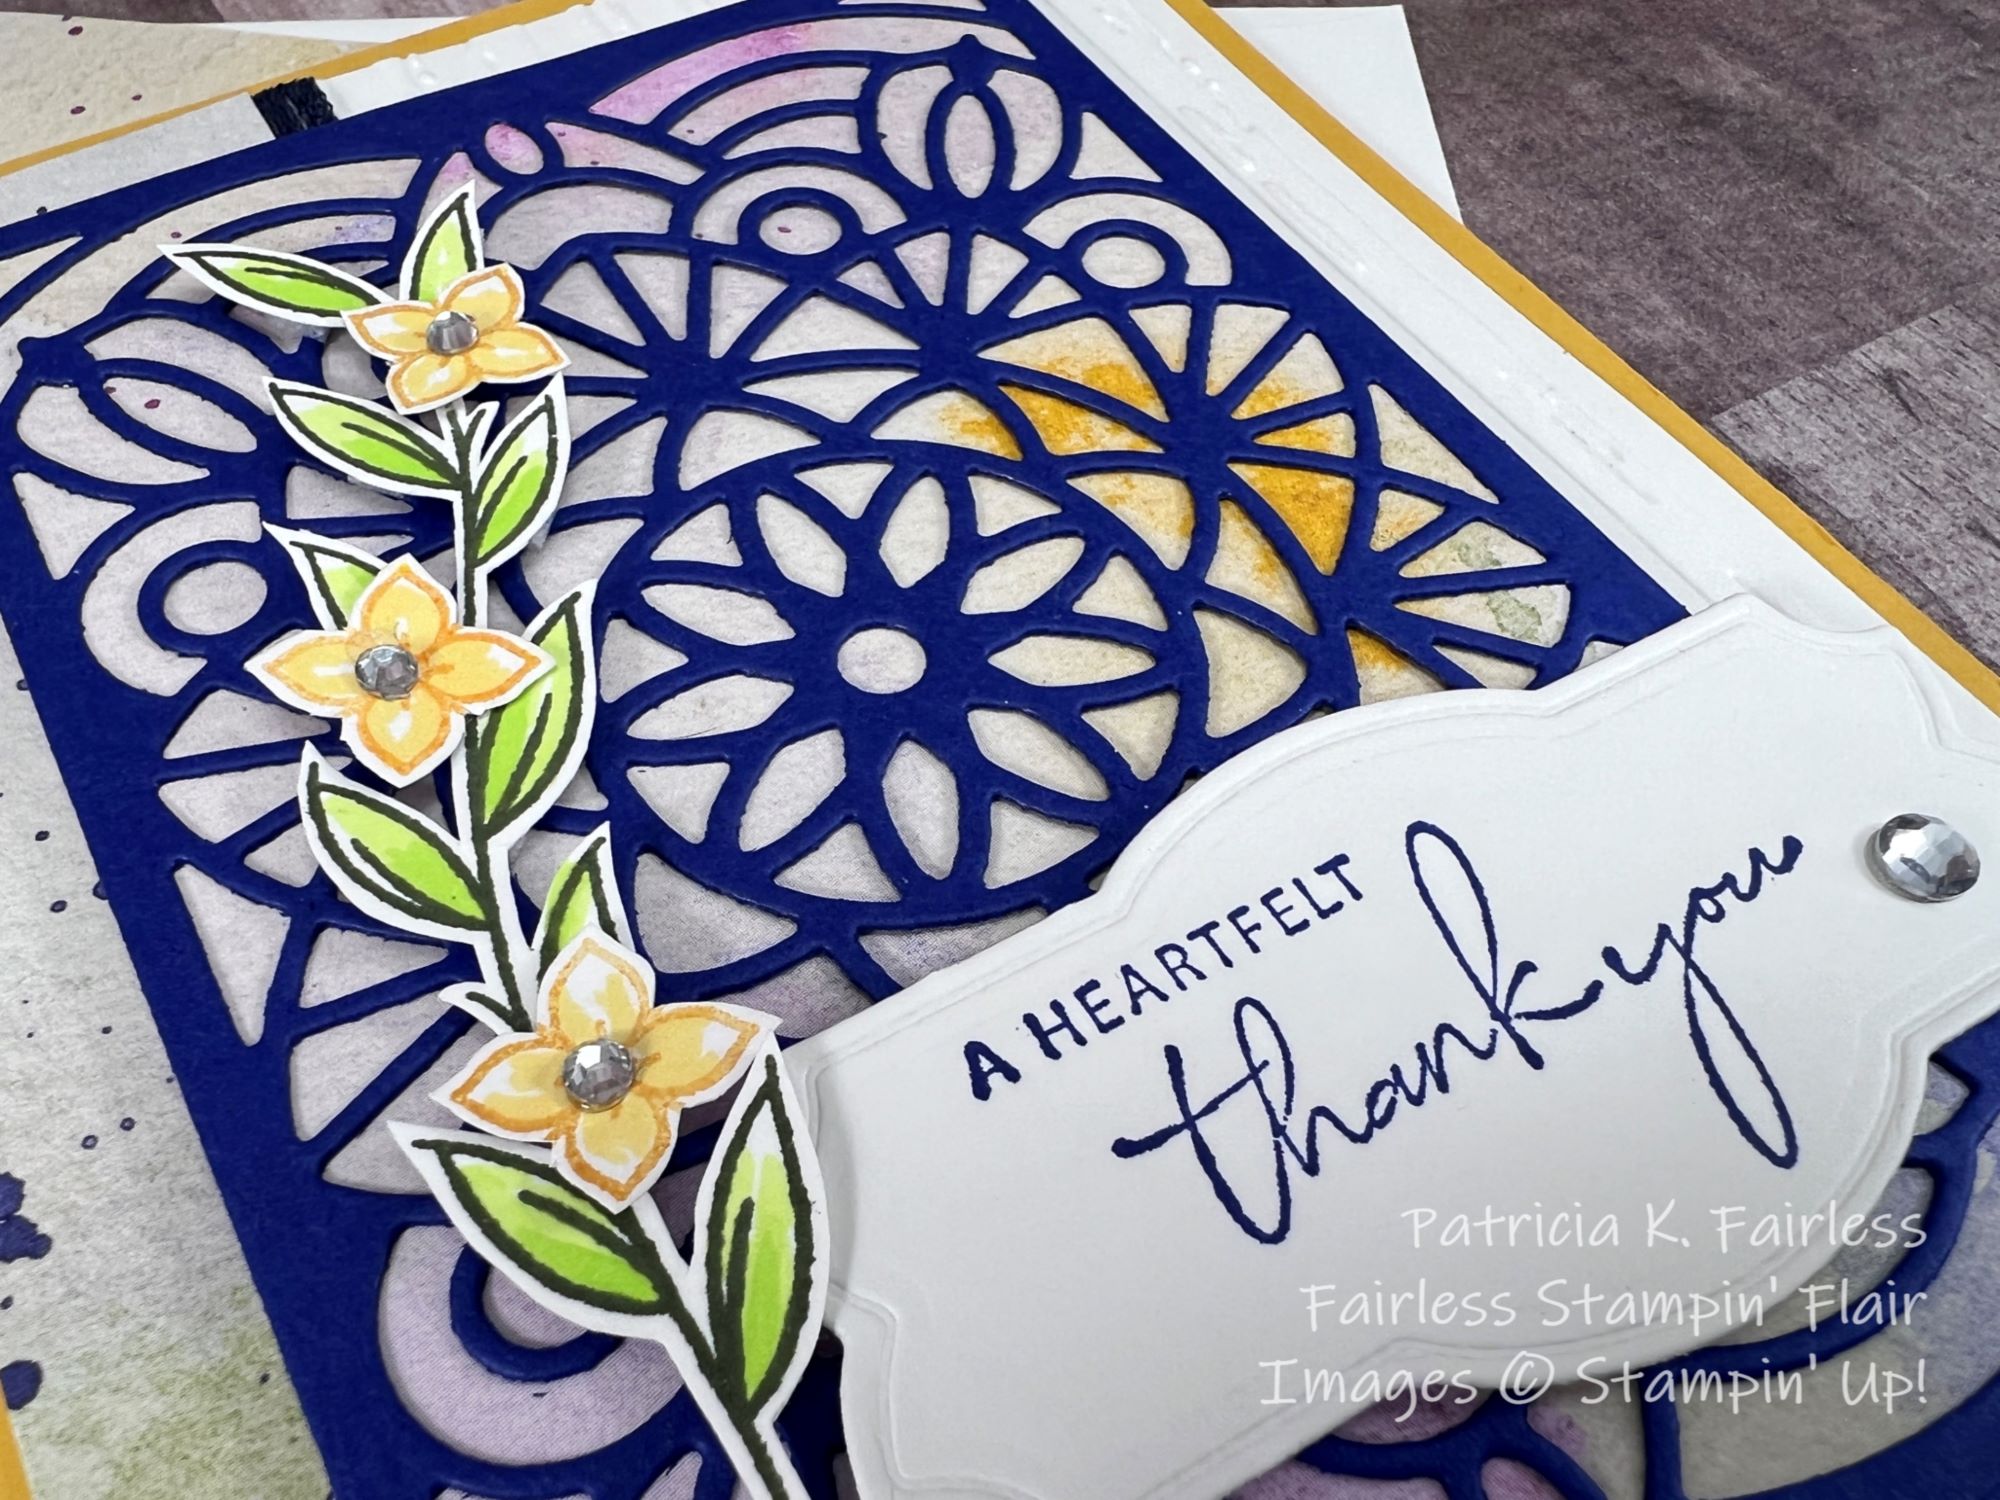
For my last Decorative Border card this week, I have combined the simple leaf border from the set and a Die Cut made with an Artisan Die.
The watercolor background behind the die cut and on the left side of the card front is one of the designs from the Dainty Flowers Designer Series Paper Collection. This beautiful paper is a Sale-A-Bration item that you can choose for FREE when you place a $50 merchandise order between now and the end of February.
I topped the leaf border die with 3 of the small flowers also from the Decorative Borders stamp set. The images were fussy cut and layered over the Starry Sky Die cut with dimensionals.
The sentiment is from Nature's Prints stamp set and was die cut with the Natural Prints dies which are part of the Nature's Prints Bundle found in the 2022-2023 Annual Catalog.
To decorate the inside of the card I used another strip of the pretty designer paper from the Sale-A-Bration Dainty Flowers. I love this paper. Both sides of the paper are so beautiful that it is difficult to choose a side.
Happy Black Friday stamping friends! Are you a shopper? I am not, and I typically avoid the stores on Black Friday! I think it is the perfect day to stay home and stamp!
Today I will share my last card for this week with the Nature's Prints Bundle. I am still working on my Christmas Cards, so today I have used this bundle to create a Christmas Card.
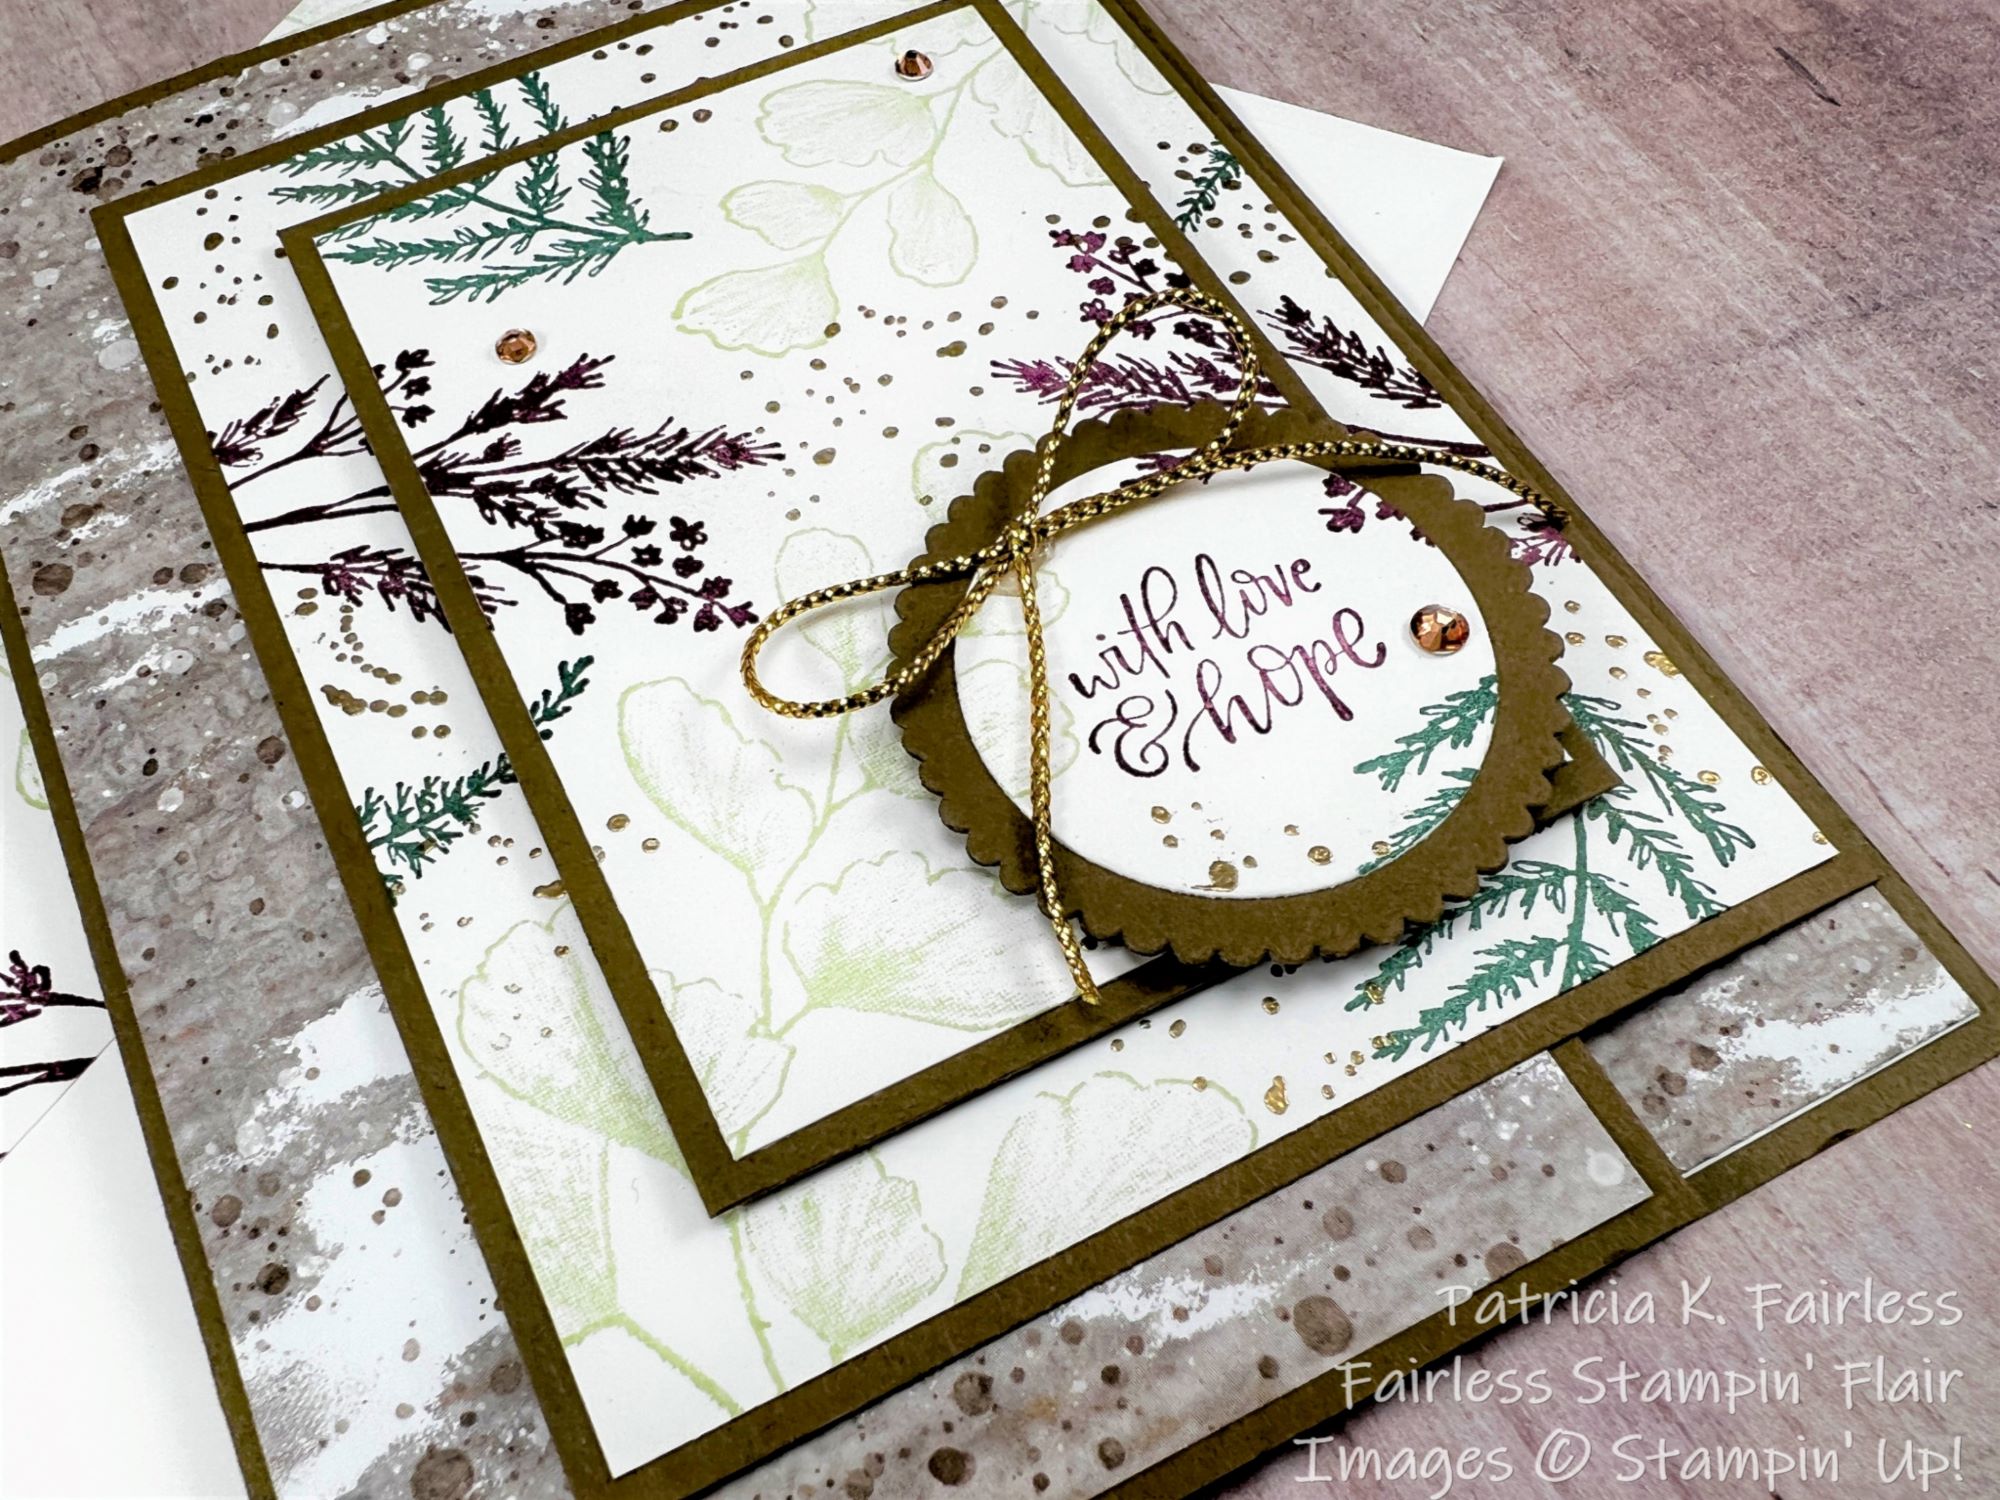
This is a Fun Fold card that is combined with the Triple Time Stamping Technique.
Here is a photo that doesn't show the card all that well, but it shows how the cards two flaps open.
The flap on the right side opens to the right and is slightly shorter than the left flap. The right flap is also made using the Triple Time Stamping Technique.
Have you been watching any of the Connect to Create videos? I am getting so much inspiration from the videos that Kathi, my Connect to Create partner, has been sharing! She shared this Triple Time Stamping Technique several weeks ago and it reminded me that I haven't used this simple technique in a long time.
Would you agree that sometimes we get inspired by something we see, and sometimes we get reminded of something we are familiar with but have forgotten all about? I hope our Connect to Create videos are giving you a bit of both -- inspiration & reminders. If you missed it, here is Kathi's Triple Time Stamping video.
This Nature's Prints Stamp Set seemed like the perfect set to use for Triple Time Stamping.
After cutting my Basic White cardstock layers for the right card front flap, I used some temporary adhesive to hold them in place and then started stamping. Since my card base is made with Soft Suede cardstock to coordinate with the Boughs of Holly Designer Series paper I chose, I was a little uncertain about what colors to use for my stamping. So, I got out my color coach, and it told me that Shaded Spruce, Rich Razzleberry and Soft Seafoam coordinates with Soft Suede. Hmmm... OK, those are probably not the colors I would have selected on my own, but I love how it turned out. That Color Coach is pretty smart!
I thought it still needed a bit of pizzaz, so I used the speckled stamp from Forever Fern to add some gold embossed speckles. As mom would have said, " it just did something to it"! The gold embossing provided that bit of shimmer & shine that the card needed.
After I finished my stamping, I separated all the pieces and matted them to their Soft Suede mats and then reassembled them to the right Soft Suede card front flap.
I have one hint for you when you do Triple Time Stamping. If your sentiment is on one of the layers, stamp your sentiment on that layer before you start stamping the images (my sentiment is on the circle layer). That way you can easily avoid it when you are stamping your images on the Triple Time layers.
On the inside of the card, I added a 1" strip of designer series paper to the right edge. I used the same designer series paper as was used on the left flap. That way, when the card is closed you have a continuous design behind the Triple Time Stamped right flap.
Both sentiments for this card are from the Hope & Peace Stamp Set. If you love Christmas sentiments that reflect the true meaning of what we celebrate at Christmas, this stamp set is one you will want to add to your Christmas collection.
For a free tutorial with all cutting and scoring dimensions, as well as step-by-step directions for this Fun Fold card, you can download a copy at this link.
I decided to use the wreath die from Natural Prints Dies, the coordinating dies in the Nature's Prints Bundle, to make my Thank You card today. Since tomorrow is Thanksgiving, a Thank You Card seemed appropriate.
The Basic White wreath is layered over Vellum that has been embossed with the Fern 3D embossing folders. Dry Embossing Vellum is a technique that has been around awhile and seems to be making a comeback. Kathi Ondus, my Connect to Create partner, reminded us of the technique of a few weeks ago. When you emboss Vellum with an embossing folder it turns the embossed areas white and is really pretty. My photo above doesn't do the technique justice, probably because I backed it with Basic White cardstock, but it is an amazingly simple and stunning technique. If you are not familiar with it check out the video to see some additional examples.
The small Autumn Bouquet that decorates my wreath was made with several of the stamps from Nature's Prints.
The Fern was stamped with Evening Evergreen Ink, the stem behind it was stamped with Cajun Craze and the flower was stamped with Black Memento and colored with Stampin' Blends. All images were die cut with coordinating dies. Two long stems were cut from Gold Foil with other dies from the bundle and tucked into the bouquet to give it a bit of shimmer.
The sentiment was Heat Embossed with Gold Embossing Powder to tie in with the sprigs of gold in the bouquet. The die used for the sentiment is also from the Natural's Prints Dies. After die cutting the sentiment, I die cut a second one from Evening Evergreen cardstock and then cut it in half horizontally and spread it apart a bit to create the small border above and below the sentiment.
The inside of the card was stamped with the same colors as used on the card front and a bouquet was created in the top left and bottom right corners. This still leaves plenty of room for a short personized thank you note.
For more information on the products used, please refer to the Product List below. If you would like additional information on any product, just click on the link which will take you to my Stampin' Up! online store.
I wish you all a very HAPPY THANKSGIVING! I hope you have a wonderful day celebrating with family and friends and remembering all you have to be thankful for! I know I am thankful for each and every one of you!