Showing posts with label Waves of Inspiration Stamp Set. Show all posts

Wednesday, August 9, 2023

IT WAS A SURPRISE!

Last week I was working with a new technique and today's card was the result of an experiment while playing with that technique.

The technique is called Spray & Smash and involves dropping various ink colors on Glossy Cardstock spritzing them with water and then laying another piece of Glossy Cardstock on top of the first one.  That's the "smash" part of the technique.  

Stampin' Up no longer sells Glossy cardstock, but even though I still have some in my stash, I thought I would try Glossy Photo Paper because it is readily available, and for some reason, I have a LOT of it!  The background for this card is actually made with glossy photo paper.


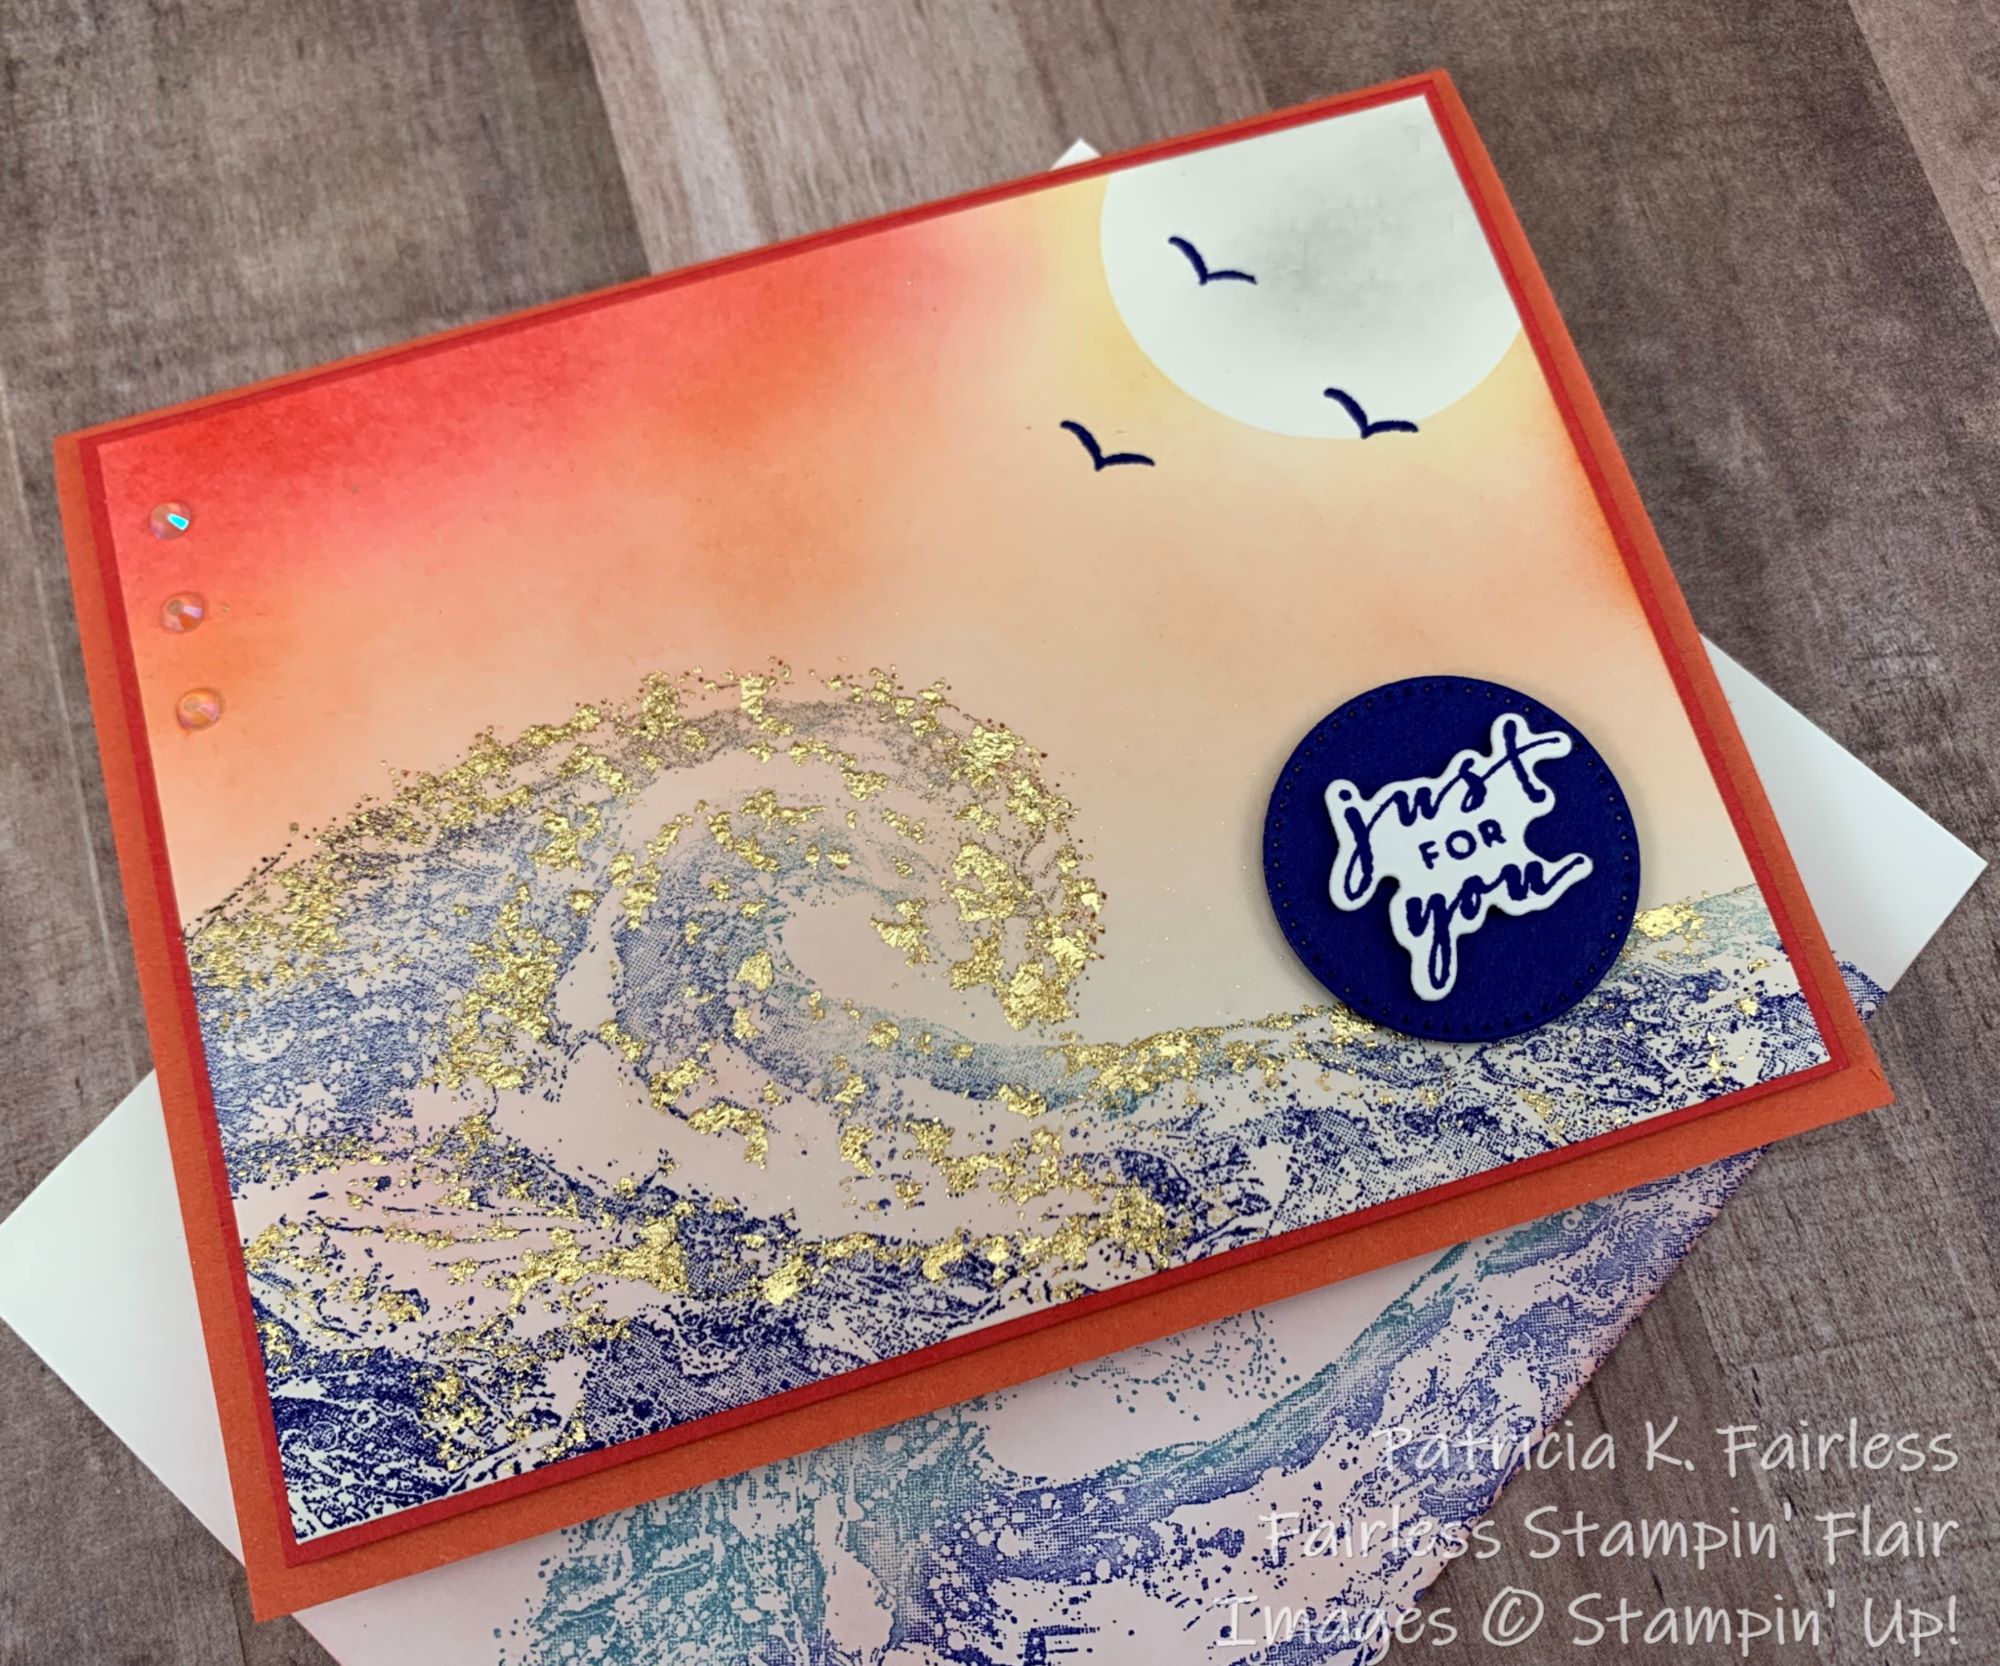
Depending on the amount of water you spritz on your cardstock, when you "smash" the 2nd piece of cardstock on the first, you may still have leftover water on the first piece.  I had lots of water "leftover" on my photo paper, so, I thought, why not "smash" a 2nd piece on the first.  I did, but there was still a lot of water, so I "smashed" another piece over the first.  In my experimenting with this technique, I obviously didn't know how much water to spritz, so probably had way too much water on this attempt.  I think this result was from my 3rd smash, but don't hold me to that.  Where you see "white" I was obviously out of inky water, and at first, I was going to toss this piece in the trash.  But I set it aside to dry and when I went back later to check out all my smashed samples (I had a lot in many colors as it was a bit addicting), I couldn't believe how pretty this piece was!  And to think, I was going to throw it away!


My lesson, never toss anything immediately.  Take a look at it later and you may find a beautiful surprise.

I saw a beautiful ocean wave when I saw my surprise.  So, I die cut a couple of the Wave Dies, one from Basic White cardstock and one from the gorgeous Holographic Specialty Paper and added them to the Technique Sheet.

If you aren't familiar with the Holographic Specialty Paper in the Annual Catalog, check it out in my product list below.  The photo of my card does not do it justice.  As you can imagine, as you move the card around, the color of the Holographic wave changes and it is so pretty!


Since I normally make my technique sheets a little larger than I need for the finished size, I had leftovers to decorate the inside of my card.  My Photo Paper was actually 7" x 5" so I had lots of "leftovers."

Tomorrow on my Fairless Stampin' Flair YouTube Channel, I will be demonstrating the Spray and Smash Technique.  But I will warn you.  It is a bit addicting.  It is also a bit messy, but I don't mind messy when I end up with surprises like this one!

What do you think of this card?  I'd love it if you would leave me a comment and let me know what you think of my surprise.


Product List

Wednesday, June 8, 2022

SUNSET WAVES

Shall we sail into the sunset today?  Some days that sounds like it would be a relaxing and beautiful experience, doesn't it?  Well, probably only if someone else is taking control of the sails and the helm!


As I was making today's card, I wanted to try to capture the reflection of a beautiful sunset in the waves with lots of shimmer and sparkle from a bright moon.

To achieve the sparkle, I used our Gilded Leafing.  I love the effect this embellishment provides, but I'll be honest, it can be messy.  Those gold leaves like to float everywhere!

But can you see the how the moon shines on the gold?  I think it makes it worth the temporary mess!

I used Shimmery White cardstock to make my scene, so that adds some extra shimmer that is more visible in person.  To create the sky, I first masked the moon and then used my Blending Brushes with So Saffron, Blushing Bride, Calypso Coral, and Sweet Sorbet ink to create the sky.


I used my Stamparatus to stamp the wave.  I inked the stamp with my sponge daubers and Starry Sky, Balmy Blue and Blushing Bride ink.  I repeated the stamping multiple times adding color here and there to get the variation of color that I wanted.  After the stamping was complete, I used my Blender Brush to add a little more Blushing Bride color to the white spaces on the waves.

Once I had the blues and pinks to my liking, I inked portions of the wave stamp with VersaMark and stamped the cardstock.  I then heat-embossed with Heat & Stick Powder to adhere the Gilded Leafing.


Do you like the shimmer and sparkle from the Gilded Leafing?

After my scene was complete, I added a sentiment from Charming Sentiments, and placed it on a Starry Sky circle mat die cut with the Stylish Shapes dies. Three birds were stamped on the moon with Starry Sky ink and three Iridescent Gems were added on the upper left for a little more bling.

You may be wondering why my moon has some gray in it.  That's the Man in the Moon!


For the inside of my card and the front of the envelope I repeated the stamping process I used for the wave on the card front to create the waves on the inside and envelope.  The colors are light, so, if necessary, I can easily write a message over my wave.  Or I can use the waves as a perfect "excuse" to keep the message short and only write in the white areas.

What do you think?  Are we sailing into the sunset?

If you would like a detailed tutorial for today's card, you can use this link to download a copy.

Refer to the Product List below for items used to create today's card.

Product List