Showing posts with label masking. Show all posts

Monday, February 10, 2025

LINKED TOGETHER

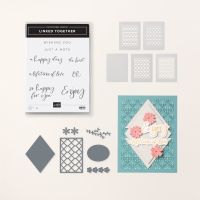
It's a new week so it is time for a new bundle.  This week I will be using the Linked Together Bundle from Stampin' Up!  This bundle is unique in that it not only includes a stamp set and dies, but it also includes Decorative Masks.  Such fun!


The stamps included in the Linked Together stamp set are all sentiments.  Some can be used alone and others are meant to be mixed and matched with each other.  The first thing that drew me to this bundle was the dies.  The die set includes this die that sort of looks like lattice, but there are also a couple of additional dies that are very versatile shapes.  There are also some daisy-type flowers in two different sizes and a couple of leafy stems which are always useful.  Come back on Wednesday to see the additional dies in use.


The set of 5 masks can be layered or used alone.  To create the softly colored ombre background behind the die cut lattice I used one of those masks.  I had "Wedding Card" in mind when I designed this card.  But choose different sentiments and it could easily be any type of card that you needed.


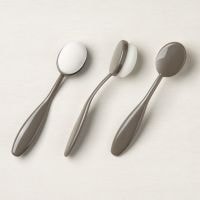
My purpose for this card was to play with the masks and the lattice die.  I quickly learned that the masks do not exactly "match" the pattern of the lattice.  I'll be honest, this kind of bothered me at first, but after I completed the card, I liked that the cross-hatched ombre background I had created using Blending Brushes and Lemon Lolly, Bubble Bath and Lost Lagoon ink did not align with the crosshatch lattice of the die cut.

This card uses only Basic White cardstock.  I chose subtle ink colors for my ombre background, but try brights or regals and the card would have a totally different feel.


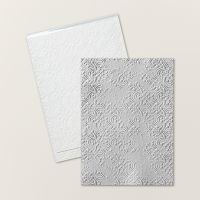
The inside is also all white.  Using the same Distressed Tile embossing folder that was used on the card front I partially embossed about 1" of the left edge of the Basic White message layer.  This provides a little texture and dresses up the inside to coordinate with the front.


A list of the products used is shown below.  Click on any image to learn more about a specific product or to place an order.


Product List

Wednesday, March 20, 2024

TWISTED ENDURING BEAUTY

Are you ready for a new Fun Fold?  I've seen this one somewhere before but had never made it.  Our Coffee Club challenge this month was to make a Fun Fold card that we have not made before, so I decided to try this Twisted Easel Fun Fold.  It was surprisingly easy to make!


This was also the first time I had used the Enduring Beauty Masks.  I thought I might require some practice with the masks so I didn't think much about what colors I chose, so when I surprised myself and was happy with my first attempt, I thought I may as well use it for a card.  

I had used Poppy Parade and Granny Apple Green ink for the flowers/leaves, and then the search began for designer series paper (DSP) that I liked with the bouquet.  That was when the challenge begain with this card.   I didn't want the DSP to detract from the flowers as I wanted them to remain the focal point.  So, the DSP need to be something subtle.  I was looking for a soft color wash but didn't find anything in suitable color.  

I ended up using Pebble Path Tartan Foil for the base of the easel and a design from Softly Stippled DSP for the easel itself.  The Softly Stippled DSP was a Sale-A-Bration item, so is no longer available, but my search did teach me a valuable crafting lesson.  Start with the DSP, and then choose your ink colors based on the colors in the paper.  

I have some leftover 5-1/2" x 5-1/2" square envelopes in my stash, so I made the card 5-1/4" x 5-1/4".  

If you would like a tutorial for this size Twisted Easel card you can download a copy at this link.  The tutorial includes all the cutting and scoring dimensions and step by step directions to make the Fun Fold.  The tutorial also explains how I created the masked flower image.  These masks are extemely intuitive and easy to use.

The "inside" of the card where you can write your message is actually the back side of the easel.

The "stopper" that holds the easel in place for display was made by layering two of the sentiment dies that are part of the Enduring Beauty Bundle.

I hope you enjoyed today's Fun Fold card.  See the Product List below for a complete list of the supplies that I used.

Product List

Monday, August 16, 2021

DAHLIA ON THE DIAG

DELICATE DAHLIAS ON THE DIAG

Thank you for stopping by and visiting my blog today.  It's a new week, so I have a new featured stamp set to explore.  If you love flowers, you are going to love this week's cards!  

Personally, I love looking at flowers, but have a "black" thumb when it comes to taking care of them.  At least with flowers on cards you don't need to worry about watering them too much, watering them not enough, or bugs eating them!

Dahlia on the Diag

This week my posts will feature the Delicate Dahlias stamp set.  The Delicate Dahlias stamp set is a Sale-A-Bration set that is available for free with a $100 order.  

Today's card is a variation of one of my favorite go-to layouts that sports a diagonal stripe across the front of the card.  I call it "The Diag" layout.  

If you are a University of Michigan grad, like I am, you will totally understand the meaning of the Diag.  For those of you that are not familiar with the U of M Campus, "The Diag" is a large open space in the middle of U of M's Central Campus.  It is one of the busiest sites on campus, and it gets is name from the many sidewalks running through it in diagonal directions.  

To create the Diag stripe I placed painter's tape on Basic White cardstock to create a 2-1/4" wide diagonal stripe.  The painter's tape that I used was leftover tape from a home improvement painting project from several years ago.  This particular tape was the worst painter's tape I've ever used as it refused to stick to anything that closely resembled walls, woodwork, windows or anything else that you typically use painter's tape for.  But since I'm pretty thrifty (ok cheap), I didn't throw it away because, you know, I might find a use for it someday.   Well, I finally did!  It works great for masking cardstock.  Since it barely wants to stick to anything, there is little worry about damaging the cardstock when removing it.   Although, I will admit, it stuck better to cardstock than it ever did to anything else, so I still had to be a little careful.

After creating the diagonal masked area for the stripe, I used Blending Brushes to create an ombré effect with Gorgeous Grape, Melon Mambo and Flirty Flamingo ink.

The large Dahlia was stamped with the outline image in Black Memento and then two-step stamped in Melon Mambo with the distINKtive flower stamp.  Next, I masked the flower by stamping the image on a Post-it Note and fussy cutting, and then two-step stamped the leaves in Granny Apple Green.

To finish the card I stamped the smaller flower with Flirty Flamingo, then added a couple of the little leaves, a sentiment and a bow made with the Silver Simply Elegant Trim.  Since you can never have too much bling, I added a rhinestone in the center of each flower and on the sentiment.


In keeping with my mantra of "No Naked Insides", I stamped the large dahlia and leaves in the lower corner on the inside using the same masking technique as I used for the large dahlia on the front.  Fortunately, I thought ahead and saved my mask from the front, so I did not have to fussy cut a second one!  
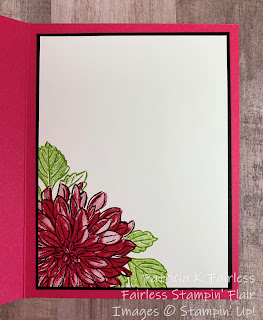

Card Inside


If you would like more information on making this card, there is a free tutorial available.

A complete list of products used to create the card is shown below.

If you would like to receive my Fairless Stampin' Flair Newsletter, please complete the information on the Contact Me tab.  If you do not already have a Stampin' Up! demonstrator, I would love to help you any way I can.  If you have questions, please leave a comment, and I will do my best to answer your questions.


Product List