Friday, July 14, 2023

LET'S RIDE IN A ONE HORSE OPEN SLEIGH

Have you ever ridden in a One Horse Open Sleigh?  I have not, but I always thought it looked like it would be fun -- and romantic.  Maybe I just watch too many Hallmark Christmas movies!


What do dryer sheets and frosty air have in common?  Have you experienced winter days where snow is swirling in the frosty breeze, and it is sparkling like diamonds in the sun?  This is the effect that using the dryer sheet technique over a winter scene on your card gives.  

The technique is very simple, and the only supplies required are a used dryer sheet and some spray adhesive.  If you are a paper crafter that love sparkle, sprinkling just a pinch of optional glitter on the adhesive before you adhere the dryer sheet to the card adds even more sparkle.

Watch this video to see how it's done.


This card uses another scene from the One Horse Open Sleigh 6" x 6" Designer Series Paper.  The most difficult part of this card was deciding which scene to select.


The Horse and Sleigh is one large stamp, so it was easy to stamp the image on Basic White and then color it with Stampin' Blends.  There is a separate die for the runners on the sleigh, so I decided to die cut those and also the trim around the top edge of the sleigh from silver foil (available as an ONLINE EXCLUSIVE).  Then I easily adhered them over the Basic White cardstock.


The white tree was die cut from cardstock with another die from the Horse & Sleigh Dies.  This Suite would be great to mass produce Christmas Cards.  The DSP is going to do most of the work for you as it will give you many diverse backgrounds that work perfectly with the horse & sleigh.  Be sure to check out this DSP in the product list below.  I can also visualize it working wonderfully with snowmen and cute little animals.


Save the pieces that you trim off your 6" x 6" DSP sheet to make the scene fit your 5-1/2" x 4-1/4" card front.  Look how pretty one of the "scraps" looks to decorate the bottom on the inside of the card.  I even had two narrower scraps to decorate the front of my envelope.  Every square inch of the 6" x 6" piece of Designer Series Paper was used!


The products I used are shown in the list below.  Additionally, you need to save your used dryer sheets and get a can of spray adhesive, and you will be all set to go!

Product List

Wednesday, July 12, 2023

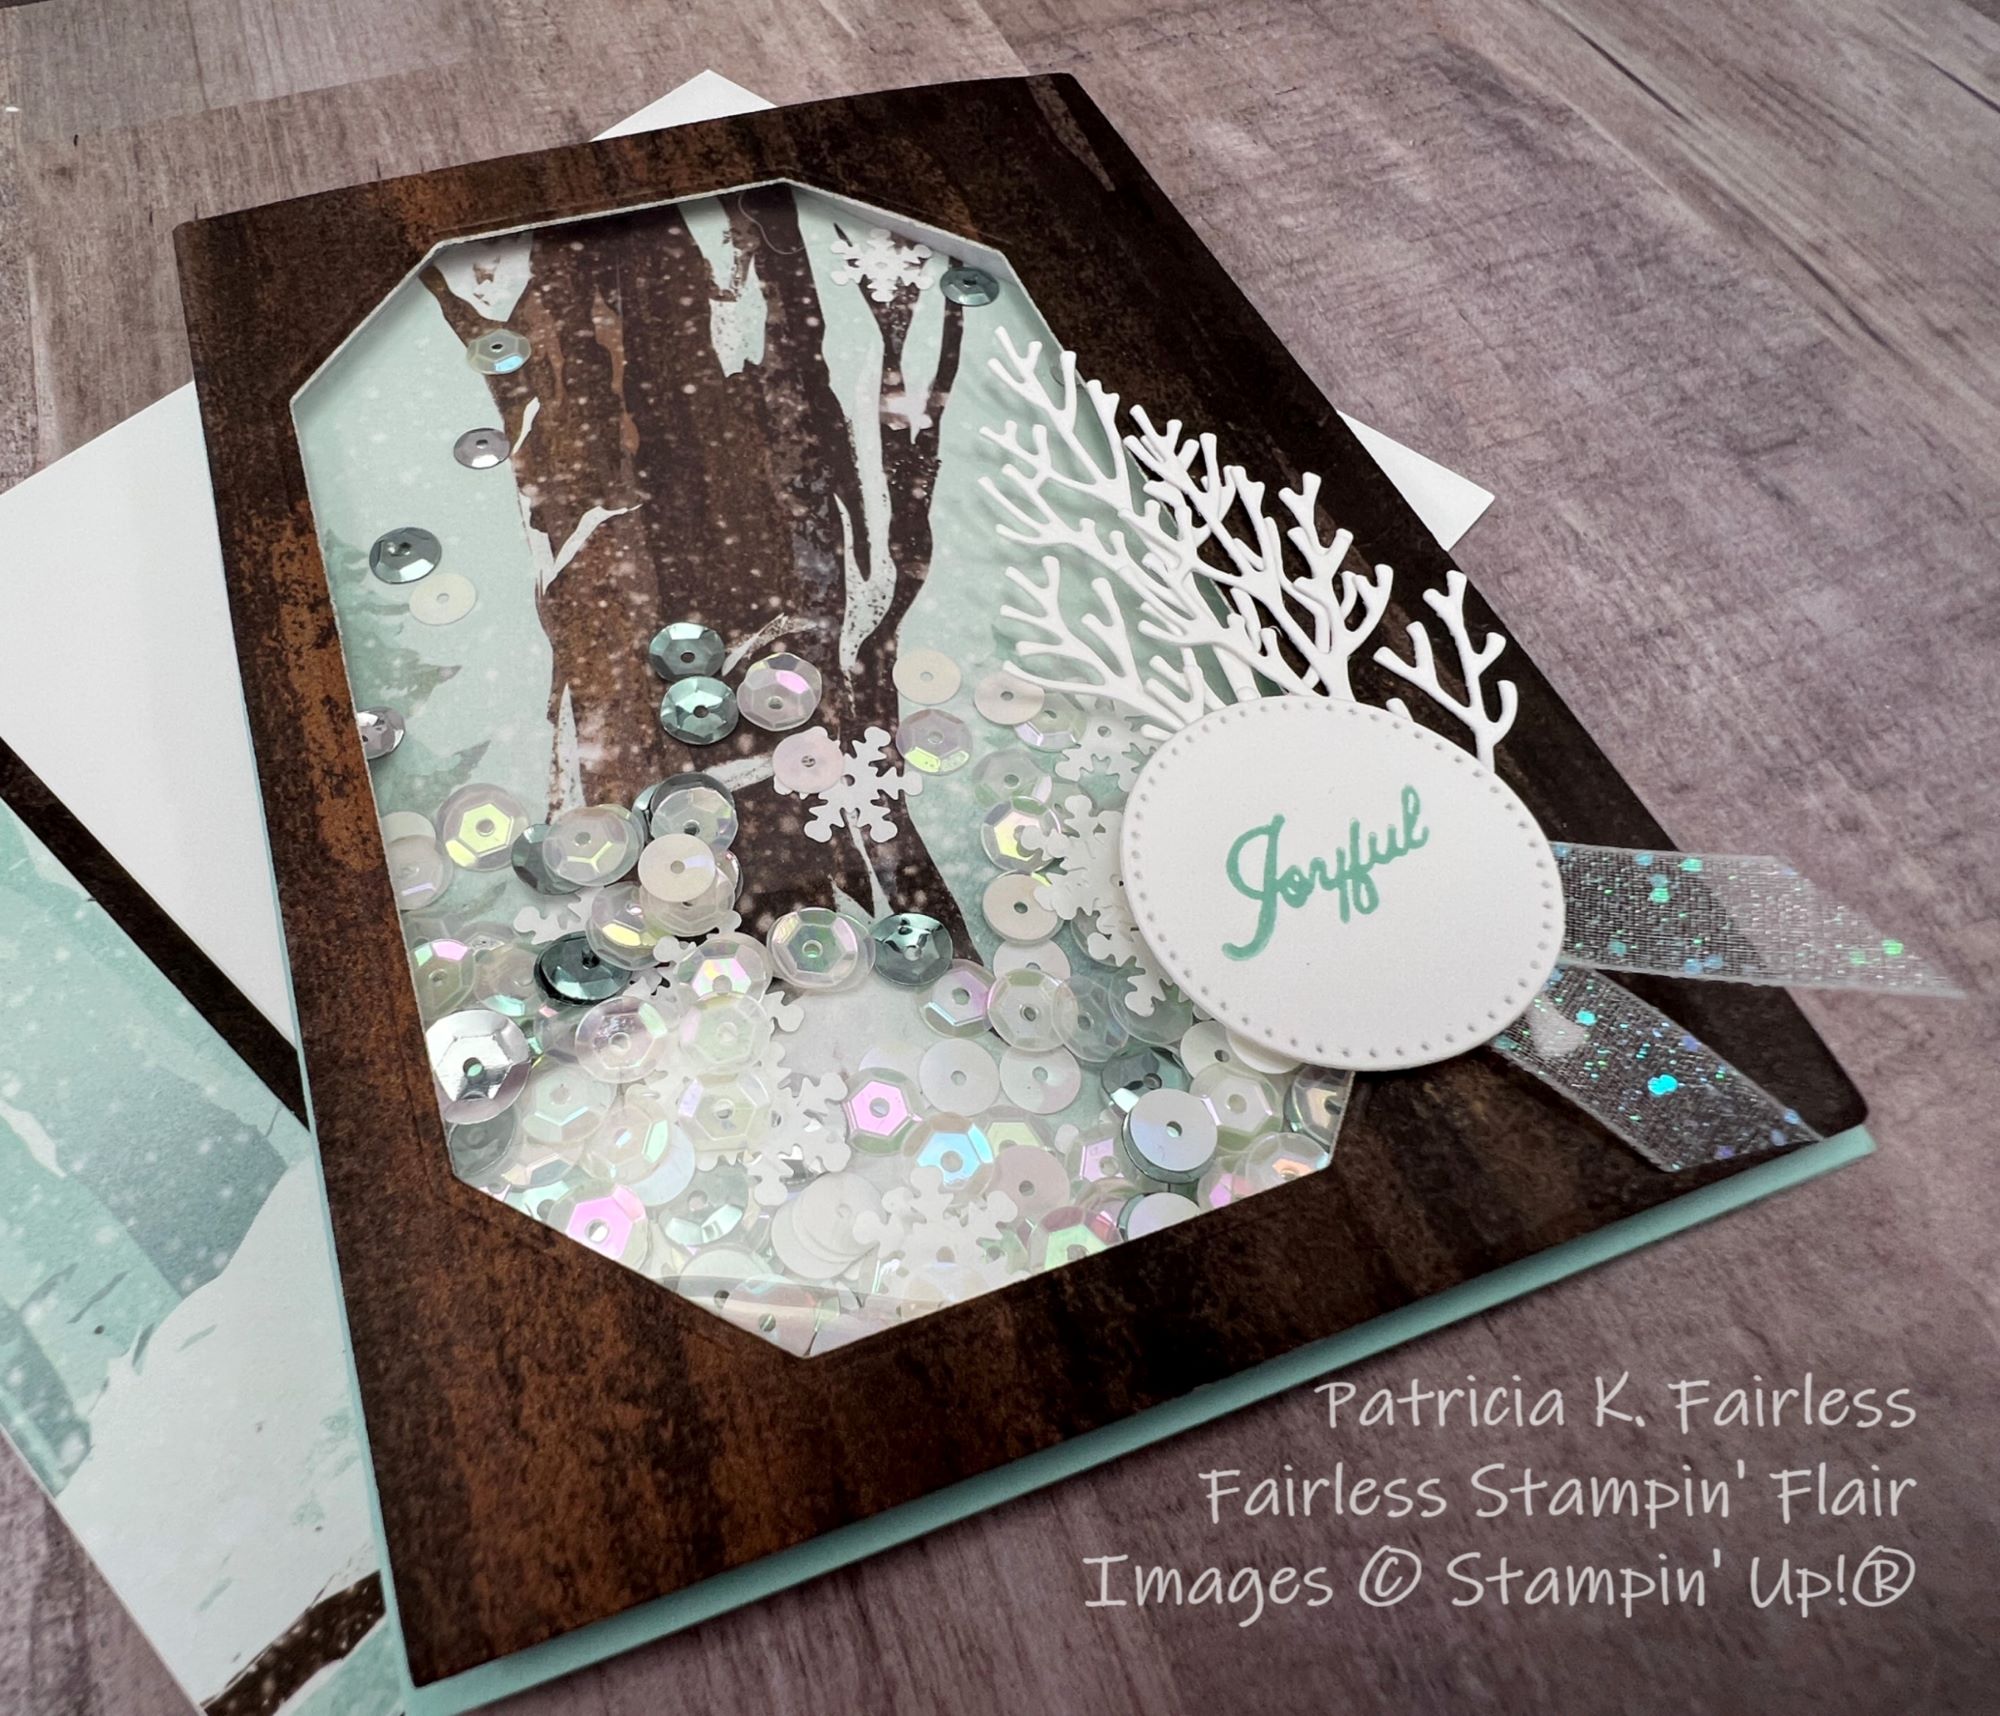
WINTER WINDS SHAKE THE TREES

I recently joined a small stamping group of fellow demonstrators and this month we have a challenge to make a shaker card.  So, I thought I would share my card with you.

I don't make many Shaker Cards because I've never been very happy with those I've attempted, but since I was challenged to do so, I had to try.

I used one of the patterns from the One Horse Open Sleigh designer series paper (DSP) for my background.   There are so many pretty designs that it was difficult to choose which one I wanted to use, but I thought the snowflakes and sequin "confetti" from my stash would be easy to see with this large Early Espresso Tree behind it.  The "window" into my shaker box was cut with the Countryside Corners Dies.


The dark woodgrain designer series paper is another pattern from the One Horse Open Sleigh DSP.

A die cut white tree and the Joyful sentiment, both from the Horse & Sleigh Bundle, highlight the window.  A little snippet of Glittered Organdy Ribbon, currently an ONLINE EXCLUSIVE, keeps the sparkle of the "confetti" going.


To trim the inside of the card I used a leftover piece of the DSP that I had trimmed off from the piece for the card front.  The narrow edge of Early Espresso cardstock draws your eye to that pretty leftover "scrap".


The sentiments are both from the Horse & Sleigh Stamp set, and I love it when Stampin' Up! gives us sentiments that pair together.

Use this link to download a FREE tutorial for today's card.

I used "confetti" I had in my stash for my "snow", but if you don't have any snow-appropriate "confetti, you could use the Loose Silver Sequins from the current catalog.  I've included it on the list before for information.  

Product List

Monday, July 10, 2023

FRIEND IN THE WOODS FOR SIMPLY MONDAY

This week I am featuring the brand new ONE HORSE OPEN SLEIGH Suite Collection.  This suite just became available as an ONLINE EXCLUSIVE last week, and I love it!  The suite includes a stamp set, coordinating dies, snowflake embellishments and GORGEOUS Designer Series Paper.


Today's Simply Monday card features mainly the Designer Series Paper.  The only stamping on this card was the sentiment!

You are definitely going to want to check out the Designer Series Paper (DSP) in the Product List at the end of this post.  The DSP has beautiful winter scenes on one side and small patterns in a variety of colors on the other side.  Honestly, with this paper and a great sentiment set you will be able to make beautiful Christmas cards very quickly.

I used the Nested Essentials and Tailor Made Tags dies to create the layout for this card.  The cute little deer was die cut from one of the DSP patterns with a Nested Essentials Die and the Mossy Meadow background behind him was also cut from the DSP with a Tailor Made Tag Die.  The pretty winter woods in the background is another of the designs from the DSP.


Copper Snowflakes were added to provide just a tiny bit of bling.

The sentiment is from the Horse & Sleigh stamp set and I like how it coordinates with the Happy New Year sentiment for the inside of the card.


To decorate the inside, I added a strip of the same DSP that was used for the vertical strip on the card front.

For a competed tutorial with all cutting dimensions and step-by-step directions you can use this link to download a copy.

Click on the links in the Product List below for more information or to purchase the supplies used.

Product List

Friday, July 7, 2023

EMBRACING TEXTURE

Today's card celebrates the fun of texture.

Texture is always something I like to include in my cards as I feel it makes a card much more interesting.  For example, you can have an all-white card, but if it has many different textures, it is beautiful.  An obvious way to create texture is with embossing folders, but you can also create the appearance of texture with layers, dissimilar materials, or the pattern on Designer Series Paper.  Today's card uses all four methods.

The two Misty Moonlight Designer Series Paper patterns used for the background both provide the appearance of texture.  The Night of Navy and Pecan Pie cardstock pieces behind the Basic White circle are embossed with two different embossing folders.  The stamped flowerpot looks extremely textured, and the Wavy Trim provides a different kind of texture with its jute-like material.  And of course, all the different layers in different shapes and sizes and heights add even more texture.  (Gotta love dimensionals!)

This was a fun card for me to make.  As I added different pieces in different shapes and sizes the card just sort of evolved.  It basically designed itself.

The color of the background DSP is Misty Moonlight, a returning favorite, but as I "built" the card piece by piece, I decided to use Night of Navy for the rectangle and the fern.  I tried Misty Moonlight first, but when I laid a piece of Night of Navy on the card it provided just a tiny bit more contrast and made the elements pop a little more.  What do you think?

Because the background on the card front has an angle, when I cut the DSP for the top section, I had a scrap that was angled.

Being one to not let my scraps go to waste, I decided to use it on the inside of the card.

It carries over that angled design to the inside of the card, and I sort of like it.  What do you think?  Thumbs up or thumbs down?

If you would like a detailed tutorial for this card, you can download a copy at this link.

The products used for the card are listed below.


Product List