I am so excited to share my Paper Kintsugi card with you today. Kintsugi is the Japanese art of repairing broken pottery by mending the cracks with gold, silver, or platinum. The piece is thought to be more beautiful because it has been broken.
This card was my very first attempt at Paper Kintsugi. I chose a designer paper pattern from the Masterfully Made Designer Series Paper because I thought it could possibly be found on an antique piece of pottery.
I shared a video on Learning with Friends yesterday that shows how to do the Paper Kintsugi Technique. I found this to be a really fun technique with many possibilities. Choose a different paper design and you get a totally different look.
You can watch my Learning with Friends video replay below.
After tearing my designer series paper into several pieces, I used Gold Embossing Powder to put it back together -- well sort of.
The embossing powder doesn't really hold the pieces together, but it trims the torn edges to make the "cracks" pretty. The torn pieces are actually attached to the Basic White cardstock used as a mat.
In the end, I'm not sure if this was the best choice of Designer Series Paper for my first attempt. It is very pretty in person, but it doesn't show up as well in photos. I used some different designer series paper patterns in the video, so be sure to watch that to get better views than you can see in the photos.
The sentiments are from the Cheerful Daisies and Happy Labels stamp sets. The front sentiment is embossed on Pretty Peacock cardstock with white embossing powder and then die cut with a die from Cheerful Daisies. A swirl of Simply Elegant Trim was added behind it to compliment the gold Kintsugi embossing.
To decorate the inside of the card I used one of my favorite techniques -- just add a strip of the same DSP.
Recently I started adding a couple of additional layers when I have a dark color card base. I normally used only a 5-1/4" x 4" Basic White layer and add the DSP strip to that single layer. But on today's card I added another layer of Pretty Peacock and then a third layer of Basic White. I varied the size of the layers so not all borders were the same width and I like how that turned out. What do you think? Are the extra layers worth it?
You can download a tutorial with all dimensional information for this card by clicking on this link.
The focal point on this card is made with silk! Just kidding. It is made with the Faux Silk Technique. So, my "silk" is actually tissue paper.
Faux Silk is a fun technique that softens any focal point that you create. To learn how to do it, you can watch a replay of the Technique Video that I shared on my Learning with Friends series a couple of weeks ago on YouTube. In the video I share some tips and tricks on colors and images that work best for this technique.
The colors I used for the focal point on this card were Calypso Coral, Mossy Meadow, and Crushed Curry. These colors are fairly vibrant when used full-strength so when you add the "silk" over the image it is still clearly visible. Very soft pastel colors may not show up well behind the "silk".
The card front and the leaf stem are from Inked Botanicals Designer Series Paper. This particular stem and spiral notebook border die add a ton of texture to your cards. The contrast between the texture from the die cuts and the softness of the "silk" make a nice combination.
Don't forget to think about varying the texture of your elements as you create your cards.
I continued the texture on the inside of my card. When you create a die cut for the card front, hang on to any scraps you may create as they may just have a use on the inside. The Mossy Meadow Border on the left is the scrap from Mossy Meadow die cut strip that was made for the card front.
This little scrap which would have been so easy to just through away helped to carry the design of the card front to the inside. Don't forget about decorating the inside of your cards! The fact that you didn't just leave a "naked" inside will make an impression on the recipients of your cards.
I shared this card on my Learning with Friends video last week where I featured the Double Embossing Technique.
The Basic White element on the card front was made with the Double Embossing Technique. I first embossed the Basic White cardstock with the crosshatch Basics 3D embossing folder (EF), and then embossed the panel a second time with the Splatters EF from the Stripes & Splatters set of embossing folders.
If you are not familiar with this Double Embossing Technique you can watch the replay of the Learning with Friends video.
The top edge was die cut with the spiral ring border die from the Gorgeously Made Bundle.
The front of the Thick Basic White card base was covered with a design from Masterfully Made Designer Series Paper. Two stems were die cut from Berry Burst and Bubble Bath cardstock and then adhered to the card front.
To finish the card a simple THANK YOU from Gorgeously Made stamp set was stamped with Blueberry Bushel ink on Bubble Bath cardstock and die cut with the sentiment die from the bundle. A Blueberry Bushel die cut was also made with the same die and layered behind the Bubble Bath sentiment. It adds just a bit of pop to set off the sentiment.
I was originally going to use the other stem die for the Bubble Bath stem on the card front, but once I laid it on the card front, I didn't really like it. It covered up too much of the pretty DSP. So, being one not to let perfectly good leftovers go to waste, I used a portion of that stem to decorate the inside of the card.
It's a new week, and this week I am using the Masterfully Made Suite Collection. Thanks to the Masterfully Made Designer Series Paper (DSP), this suite is a bright and cheery set full of color. The Gorgeously Made Bundle has beautiful, versatile dies and simple stamps.
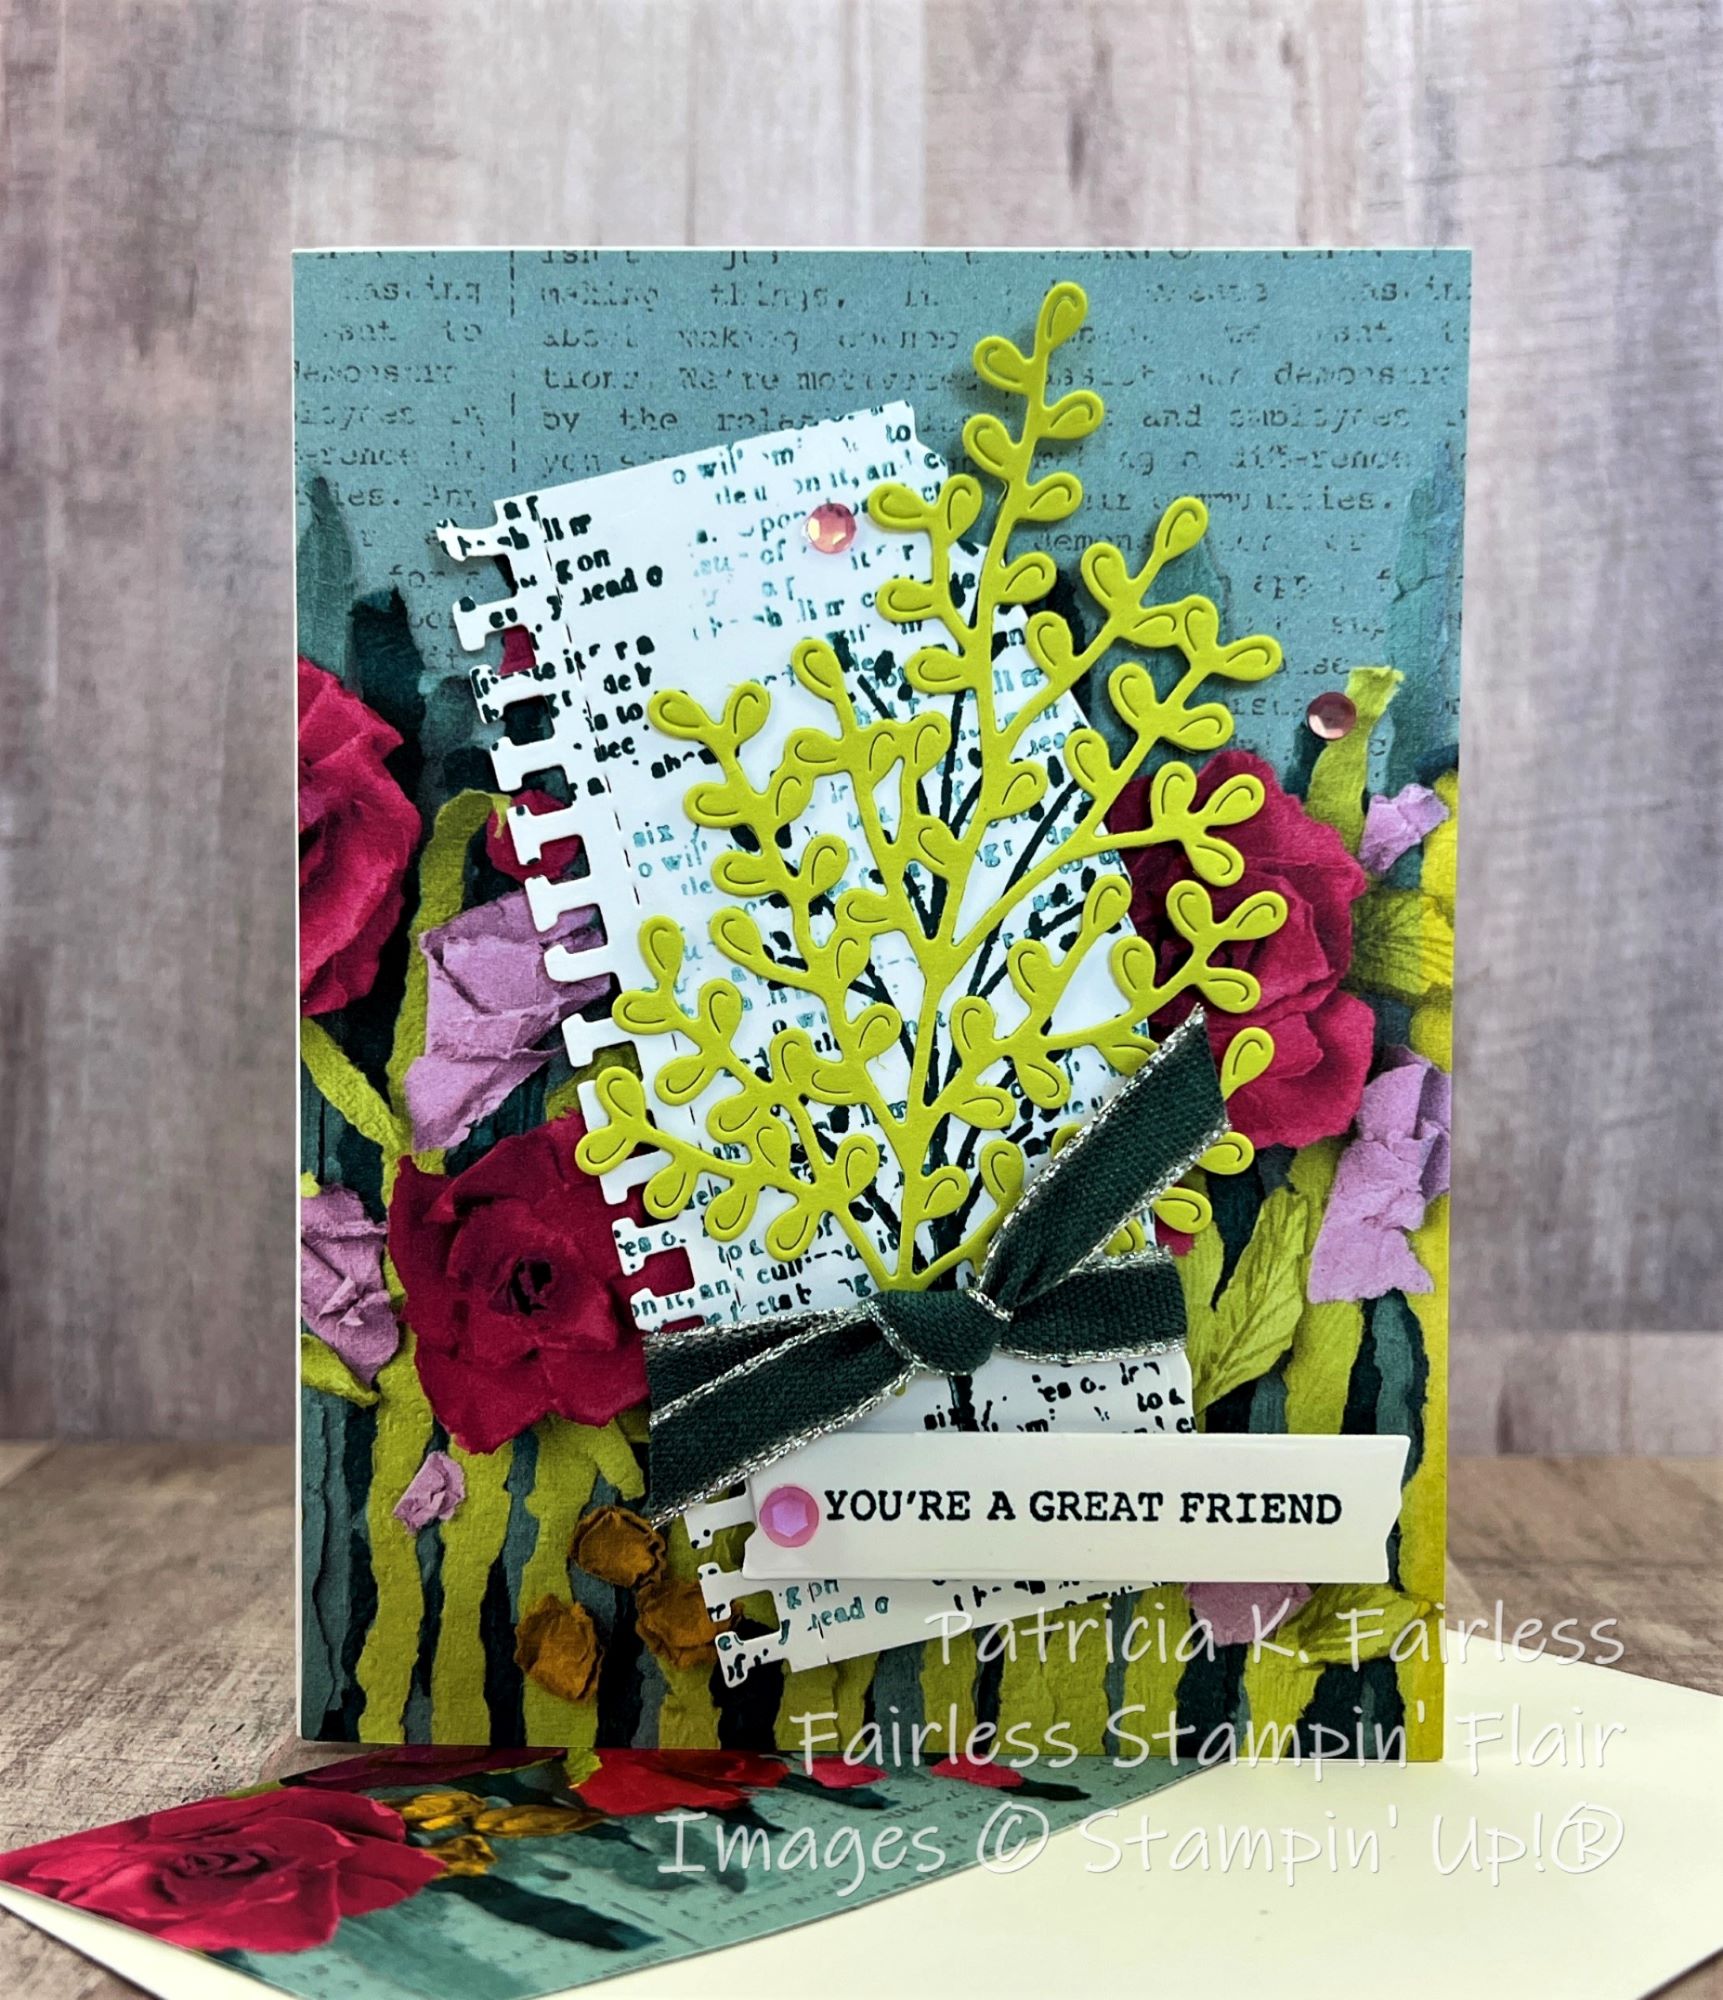
Today's Simply Monday card uses a bit of everything from the suite. The front of the Thick Basic White card base is covered with one of the designs from Masterfully Made DSP. Isn't it colorful?
The Basic White element was cut on both sides with two of the border dies. The Lemon Lime Twist Branch and sentiment use two additional dies.
The great friend sentiment, the stamped Pretty Peacock branch, and the grungy words are from the stamp set.
And the Berry Burst Sequins are from the Adhesive-Backed Sequins Trio included as part of the suite.
The only item on this card that is not part of the Suite is the ribbon. This ribbon is the retired metallic edge white cotton ribbon that I colored with a Dark Pretty Peacock Stampin' Blend to coordinate with the card.
Coloring your ribbon is a good trick to remember. Light colors will obviously color better and truer to the desired end color, but most ribbons can be colored.
To finish the inside of the card I simply added another strip of the same DSP as was used on the card front and then matted the Basic White cardstock to the Lemon Lime Twist.
As long as you have a die cutting machine, this card is extremely quick and easy to make. For a detailed tutorial with step-by-step directions and all cutting dimensions, use this link to download a copy.
A list of the products I used is shown below. Click on any image and it will take you to my Stampin' Up! store where you can find more information or order that product. Purchase the suite and you will have everything you need to make this card and many more beautiful cards. All you will need is some ribbon.