Showing posts with label Masterfully Made Designer Series Paper. Show all posts

Friday, July 21, 2023

MASTERFULLY MADE PAPER KINTSUGI

I am so excited to share my Paper Kintsugi card with you today.  Kintsugi is the Japanese art of repairing broken pottery by mending the cracks with gold, silver, or platinum.  The piece is thought to be more beautiful because it has been broken.


This card was my very first attempt at Paper Kintsugi.  I chose a designer paper pattern from the Masterfully Made Designer Series Paper because I thought it could possibly be found on an antique piece of pottery.

I shared a video on Learning with Friends yesterday that shows how to do the Paper Kintsugi Technique.  I found this to be a really fun technique with many possibilities.  Choose a different paper design and you get a totally different look.

You can watch my Learning with Friends video replay below.

After tearing my designer series paper into several pieces, I used Gold Embossing Powder to put it back together -- well sort of. 

The embossing powder doesn't really hold the pieces together, but it trims the torn edges to make the "cracks" pretty.  The torn pieces are actually attached to the Basic White cardstock used as a mat.


In the end, I'm not sure if this was the best choice of Designer Series Paper for my first attempt.  It is very pretty in person, but it doesn't show up as well in photos.  I used some different designer series paper patterns in the video, so be sure to watch that to get better views than you can see in the photos.

The sentiments are from the Cheerful Daisies and Happy Labels stamp sets.  The front sentiment is embossed on Pretty Peacock cardstock with white embossing powder and then die cut with a die from Cheerful Daisies.  A swirl of Simply Elegant Trim was added behind it to compliment the gold Kintsugi embossing.


To decorate the inside of the card I used one of my favorite techniques -- just add a strip of the same DSP.

Recently I started adding a couple of additional layers when I have a dark color card base.  I normally used only a 5-1/4" x 4" Basic White layer and add the DSP strip to that single layer.  But on today's card I added another layer of Pretty Peacock and then a third layer of Basic White.  I varied the size of the layers so not all borders were the same width and I like how that turned out.  What do you think?  Are the extra layers worth it?

You can download a tutorial with all dimensional information for this card by clicking on this link.

The list of products used is shown below.


Product List

Tuesday, July 18, 2023

GORGEOUSLY MADE WITH DOUBLE EMBOSSING

I shared this card on my Learning with Friends video last week where I featured the Double Embossing Technique.

The Basic White element on the card front was made with the Double Embossing Technique.  I first embossed the Basic White cardstock with the crosshatch Basics 3D embossing folder (EF), and then embossed the panel a second time with the Splatters EF from the Stripes & Splatters set of embossing folders. 

If you are not familiar with this Double Embossing Technique you can watch the replay of the Learning with Friends video.


The top edge was die cut with the spiral ring border die from the Gorgeously Made Bundle.

The front of the Thick Basic White card base was covered with a design from Masterfully Made Designer Series Paper.  Two stems were die cut from Berry Burst and Bubble Bath cardstock and then adhered to the card front.

To finish the card a simple THANK YOU from Gorgeously Made stamp set was stamped with Blueberry Bushel ink on Bubble Bath cardstock and die cut with the sentiment die from the bundle.  A Blueberry Bushel die cut was also made with the same die and layered behind the Bubble Bath sentiment.  It adds just a bit of pop to set off the sentiment.


I was originally going to use the other stem die for the Bubble Bath stem on the card front, but once I laid it on the card front, I didn't really like it.  It covered up too much of the pretty DSP.  So, being one not to let perfectly good leftovers go to waste, I used a portion of that stem to decorate the inside of the card.

For a complete tutorial with step-by-step directions and all cutting and scoring dimensions you can download a free copy at this link.

A list of the products used is shown below.


Product List

Friday, June 16, 2023

TIME FOR A PICNIC

This might be my favorite So Refreshing Card of the week.  The colors just make me happy.


Are you wondering how I made the colorful background behind the picnic blanket?  It looks like I took a bunch of different pieces of designer series paper and tore them into strips and then layered them together, doesn't it?  Well, I certainly could have done that, but I didn't need to because IT WAS DONE FOR ME! 

The Masterfully Made Designer Series Paper (DSP) has a design that already looks like this.  All I needed to do was to tear along the top and bottom of the pale pinkish colors to remove this striped area from the full 12" x 12" sheet, and I had my scrappy piece finished!


For my picnic, I die cut the blanket from Blueberry Bushel and then stamped-up a pitcher and a couple of glasses of lemonade.


It doesn't show well in the photo, but a few of the So Refreshing Dies also include embossing, like the strawberries, leaves and blanket used on this card.  

The sentiment is also from the So Refreshing stamp set.  I stamped it the Berry Burst and then fussy cut it as I wanted to maximize the amount of the colorful DSP that showed.  It is too pretty to cover up!


I added another pitcher and glass of lemonade on the inside of the card and matted the Basic White cardstock to Blueberry Bushed to give the inside a little pizzaz.

In Wednesday's Post I gave you a hint on how to best align the 3 stamps that make up the flower, but no hints are needed to align the lemonade inside the pitcher and glass.  Alignment is super easy and forgiving!

To access a tutorial for today's card, please use this link.  A complete list of the products used is shown at the end of the post.

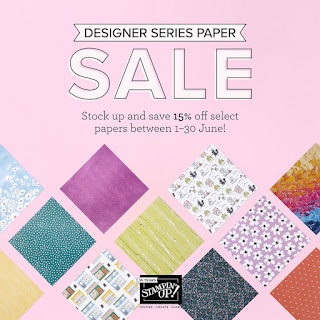
I hope you have enjoyed the So Refreshing cards this week.  Don't forget that through the end of June you can save 15% on many of the beautiful Designer Series Paper Collections we have at Stampin' Up! -- including the Masterfully Made DSP used on today's card.  Click on this link to see a flyer showing all the available DSP that is on sale.


In June, Stampin' Up is also having a wonderful promotion for joining as a demonstrator.  The starter kit is always the best deal in town, but during June it is even more special.  


If you sign up during June, you will be able to choose $155 (USD) worth of product for only $99.  You will also receive free business supplies, and shipping is FREE on your complete Starter Kit.  And don't forget, as long as you remain an active demonstrator, you will receive at least a 20% discount on your purchases.  Join in June and you will remain active at least through the end of October.  Use this link to learn more and to join my team.

If you are interested or have additional questions, please feel free to send me an email at fairlessflair@gmail.com.  I would love to have you join my team.  Here at Fairless Stampin' Flair, our main goal is to have FUN and develop FRIENDSHIPs while sharing our CREATIVITY and learning together.


Product List