Showing posts with label So Refreshing Bundle. Show all posts

Friday, June 16, 2023

TIME FOR A PICNIC

This might be my favorite So Refreshing Card of the week.  The colors just make me happy.


Are you wondering how I made the colorful background behind the picnic blanket?  It looks like I took a bunch of different pieces of designer series paper and tore them into strips and then layered them together, doesn't it?  Well, I certainly could have done that, but I didn't need to because IT WAS DONE FOR ME! 

The Masterfully Made Designer Series Paper (DSP) has a design that already looks like this.  All I needed to do was to tear along the top and bottom of the pale pinkish colors to remove this striped area from the full 12" x 12" sheet, and I had my scrappy piece finished!


For my picnic, I die cut the blanket from Blueberry Bushel and then stamped-up a pitcher and a couple of glasses of lemonade.


It doesn't show well in the photo, but a few of the So Refreshing Dies also include embossing, like the strawberries, leaves and blanket used on this card.  

The sentiment is also from the So Refreshing stamp set.  I stamped it the Berry Burst and then fussy cut it as I wanted to maximize the amount of the colorful DSP that showed.  It is too pretty to cover up!


I added another pitcher and glass of lemonade on the inside of the card and matted the Basic White cardstock to Blueberry Bushed to give the inside a little pizzaz.

In Wednesday's Post I gave you a hint on how to best align the 3 stamps that make up the flower, but no hints are needed to align the lemonade inside the pitcher and glass.  Alignment is super easy and forgiving!

To access a tutorial for today's card, please use this link.  A complete list of the products used is shown at the end of the post.

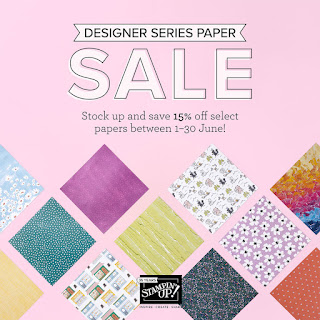
I hope you have enjoyed the So Refreshing cards this week.  Don't forget that through the end of June you can save 15% on many of the beautiful Designer Series Paper Collections we have at Stampin' Up! -- including the Masterfully Made DSP used on today's card.  Click on this link to see a flyer showing all the available DSP that is on sale.


In June, Stampin' Up is also having a wonderful promotion for joining as a demonstrator.  The starter kit is always the best deal in town, but during June it is even more special.  


If you sign up during June, you will be able to choose $155 (USD) worth of product for only $99.  You will also receive free business supplies, and shipping is FREE on your complete Starter Kit.  And don't forget, as long as you remain an active demonstrator, you will receive at least a 20% discount on your purchases.  Join in June and you will remain active at least through the end of October.  Use this link to learn more and to join my team.

If you are interested or have additional questions, please feel free to send me an email at fairlessflair@gmail.com.  I would love to have you join my team.  Here at Fairless Stampin' Flair, our main goal is to have FUN and develop FRIENDSHIPs while sharing our CREATIVITY and learning together.


Product List

Wednesday, June 14, 2023

REFRESHING FLOWERS & PARTIAL EMBOSSING

Today's card features the bouquet of flowers in the So Refreshing Bundle.  


One completed flower stem in the So Refreshing stamp set is made by layering 3 different stamps.  There is the stem, the outline image of the flowers and the solid (fill-in) image of the flowers.

Being totally transparent, it took me a bit of trial and error to figure out how to align these three stamps.  My hint is... Stamp the stem last!

Stamp the outline image of the flowers first.  Then it is extremely easy to align the solid image of the flowers within the outline image.  For my two stems I used Lemon Lolly and Calypso Coral.  The outline image was stamped with full-strength ink and the solid image was stamped with the same color stamped-off ink.

Once I had my flowers it was easy to see where to align the stem.  When I stamped the stem first, I had a more challenging time figuring out where to stamp the flowers.


A few weeks ago, Kathi Ondus, my good friend and Connect to Create Collaborator, shared a technique that has been extremely popular on our YouTube channels.  It is called Partial Embossing.  In one of her cards, she used two different embossing folders to emboss the upper and lower portion of the card front.  I had not used this technique before, so decided to try it on today's card.  The two sections are separated by a non-embossed area where the sentiment can be stamped.  She then used the Simply Scored Tool to emboss a straight line across the upper and lower edges of the non-embossed area.  Look closely and you can see that embossed line in the above photo.  I love how that finishes off the look.  As mom would have said, "It just does something to it".

If you have not seen the Connect to Create video that demonstrates the Partial Embossing Technique, please take a look.  You are going to love this technique!

To decorate the inside of my card I simply stamped another of the flower stems in Calypso Coral and added a sentiment from the Something Fancy stamp set.


If you would like a tutorial for today's card, you can download a free copy at this link.

A complete list of the Products used is shown below.  For additional information or to purchase any of the products, just click on the image and it will take you to my Stampin' Store.


Product List

Monday, June 12, 2023

SO REFRESHING FOR SIMPLY MONDAY

This week I will share projects made with the So Refreshing Bundle.  How many of you enjoy a nice ice-cold glass of lemonade on a sizzling summer day?


My personal favorite is pink lemonade.  So, today I made a pitcher of Flirty Flamingo Lemonade just for you.

The blanket for our picnic was woven from the Hello, Irresistible Designer Series Paper and it was easily die cut with the fun die from So Refreshing Dies.


I even brought a bouquet of coordinating Flirty Flamingo flowers for our picnic.  Aren't they pretty?

A bit of stitched whimsy was added to the background with a Stitched with Whimsy die before a hint of blue sky was added with a Blending Brush and Boho Blue ink.


This card may look like it has lots of details for a Simply Monday card, but as long as you have a Stampin' Cut & Emboss Machine (or another die cutting machine), it is an amazingly easy card to put together.  The two-step stamps in the So Refreshing stamp set make creating these images simple.

For the inside of the card, I simply added a strip of Hello, Irresistible Designer Series Paper (DSP) matted to a strip of Petal Pink.  And the good news is that during June this beautiful ON-LINE Exclusive DSP is on sale for 15% off.


There is no simpler way to decorate the inside of a card or an envelope flap than to add a bit of DSP!

If you would like a tutorial with all the cutting and scoring dimensions as well as step-by-step assembly instructions, you can download a FREE copy at this link.

Refer to the list below to see the minimal number of products used on this card.


Product List