Showing posts with label Expressions in Ink Ephemera Pack. Show all posts

Friday, April 8, 2022

SCRAPPY PRIZED PEONY

Today I have another Easter Card to share.  I'm slowly working on building up my Easter Card supply.  Good thing I don't need too many, and thankfully Easter comes a little later this year!
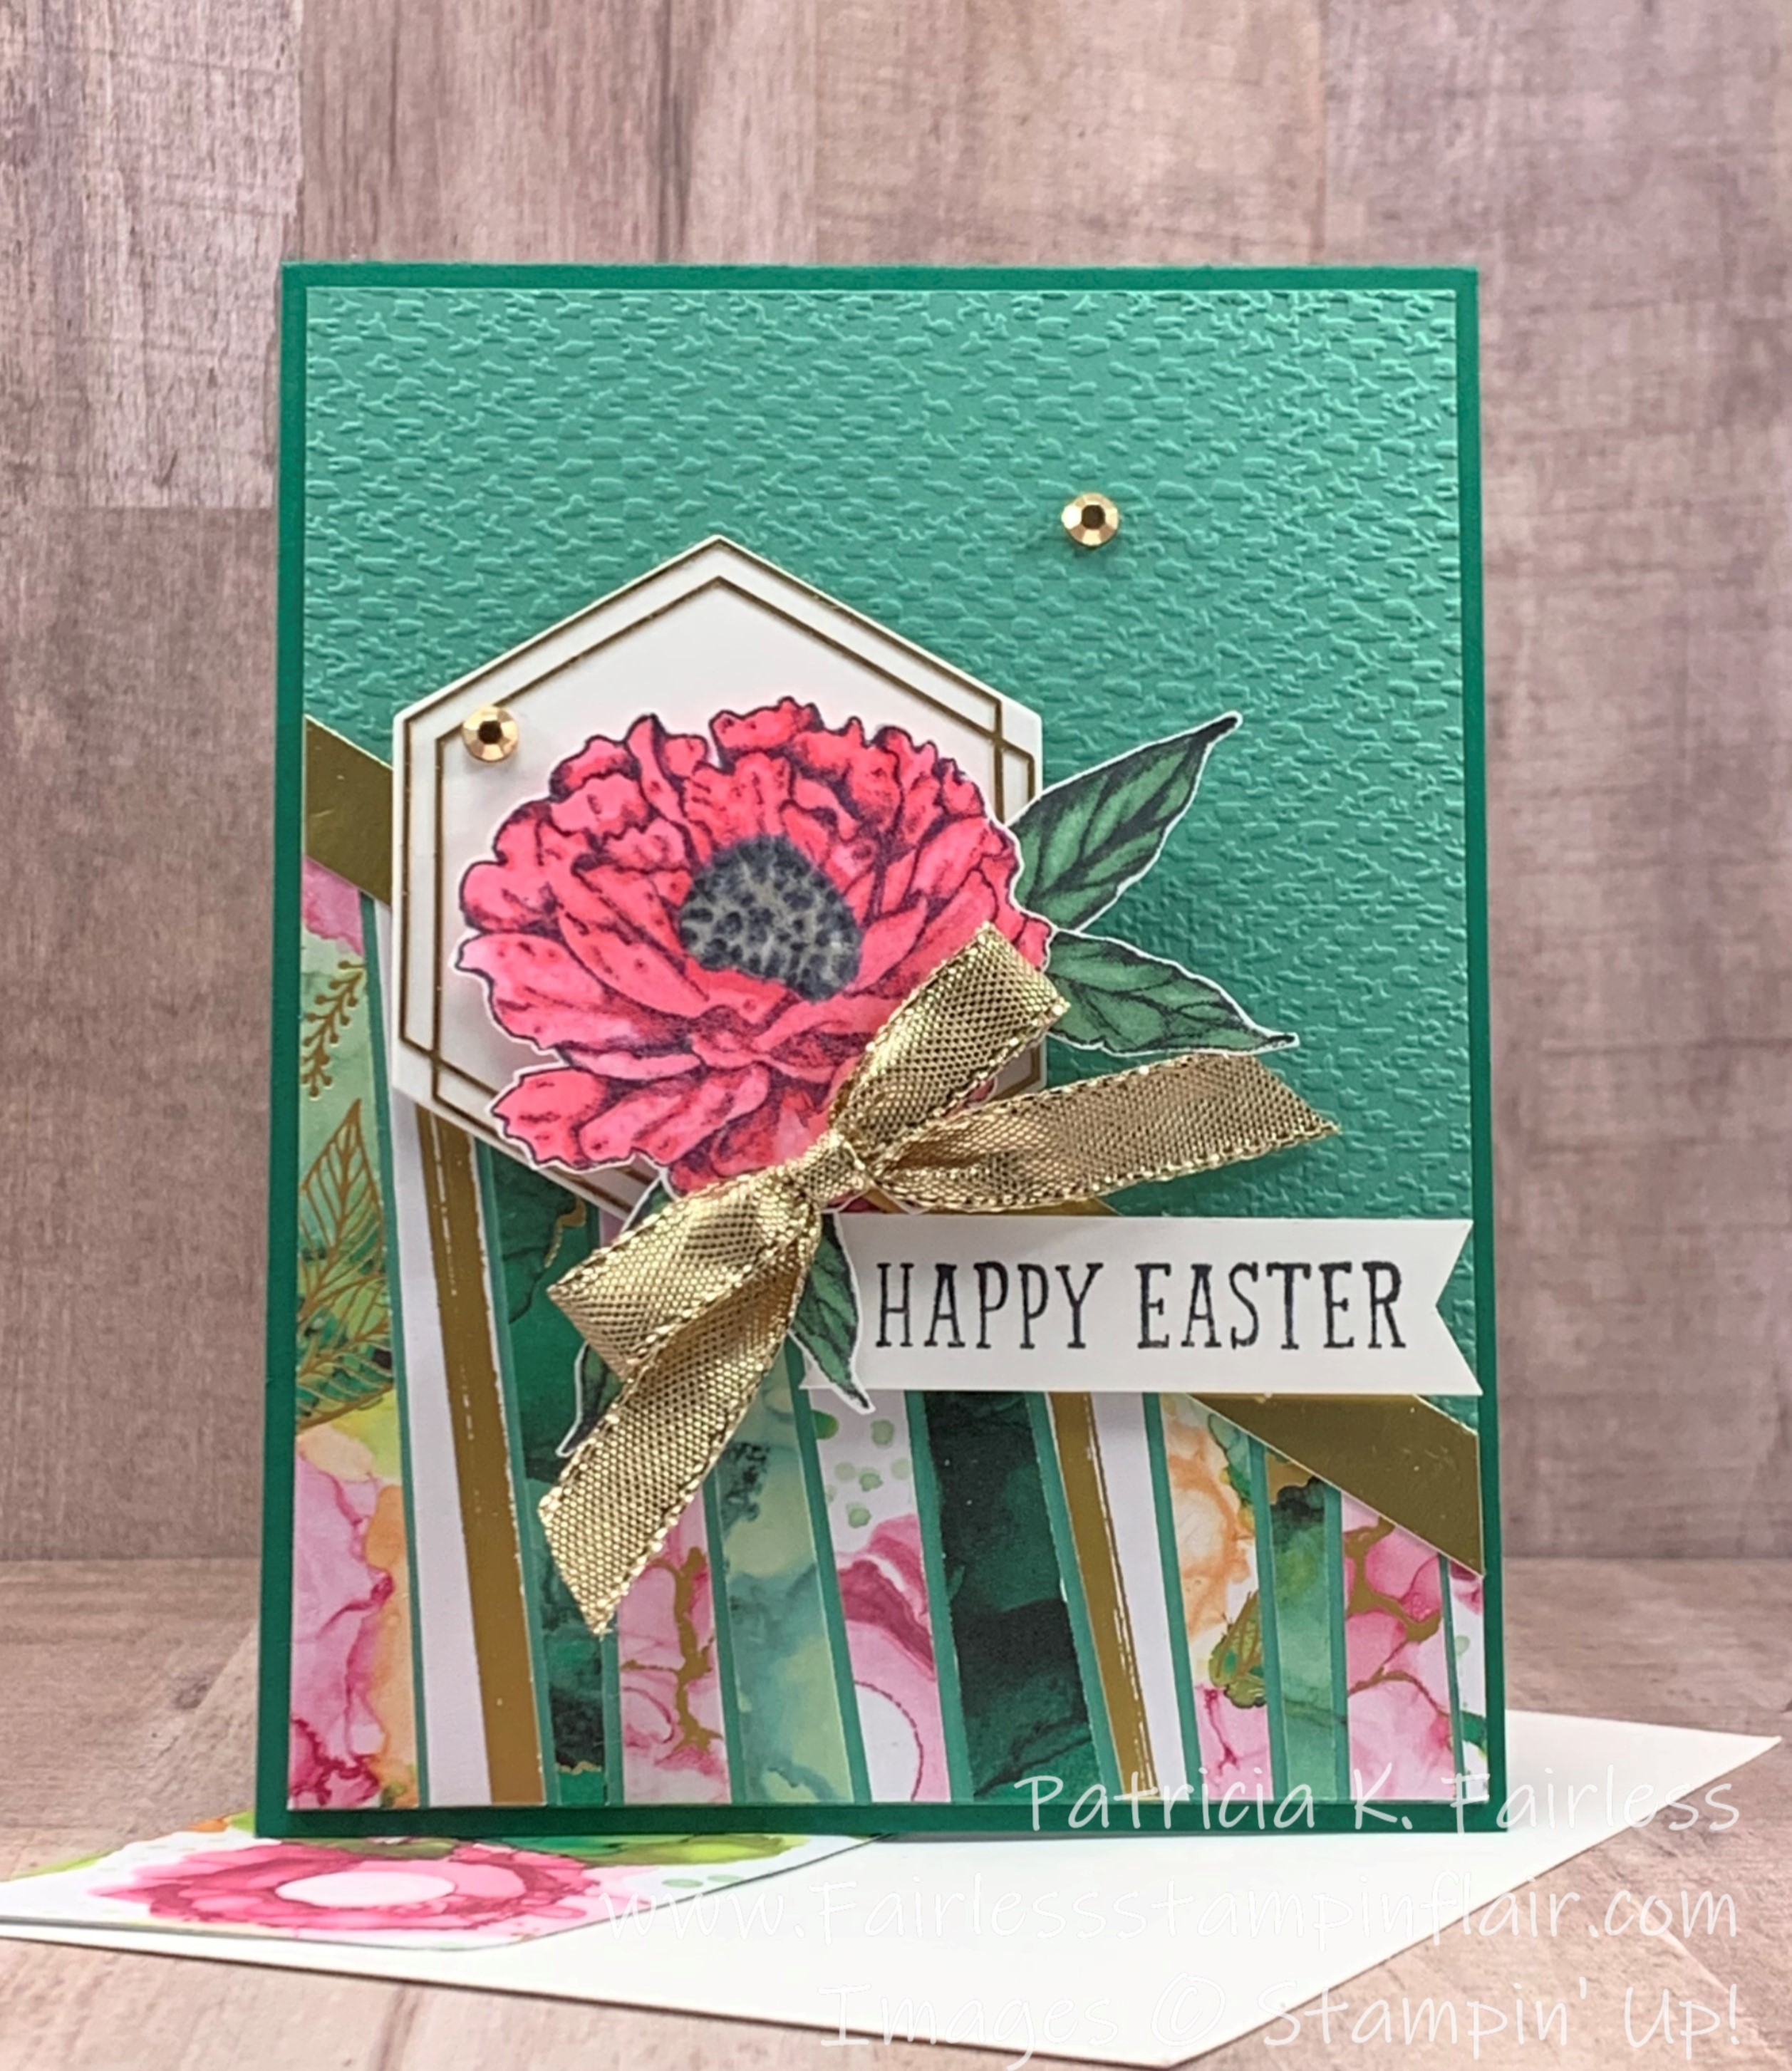


I used the Scrappy Strip Technique again for this card.  I first used this Technique on a Card back in February.  Check it out!  They don't look anything alike!  This is such a terrific way to use up scraps of cardstock.  Today I used scraps from Expressions in Ink Designer Series Paper.  This beautiful paper is retiring soon, so rather than hoard it I thought I would use some of it for my Easter cards.


The Hexagon Shape that I used as the backdrop for my flower was made with the Beautiful Shapes Dies from the Jan-June 2022 Mini Catalog.  The gold trim around the hexagon is from the Expressions in Ink Ephemera Pack and it fits the largest Hexagon Die perfectly.

The flower used on today's card is the medium sized flower from Prized Peony.  It was colored with Polished Pink Stamping Blends and the leaves were colored with Just Jade Blends.  I first colored the flower center with Gray Granite Stampin' Blends, but then added just a little bit of strategically placed Basic Black to deepen the color.

I embossed the Just Jade background on the card front with the Tasteful Textiles 3D Embossing Folder.  This embossing folder is on the LAST CHANCE LIST.  It has been my go-to embossing folder whenever I wanted just a little texture, but not so much texture that it took away from the card.  I am certainly going to miss this one!


When I used the Scrappy Strip Technique, I found that I like to make the piece larger than required.  Not only does trimming the piece down to the final size help to clean up the edges of the main piece, but if you plan ahead, you can have a large enough "scrap" to use as a trim piece somewhere else.  I made the piece for my card front about 1" taller than I needed so I ended up with a nice clean 3/4" strip to use on the inside of my card.  Pretty, right?

My sentiments are from a very old, retired Easter Stamp Set called Indescribable Gift.  As I mentioned on Monday, I discovered I don't have any current Easter sentiment stamps, so I went to my retired stash and found a couple.  I have a tough time getting rid of sentiment stamp sets, and this time I'm really glad I had a couple retired Easter sets to fall back on!

If you would like more details on how to make this card, you can download a FREE TUTORIAL using this link.

Also be sure to check out the LAST CHANCE LIST as some of the products used today are soon going to be gone forever!


The best way to see the most up-to-date Last Chance List is to use this link.  Items on the list are only available while supplies last and some items are already selling out. This link will take you to my Demonstrator store.  Once there click on the Last Chance Banner and you will be able to see pictures and information for all LAST CHANCE items that are still available.

Below is a list of current products used for today's card.


Product List

Wednesday, January 19, 2022

EDEN'S GARDEN - ON THE DIAG

Today the border die in the Eden Dies set was speaking to me to use it to decorate the edge of one of my favorite layouts -- which I call "On the DIAG".  You probably need to be a Michigan Wolverine graduate to appreciate the name.  The DIAG is green space on the University of Michigan campus where several walkways run across it on the diagonal.  It is a place where events are held and friends gather.  This diagonal layout is one of my favorites, and it reminds me of that special place.  I guess you could say I'm drawn to it like an old friend.


The Basic White background is embossed with one of my favorite things from the new Spring Mini Catalog, the new Gingham Embossing Folder.  On the Basic White Diagonal, I stamped various leaves from the Eden's Garden Stamp Set with Granny Apple Green Ink.  This is such a happy green, isn't it?  After the leaves were stamped, I embossed the panel with the Tasteful Textile 3D embossing folder.

The card base and the diagonal border are Fresh Freesia.   


Have you ever had an idea or vision of what you wanted, but struggled to get it to turn out like you pictured it in your mind?  That was my challenge with the center bouquet on this card.

I wanted to use the large flower from the Eden's Garden Stamp Set for the center focal point.  But I also envisioned a multi-color bouquet.   My initial plan was use Stampin Write Markers to color the stamp with different colors, but I was not able to get an image with which I was happy.  Perhaps DisINKtive stamps are not made for this technique; I'm not sure.

Inking the image with a stamp pad resulted in a much better image, so out came my Stamparatus.  By using the Stamparatus, I could selectively ink various areas of the bouquet with different color ink pads and stamp them one color at a time. It took a little experimentation, but I finally achieved an image I was satisfied with.  What do you think?  Colors I used were Fresh Freesia, Granny Apple Green, Calypso Coral, and Coastal Cabana.  For the tiny Coastal Cabana flowers and dots I just used a Stampin' Write Marker, not the Stamparatus.


After I added the large flower bouquet over the Granny Apple Green leaves on the diagonal strip, I thought it needed some bling, so I tucked various stems and leaves from the Expressions in Ink Ephemera Pack behind the flower.  That was a quick and simple fix.  I need to remember to use that Ephemera Pack more often! The pack has lots and lots of shiny, gold pre-cut trim pieces.  All you have to do is pop them out of the sheet and add them to your card.

For the sentiment I used "Sending Hugs" from the Eden's Garden Stamp Set.  Staying with the theme of gold accents,  I heat embossed it with gold and then die cut with the Stitched So Sweetly Dies.  I will be so sad if these dies ever retire.  

For the inside of the card, I kept it clean and simple.


The sentiment is from the Peaceful Moments Stamp Set.  A die cut Fresh Freesia border was added to the bottom of the card.

You can use this link to download a FREE TUTORIAL with all the dimensions and directions to create this card.  

A complete product list is shown below, but remember, you can always adapt these ideas to use products you already have.


Product List