Showing posts with label Expressions in Ink DSP. Show all posts

Friday, April 8, 2022

SCRAPPY PRIZED PEONY

Today I have another Easter Card to share.  I'm slowly working on building up my Easter Card supply.  Good thing I don't need too many, and thankfully Easter comes a little later this year!


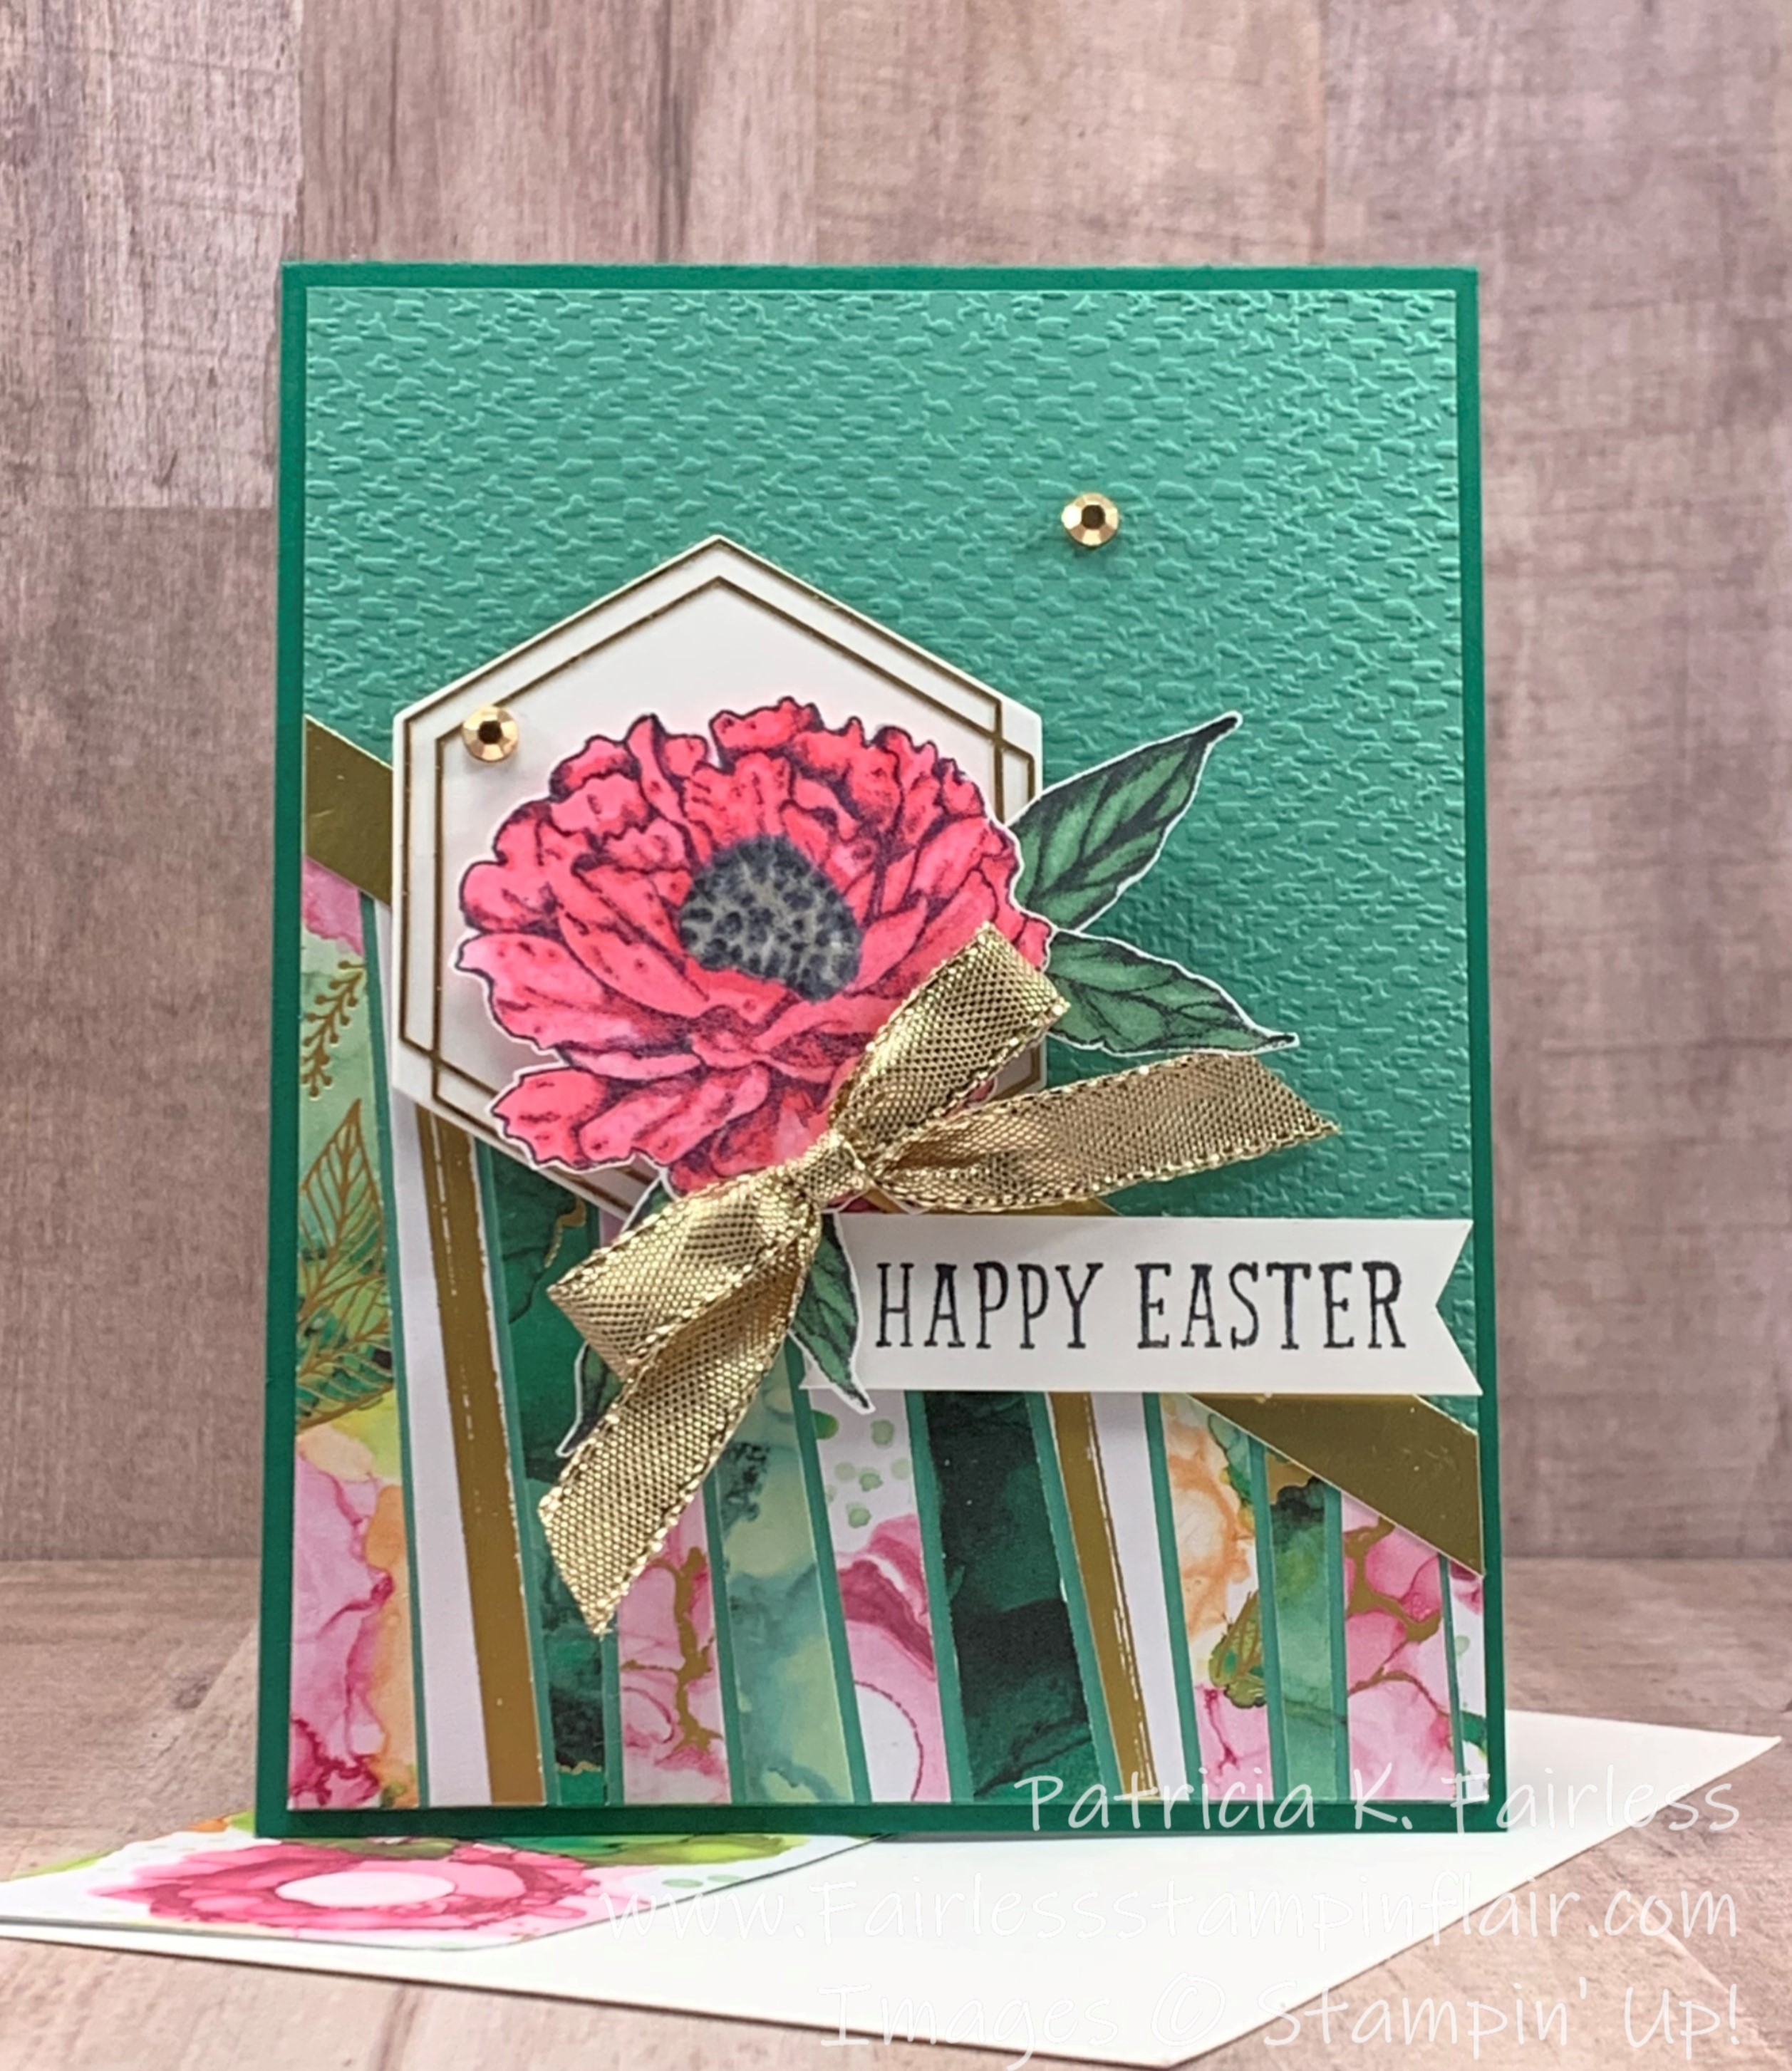
I used the Scrappy Strip Technique again for this card.  I first used this Technique on a Card back in February.  Check it out!  They don't look anything alike!  This is such a terrific way to use up scraps of cardstock.  Today I used scraps from Expressions in Ink Designer Series Paper.  This beautiful paper is retiring soon, so rather than hoard it I thought I would use some of it for my Easter cards.


The Hexagon Shape that I used as the backdrop for my flower was made with the Beautiful Shapes Dies from the Jan-June 2022 Mini Catalog.  The gold trim around the hexagon is from the Expressions in Ink Ephemera Pack and it fits the largest Hexagon Die perfectly.

The flower used on today's card is the medium sized flower from Prized Peony.  It was colored with Polished Pink Stamping Blends and the leaves were colored with Just Jade Blends.  I first colored the flower center with Gray Granite Stampin' Blends, but then added just a little bit of strategically placed Basic Black to deepen the color.

I embossed the Just Jade background on the card front with the Tasteful Textiles 3D Embossing Folder.  This embossing folder is on the LAST CHANCE LIST.  It has been my go-to embossing folder whenever I wanted just a little texture, but not so much texture that it took away from the card.  I am certainly going to miss this one!


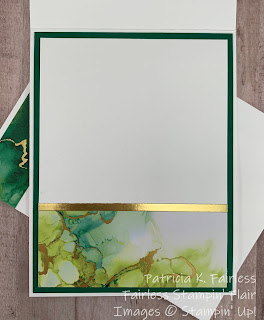
When I used the Scrappy Strip Technique, I found that I like to make the piece larger than required.  Not only does trimming the piece down to the final size help to clean up the edges of the main piece, but if you plan ahead, you can have a large enough "scrap" to use as a trim piece somewhere else.  I made the piece for my card front about 1" taller than I needed so I ended up with a nice clean 3/4" strip to use on the inside of my card.  Pretty, right?

My sentiments are from a very old, retired Easter Stamp Set called Indescribable Gift.  As I mentioned on Monday, I discovered I don't have any current Easter sentiment stamps, so I went to my retired stash and found a couple.  I have a tough time getting rid of sentiment stamp sets, and this time I'm really glad I had a couple retired Easter sets to fall back on!

If you would like more details on how to make this card, you can download a FREE TUTORIAL using this link.

Also be sure to check out the LAST CHANCE LIST as some of the products used today are soon going to be gone forever!


The best way to see the most up-to-date Last Chance List is to use this link.  Items on the list are only available while supplies last and some items are already selling out. This link will take you to my Demonstrator store.  Once there click on the Last Chance Banner and you will be able to see pictures and information for all LAST CHANCE items that are still available.

Below is a list of current products used for today's card.


Product List

Wednesday, March 16, 2022

CIRCLE OF THANKS

I have another card for you today that was made using the Encircled in Friendship Bundle.


Today I chose to use one of my favorite Designer Series Papers, Expressions in Ink, for the background.  I just love the watercolor look of this beautiful paper with its veins of gold.  This paper is so gorgeous, I thought it deserved to have some more gold bestowed on it, so I added lots of it!  The die cut element on the front of the card was die cut from gold foil using on the Encircled in Beauty dies. 

The floral image was made by stamping with VersaMark and heat embossing with Gold Embossing Powder.


After coloring the flowers with Flirty Flamingo Stampin' Blends and the leaves with Granny Apple Green, the floral circle focal point and its scalloped circle Shaded Spruce mat were both die cut with dies from the Layering Circles Die set.

More gold was added by heat embossing the heartfelt thanks sentiment, another of the beautiful sentiments from Encircled in Friendship.


The sentiment was then layered over a flag of gold foil and a bow made of Gold Shimmer Ribbon was added.  To provide a bit more sparkle, three Basic Rhinestones were scattered on the front of the card.

With such an elegant card front, the inside of the card also deserved to be attired in gold.


And how much easier could it get than adding a bit of the same beautiful Expressions in Ink Designer Series Paper, trimmed at the top with a gold foil strip?  Whenever possible, let beautiful designer series paper do the work for you!

What do you think of this card?  Do you think the recipient of this thank you card will like it?

If you would like a tutorial with cutting dimensions and step-by-step directions, one is available for download at this link.

The product list below shows the products that were used to create the card.  

As always, if you have any questions on the projects I share, please don't hesitate to ask.  I'm here to help!  If you would like to receive my bi-weekly Fairless Stampin' Flair Newsletter, please subscribe using the link on the right.  It will keep you updated on the happenings at Stampin' Up! and the events and classes at Fairless Stampin' Flair.


Product List

Wednesday, September 15, 2021

FUN FOLD DAHLIA EASEL CARD

I’m back today with another fun FUN-FOLD card featuring my Stamp Set of the week, Delicate Dahlias.

Now it doesn’t look like much of a Fun-Fold in the above picture, does it?  But look what happens when you open it into its Easel form.

Is it still not real clear what is going on?  How about from this angle?


Now is it starting to make a little more sense why I called it an Easel card?  If you would like to give making one of these a try, I have a Free Tutorial available for you with all the dimensions and directions. 

To make my Dahlias today, rather than stamping them or stamping and coloring them, I used the gorgeous Expressions in Ink Specialty Designer Series Paper to create my flowers.  I simply stamped the outline image stamp on some various scraps of paper from Expressions in Ink and then fussy cut them.

For the card base I used another design from this beautiful paper and the Easel “tent” was covered with the gold stripe pattern from the same paper package. 

The flowers and leaves are adhered to the lower part of the Easel “Tent” with either liquid glue or dimensionals.  The only thing to be careful of is that you attach the flowers to the lower part of the “tent” only – otherwise your tent won’t open, and you will be camping under the stars! 

Here is a little look at the inside of the “tent”.


I stamped one more, small Dahlia on another scrap of Expressions in Ink DSP, fussy cut it and adhered it to the top corner of the inside basic white mat.

The sentiment labels (or stake in the ground that holds your tent in place) were die cut from two dies from the Ornate Frames Dies.  The sentiment is from the Delicate Dahlias stamp set and the mat is from another scrap of Expressions in Ink and matches the paper on the card base.


What do you think of this card?  I’d love to hear your thoughts.

Don’t forget to check out the tutorial and if you have questions, I’m here to help.

A complete Product List is below.

We are down to 15 days and counting left in Sale-A-Bration, so don’t miss out on your chance to earn some FREEBIES including this beautiful Delicate Dahlia Stamp set!

If you missed the Delicate Dahlia cards that I shared the week of August 15 you can use the following links to see them.

Dahlia on the DIAG

Delicate Dahlia Inspired by Pat's Garden

Juxtaposition Dahlia Card


Product List