Showing posts with label Brick & Motor 3D Embossing Folder. Show all posts

Friday, July 8, 2022

BIRTHDAY BREWS

I hope you have been enjoying the Brewed For You cards this week.  Today's birthday card is perfect for the guy in your life that enjoys a cold beer every once in a while.


The card design was created to remind you of that old-fashioned gathering place with the aged antique red brick walls and the old, silver mirror behind the bar.

I used a few common techniques to create the card including brayering the Brick and Mortar 3D embossing folder with Early Espresso ink before I embossed the Merry Merlot cardstock.  I then used my Blending Brush to add some additional aging on the brick with Early Espresso ink.


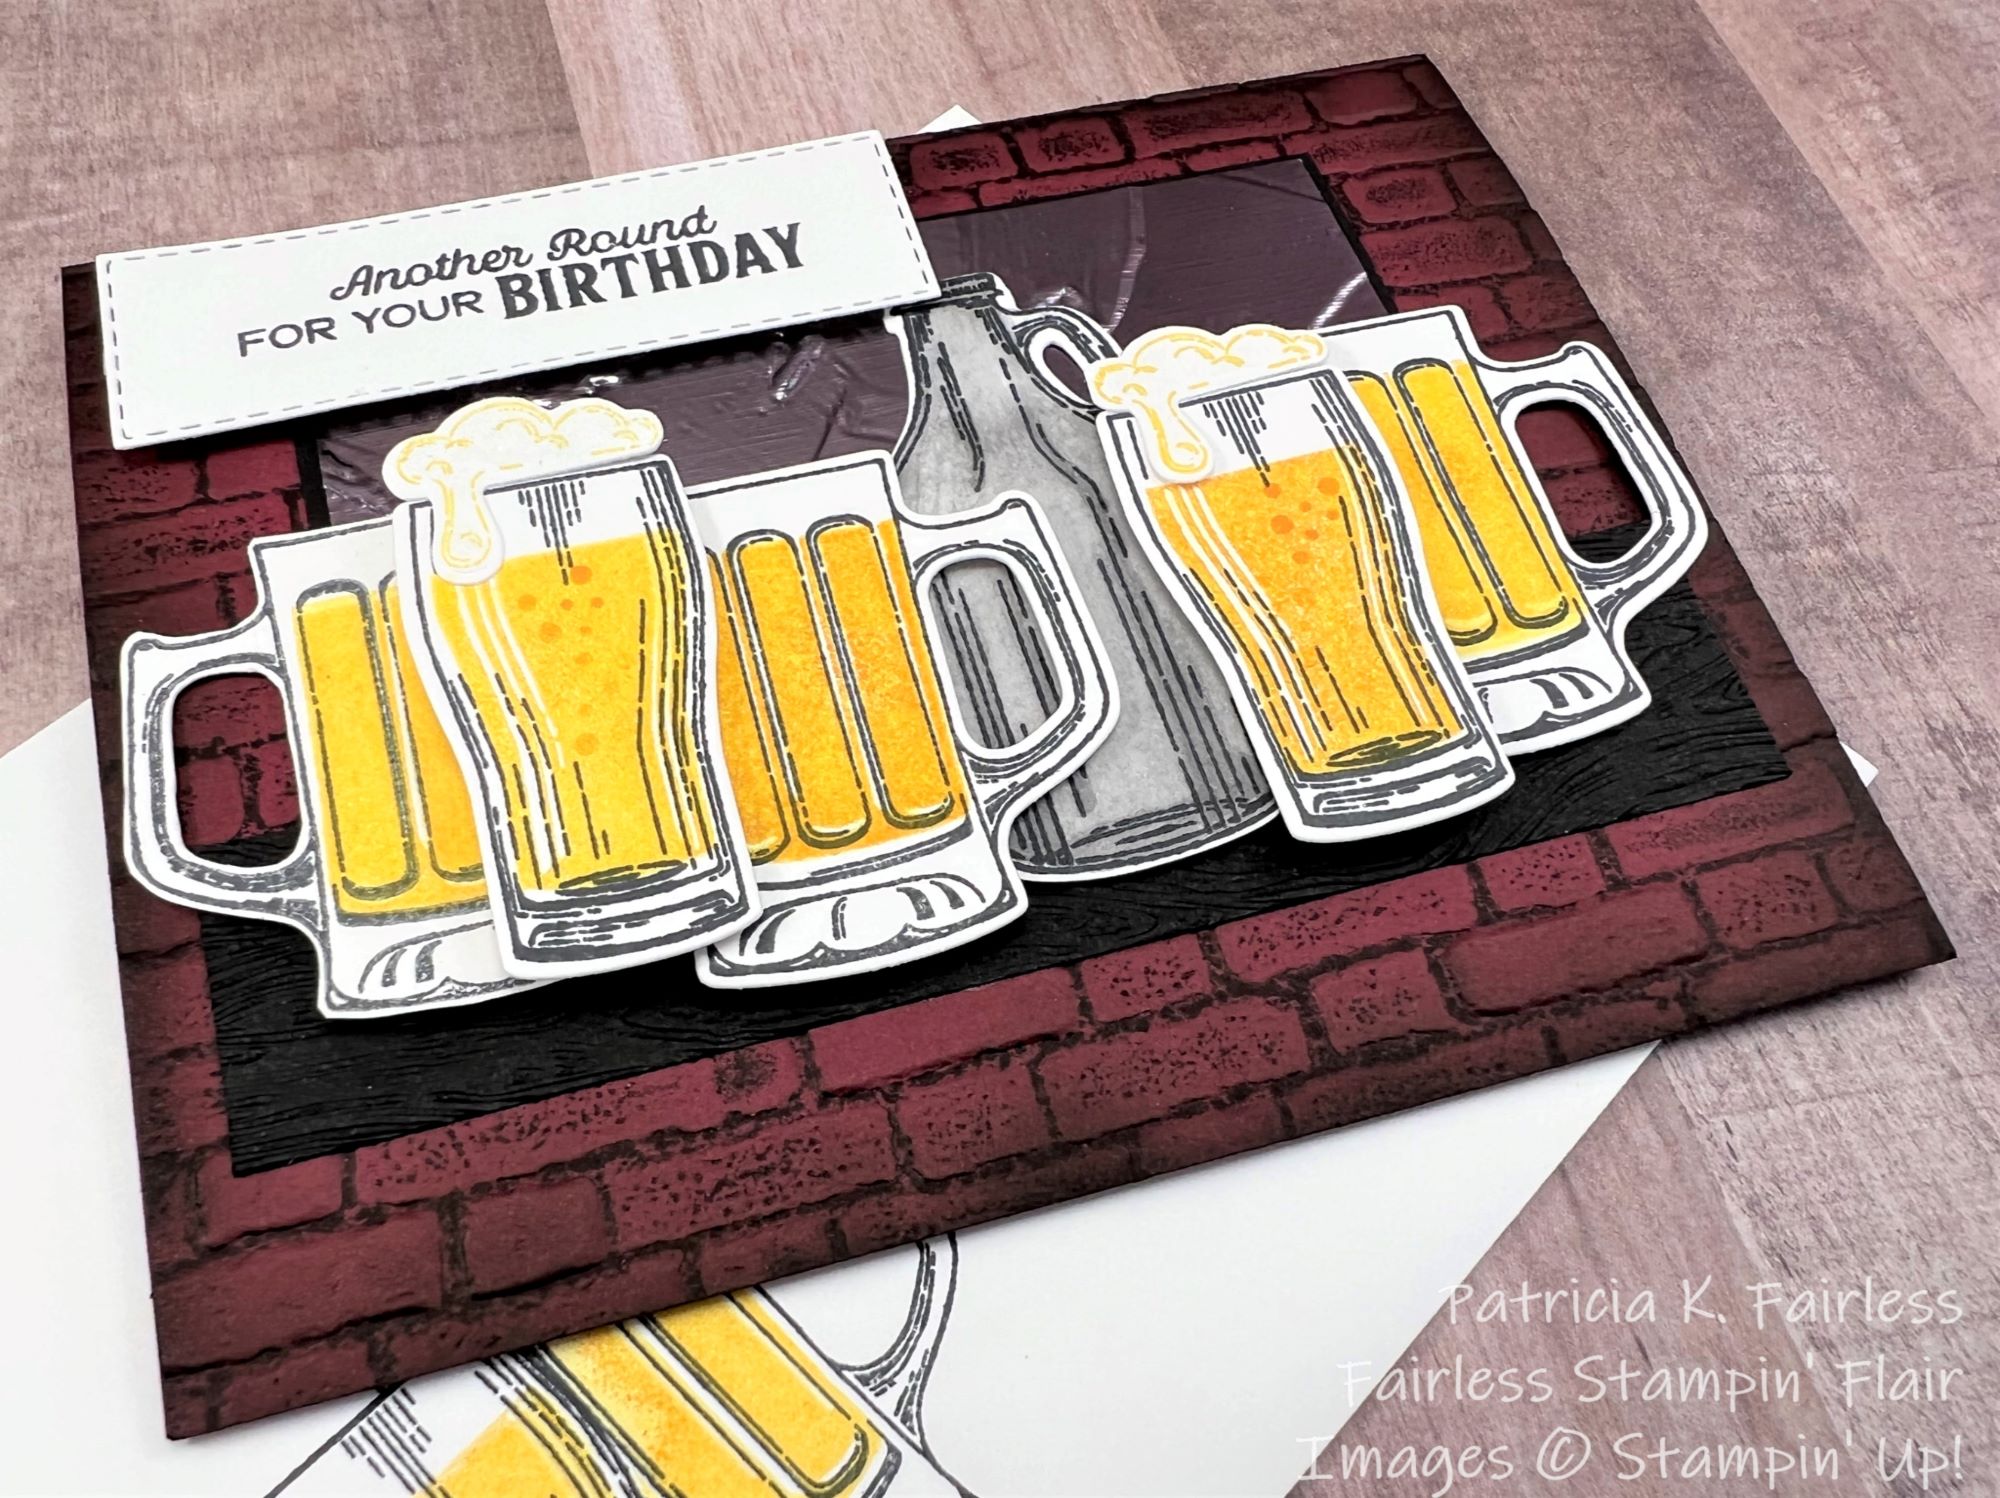
The Mirroring Technique (also sometimes called the Reflection Technique) was used to make the stein on the far left.  Did you notice how its handle is on the left?

I experimented a bit with my "yellow" ink colors to get the "beer" the color I wanted it.  I ended up using Daffodil Delight and Crushed Curry ink -- but played with different combinations of color layers and stamping off.  It's definitely a "light" beer and not a "stout".


For my mirror behind the bar, I chose the darkest of the three foil colors from the Silver Foil package because I thought it more closely resembled an antiqued mirror.  I embossed it with the Painted Texture 3D embossing folder to add a little additional aging.  The shelf under the mirror was made with a Basic Black strip embossed with the Timber 3D embossing folder.  I also brayered that embossing folder with Black Memento ink before I embossed the cardstock, but honestly you can skip that step as it really doesn't show very much.


Because there was a lot going on with the card front, I kept the inside simple and just used a simple double mat layer.  It is a "guy card" after all, so it doesn't need a lot of "fancy" right? 

The sentiment is from Inspired Thoughts.  I main reason I purchased this stamp set when it was first introduced last year was because of the wide variety of sentiments it includes, but I admit that I often forget about it.  However, if you need a versatile sentiment set, this is it!  To see all the sentiments included, check it out more closely in my product list below.  It really could be categorized as an all-occasion stamp set.

If you have questions about any of the techniques I mentioned using, please leave me a comment.  I will do my best to answer your questions.  I'm here to help you learn and grow.  A free tutorial is also available for download by using this link.

In the above photos, you can see a little peek of the envelope.  In keeping with my philosophy of no naked card insides and no naked envelopes, I decorated the envelope with a couple more beers.  I thought that would entice the recipient to look inside!

Thank you for visiting today!  Enjoy your weekend.


Product List

Wednesday, March 23, 2022

TULIPS ON THE WALL

Last month I was asked to present three cards using the Tulip Field Bundle at a stamping retreat.  This is one of the cards that I shared with the group. 


When I envisioned this card, I thought I would use the die that creates a border of tulips.  However, when I started making the card, I realized that the die I wanted to use was from the Flowering Tulips Bundle and not the Tulip Fields bundle.  Oops!

I had already created my brick walls, and didn't want to scrap the whole idea, so I decided to use one of the designer series paper designs from the Flowering Fields Designer Series Paper (DSP) Collection.

I laid a piece of the Tulip paper behind the brick wall and plotted out a plan on how to fussy cut the paper so that it would follow the steps of the wall.  Tedious?  Yes, a bit, but I was really happy with the outcome.


To make the brick wall I used my brayer and inked up the logo side of the Brick & Mortar 3D Embossing Folder with Gray Granite ink.  Note: You will want to use a hard rubber brayer, not a sponge brayer.  I then added Basic White Cardstock to the folder and ran it through the Stampin' Cut & Emboss Machine.  Voila, I had brick with gray grout.  I then cut the paper along the grout lines to create the steps on the retaining wall.  The lower wall is the top piece that I had cut off.  I just rotated it 180 degrees to make a second flower box "retaining wall".

The beautiful sky is another of the designs from Flowering Fields DSP.   I could have used Basic White for the sentiment, but I didn't want it to become the focal point.  I wanted it to sort of blend in with the sky, so I stamped it on the same DSP as I had used for the sky.  I could have stamped it directly on the sky, but I thought the added dimension I got by popping it up on dimensionals added a bit of interest.   The sentiment is from the Flowering Tulips Stamp set.


To create the bicycle, I die cut the bike three times with three different colors of cardstock, Basic Black, Poppy Parade and Mango Melody.  I kept the Basic Black bicycle intact but cut the Poppy Parade and Mango Melody bikes into pieces.  I then used liquid adhesive to add the different colors to the Basic Black bike.  That way I still had black tires, but I was able to get a red bike with a Mango Melody basket.  I added a couple of Rhinestone Basic Jewels as hubcaps -- plus they hide the Mini Dimensional that fits behind the wheel hub.


When I created the brick wall, I had three rows of bricks leftover, so I used these to create a flowerbox for the inside of the card.  A little more fussy-cutting, and the flower box was filled with tulips!


What do you think of this card?  Would you like to make it?  I have a FREE tutorial available for download.  Use this link to access it.  If you have any questions, or if I can be of help, please leave a comment, and I will do my best to answer your questions.

The products I used for this card are listed below.


Product List

Friday, August 20, 2021

Juxtaposition Dahlia Card

Which card is your favorite?

I had not played with my Basic Border Dies in a while so I wanted to see what I could do with them to create some interesting angles on a card--something a little different than a basic border.  This is the first card that I created.


It uses the scalloped edge border die that looks sort of like a squared-off envelop flap.  I used it to die cut the Basic White Cardstock at an angle.

Since I had a few  "leftover" silver foil scalloped rectangles that had been cut with the Stitched so Sweetly Dies from, I also decided to use one of those.

You may be wondering why I would have a "few" of these leftover silver foil die cuts.  When I create a larger mat from any foil, I never want to waste any!  Did I mention the other day when I was talking about some "bad" painter's tape that I'm "cheap"?  Anyway, if the center of the foil mat is going to be covered with other cardstock, I always die cut a shape from the center of the larger mat to use later so I can maximize the use of the foil.  So for today's card, I decided to use one of those valuable "leftovers".

To stay with the mood of silver elegance, I heat embossed the dahlia flower and two of the triple leaves from the Delicate Dahlias stamp set with silver embossing powder.  I then colored the flower with Balmy Blue Stampin' Blends and the leaves with Granny Apple Green Stampin' Blends.  After coloring, they were fussy cut and assembled on to the silver foil.

I added a sentiment stamped with Black Memento and die cut it with one of the dies from the new Frightful Tags Dies.  Although the Frightfully Cute Bundle is a Halloween themed bundle, the dies have some great shapes perfect for sentiments.

I had intended to cover the lower portion of the Balmy Blue card base with a designer series paper, but after searching through my stash I did not find a Balmy Blue design that I liked.  So my next thought was to emboss that portion of the card.  I decided to try the Brick & Motor 3D embossing folder.  I wasn't sure how it would look because the Brick & Motor is sort of the opposite of "elegant".  But once I assembled the white scalloped die cut piece and the silver foil and flower assembly over it, I loved the juxtaposition it created.  Elegance with a little rough and tumble!  I'd love to hear your thoughts about this combination.  

I kept the inside of the card clean and simple, but it is definitely not naked!  I added a sentiment from In Your Words stamp set, and trimmed the Basic White cardstock with a Balmy Blue strip and a little narrow scrap of silver foil placed beside it.  Now I'm ready to send the card to a friend and hopefully make them smile!


As I mentioned above, my initial vision for this card had designer series paper (DSP) on the lower front.  Since I was having fun playing with the Basic Border Dies, and I had another "leftover" valuable scrap of silver die cut foil,  I decided to see if I could come up with another card using this same layout.  Here's what I came up with.


There are a few differences between the two cards.  Some are obvious.  Some are less obvious.  Which card do you like best?

Do you ever do those puzzles where you compare two pictures that at first appear to be the same, but the challenge is to find all the differences?  How many differences can you find between my two cards?  Leave me a note in the comments! 

There is a free tutorial available for the Balmy Blue card.  That tutorial also can easily be used to also create the second card.  

If you would like to receive my Fairless Stampin' Flair Newsletter, please complete the information on the Contact Me tab.  

It is my goal to help you any way I can.  If you have questions, please leave a comment or contact me through the Contact Me tab, and I will do my best to answer your questions.

A complete list of products used to create the card is shown below.


Product List