Showing posts with label Window Card. Show all posts

Wednesday, September 18, 2024

MERRIEST TREES WINDOW CARD

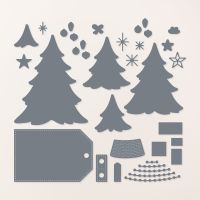
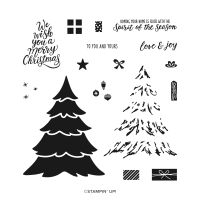
Today's card is a Window card made with the Merriest Trees stamp set and dies.


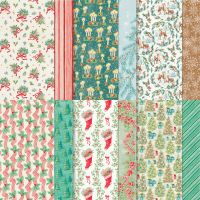
The designer series paper (DSP) used on the card front is from the Sentimental Christmas Collection.  It includes a variety of designs ranging from more traditional Christmas to cute to beautiful.  And for every purchase of this Sentimental Christmas DSP, Stampin' Up! will donate $3 to organizations supporting Children's Literacy.


The design pattern I chose for today's card had this beautiful lantern hanging from pine boughs in shades of Pretty Peacock.  In the first photo you can see the "window" that was cut in the card front with one of the Merriest Tree dies.  

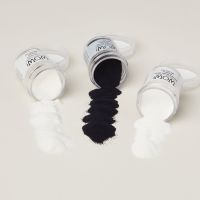
Tucked into that window and adhered to the inside of the card is the Pretty Peacock tree.  On that tree the sentiment was stamped with VersaMark and then heat embossed with white embossing powder.


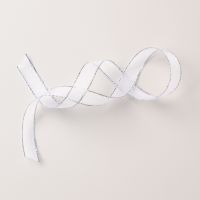
A second small tree for the card front was stamped and die cut and then decorated with a little silver "tinsel".  It is so easy to make pretty cards when you have designer series paper that does all the work for you.


When you open the card you see the tree that was visible through the window!  The strip on the inside and the envelop flap were created with some of the pine boughs that were holding up the lantern.

If you would like a tutorial with all the details to create today's card, use this link to download a copy.

A list of the products used is shown below.  Click on any image to learn more.  You definitely should check out the beautiful Sentimental Christmas Designer Series Paper. 


Product List
Friday, August 4, 2023

LET'S USE IT ALL!

The Ringed with Nature Stamp set has so many different stamps in it that for today's card I decided to see how many of the different stamps I could use.


Stamping' Up! used to have a couple of dies that were called "Picture This".  These dies cut multiple openings in a piece of cardstock that created little "windows" to see what is behind the window.  These dies are no longer available, but a similar effect can be achieved with the Tree Rings dies.  I used the Tree Ring Hybrid Embossing folder and coordinating die to cut the openings in a piece of Pecan Pie cardstock.  The added feature of this Hybrid Embossing folder/die is that not only does it cut the "windows" in the cardstock, but it also embosses the cardstock at the same time!

After laying the die cut Pecan Pie cardstock on the Crumb Cake card front and marking the position of each opening lightly with a pencil, I chose different stamps from the stamp set to stamp a design with stamped-off Crumb Cake ink in each opening.

I then chose several other images (flowers, mushrooms, the little house, & hearts) from the stamp set and stamped them on Very Vanilla cardstock in a variety of colors I had chosen for the card.  I based my color selection of Calypso Coral, Crushed Curry, and Lost Lagoon on the colors in the Inked Botanicals designer series paper that I decided to use in the center of the card.


After stamping the images, I started fussy cutting.  Unfortunately, there are not dies in the Tree Ring Dies set that coordinate with every stamp, but most of these were extremely easy to fussy cut.


I also die cut some stems from Shaded Spruce and Crushed Curry.   Once I had all the elements ready, I started arranging them in the various tree ring circles, and I used the "leftovers" to decorate the center sentiment strip.  Even with all of these different images, I still did not manage to use every image, but I had fun trying.  This stamp set has a total of 22 different stamps!


A double bow of Linen Thread on the sentiment strip completed the card front. 

After all this detail, I decided to leave the inside of the card clean and simple.  We don't want to overdo a good thing, right?


I'll be honest, I'm still deciding how I feel about this card.  Sometimes, I need to set a card aside and come back in a day to two and look at it again.  Do you ever have that happen when you create a card?  I'd love to hear your feedback.  Thumbs Up?  Thumbs Down?  

You can use this link to download a detailed tutorial. What, if anything, would you do to change the card?

A list of the products I used is shown below.


Product List

Friday, December 16, 2022

FRIENDS IN THE WINDOW

Today's cute Window Card was made with the Stylish Shapes Dies and the Stitched Rectangle Dies.  Stampin' Up! does have "ready-made" window dies called Picture This, but since I don't own them, I decided that I could make a Window Card using products I already have.  Besides, by mixing and matching dies from both the Stylish Shapes and Stitched Rectangle die sets, I could have both rectangular and circle shapes on my card.


What do you think?  I like how this turned out!

You have already met Foxy, Olivia and Bob earlier this week on our Walk through the Woods.  While they are hugely different from each other, and probably would not normally be friends, they decided to put aside their differences and become friends.  They are visiting at Fred's house, but Fred is still a little shy (remember him peaking from behind the tree) so he didn't want pose for the camera.  Fred said he would take the picture.  Steve the snail was just way too slow, so since he's running late, these friends decided to start the party without him.


Fred owns a Lava Lamp, and you can see the blue & pink glow it creates behind the friends.


These little guys are very thrifty and when they cut out their windows, they saved the pieces to decorate the inside of their card.


They all told me to be sure to Thank You for visiting us this week.  They were happy to get to meet you and said that if you would like to become friends and stay in touch, you should sign up for the Fairless Stampin' Flair Newsletter.  It will help you to stay updated on all types of fun activities and special promotions and also provide some additional crafting inspiration!

Olivia, the wisest of the three friends, says that if you would like to make a window card like this, be sure to download the free tutorial.  Bob, who is about to get ready for his long winter nap and is not feeling overly ambitious, also thinks using the tutorial is a clever idea because it saves a lot of thinking (and work).  If you agree with them, you can access the tutorial here.

Foxy says to check out the List below if you want to know more about the products I used to make the card.


Product List